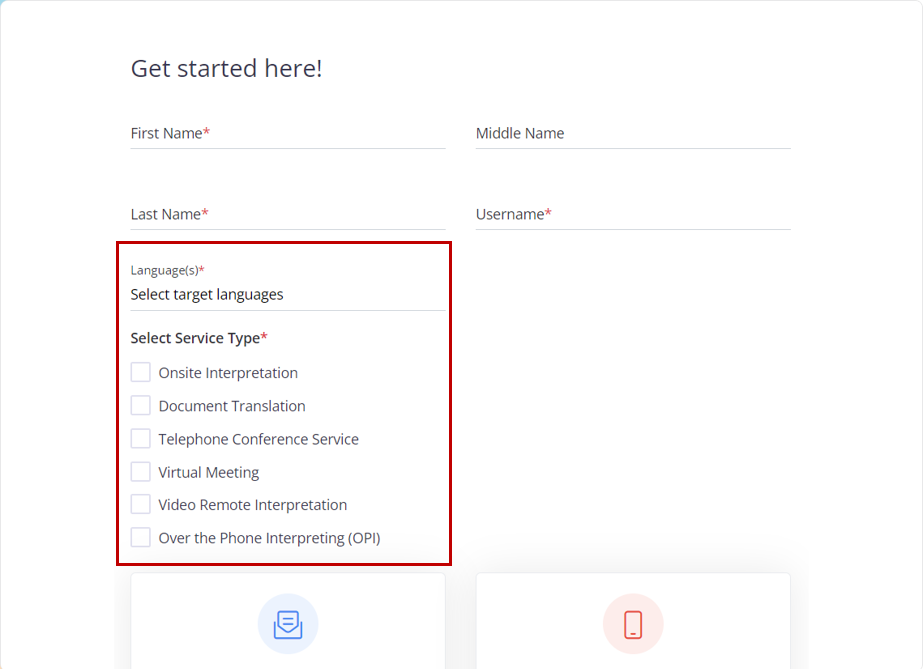
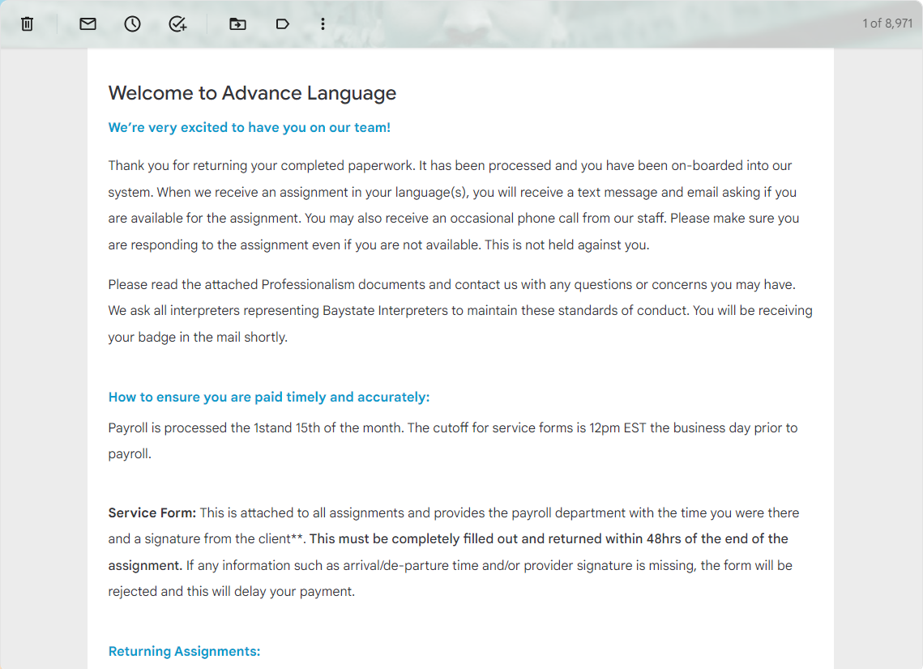
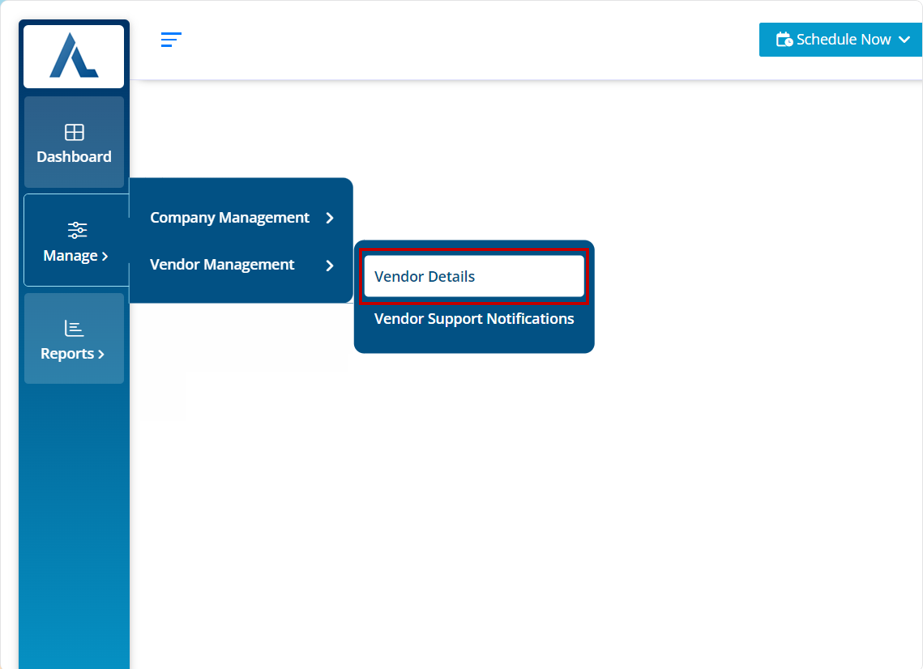
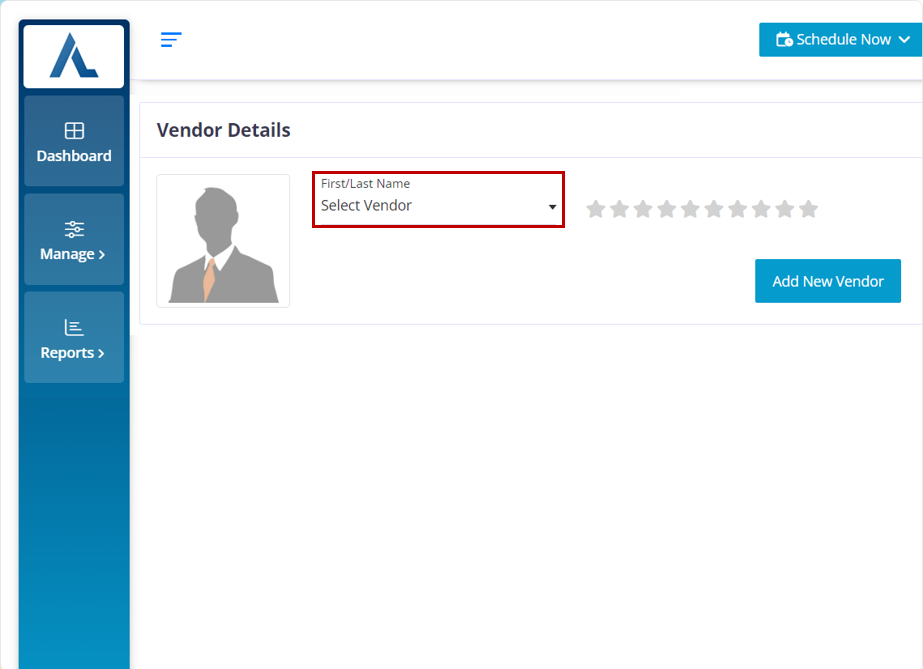
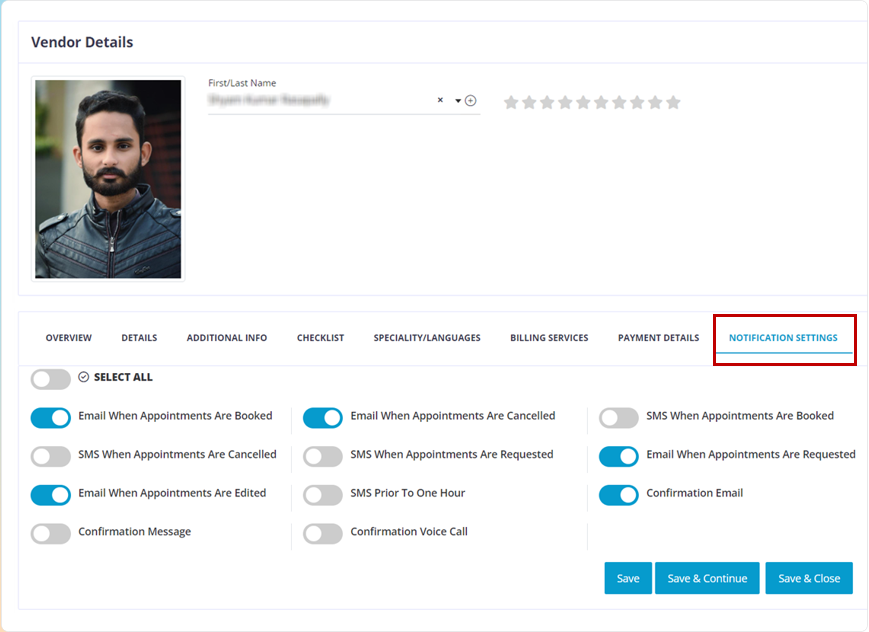
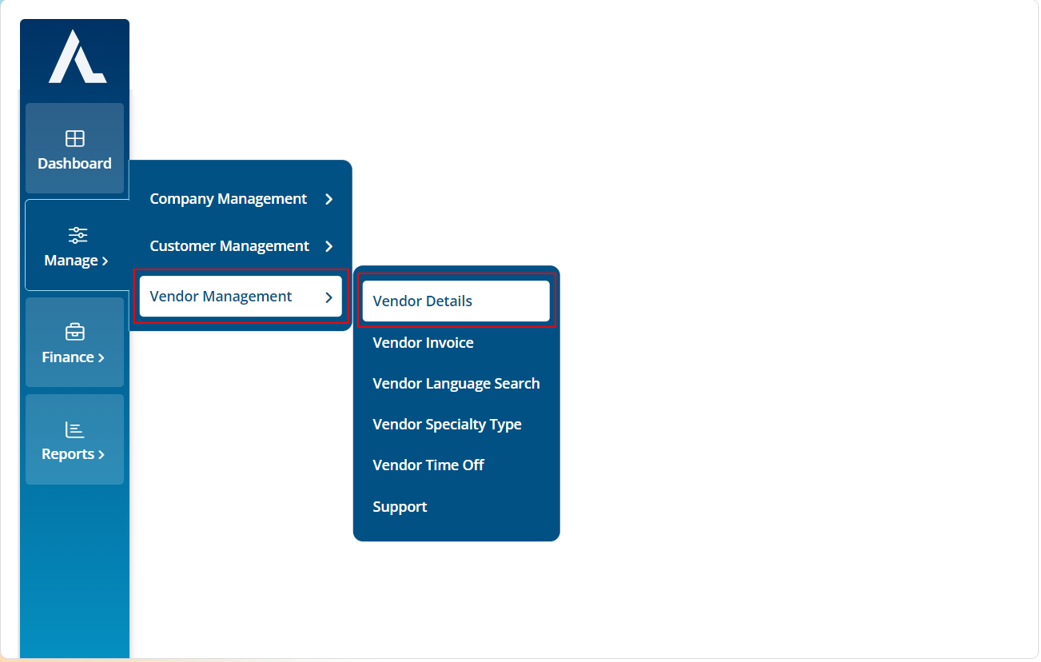
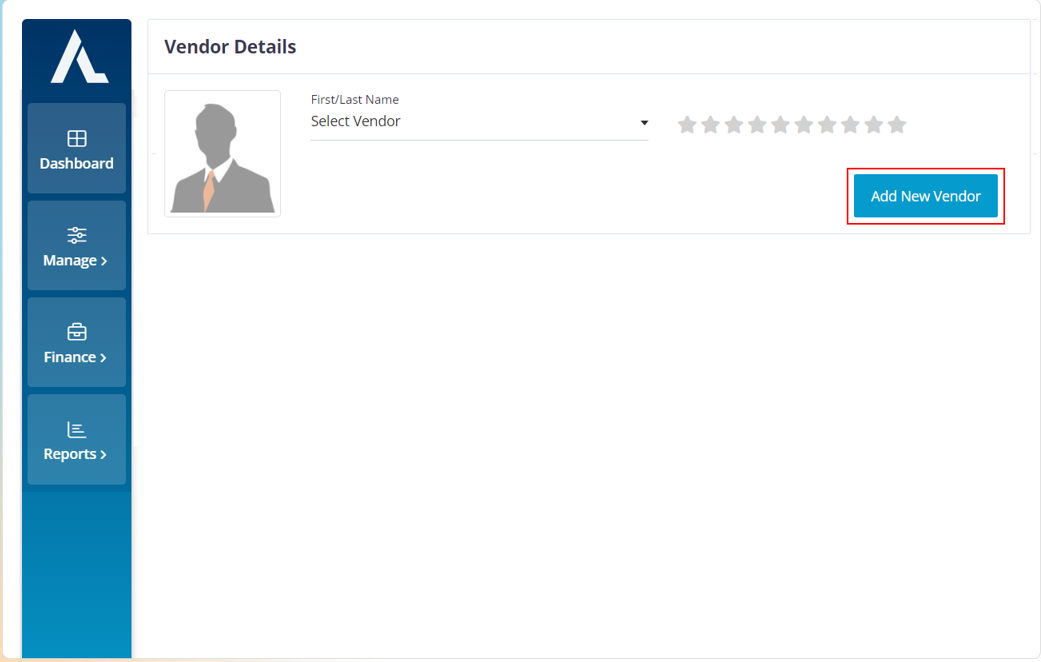
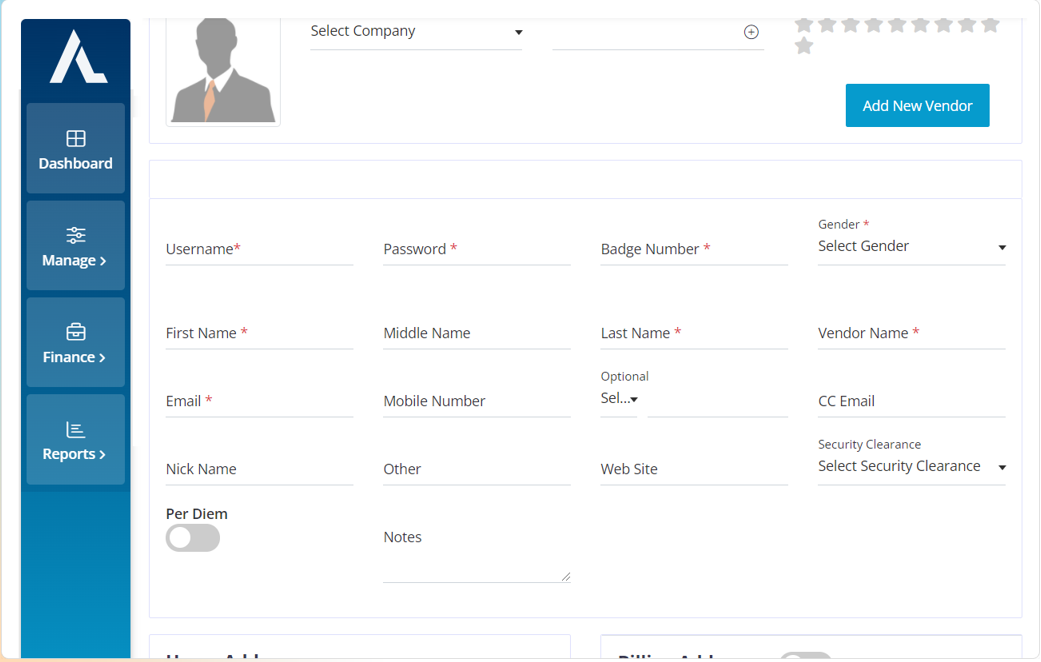
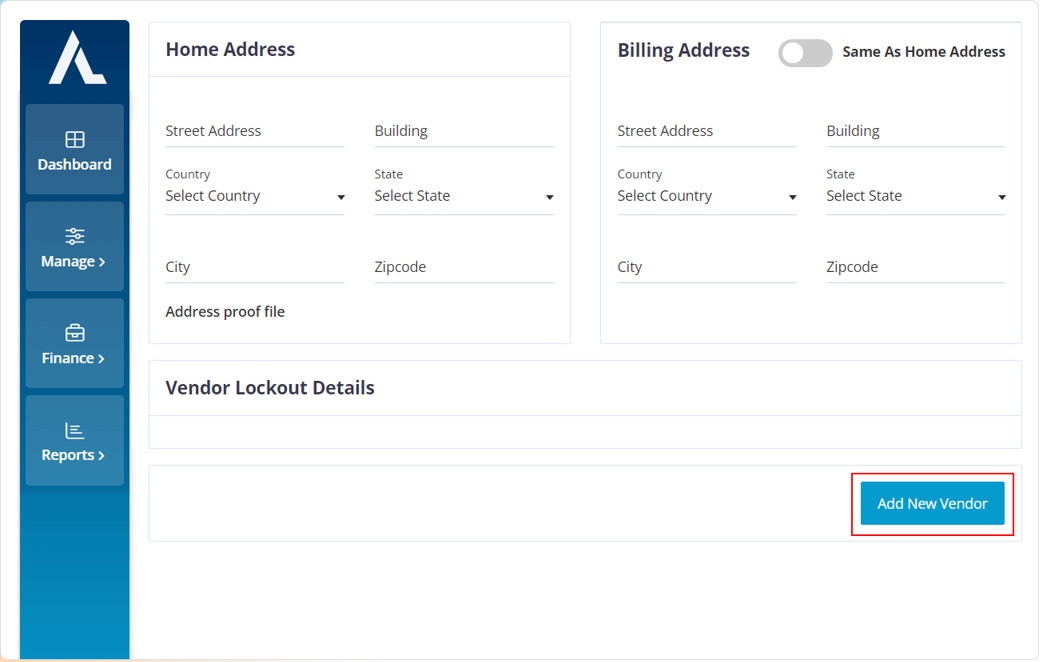
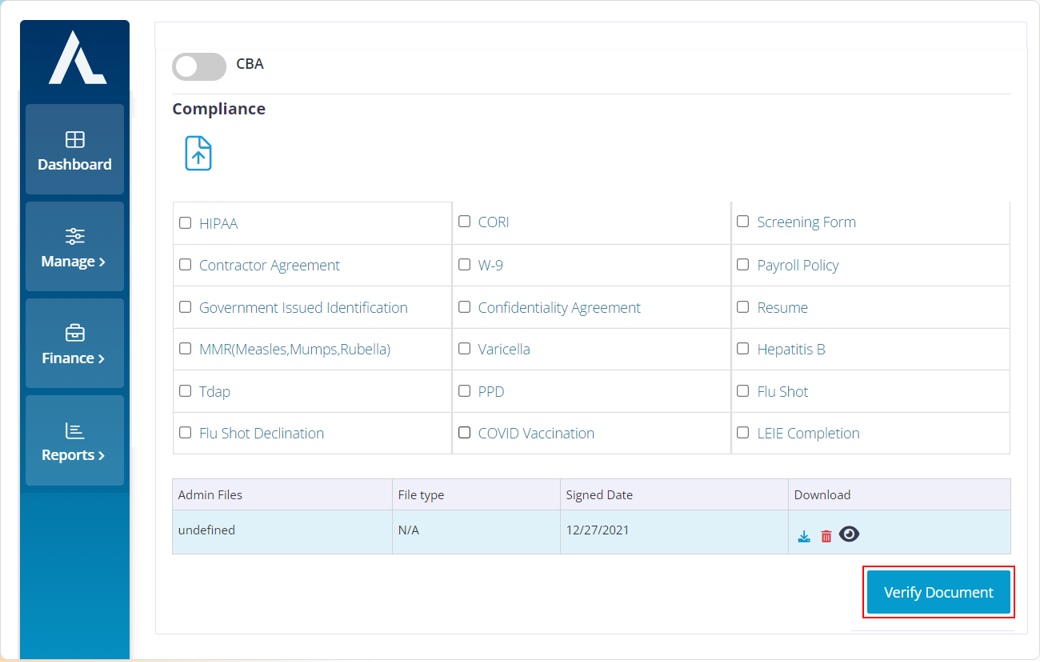
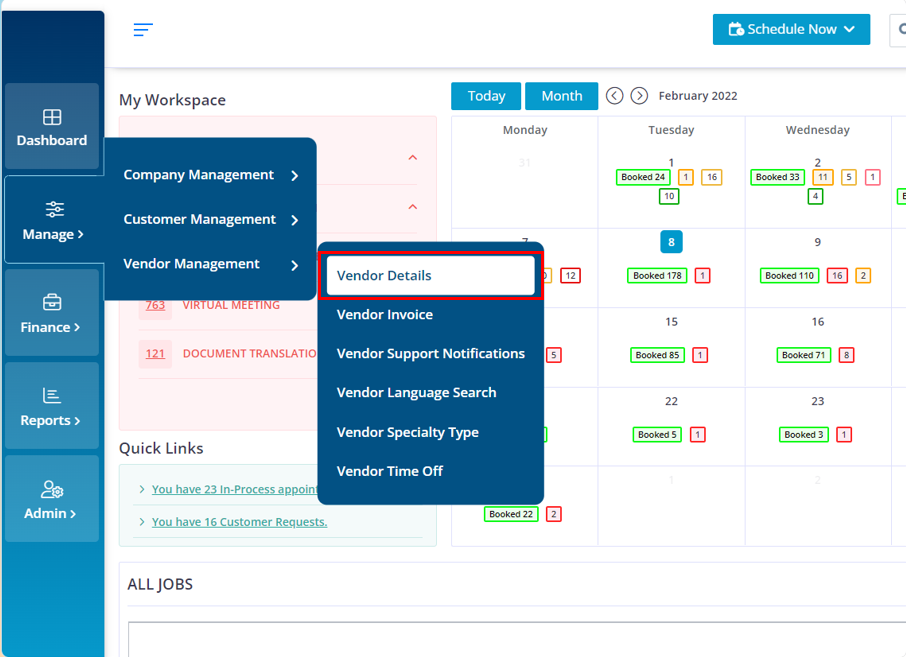
1.Vendor Registration
Please follow the below steps to understand the process for Vendor Registration.
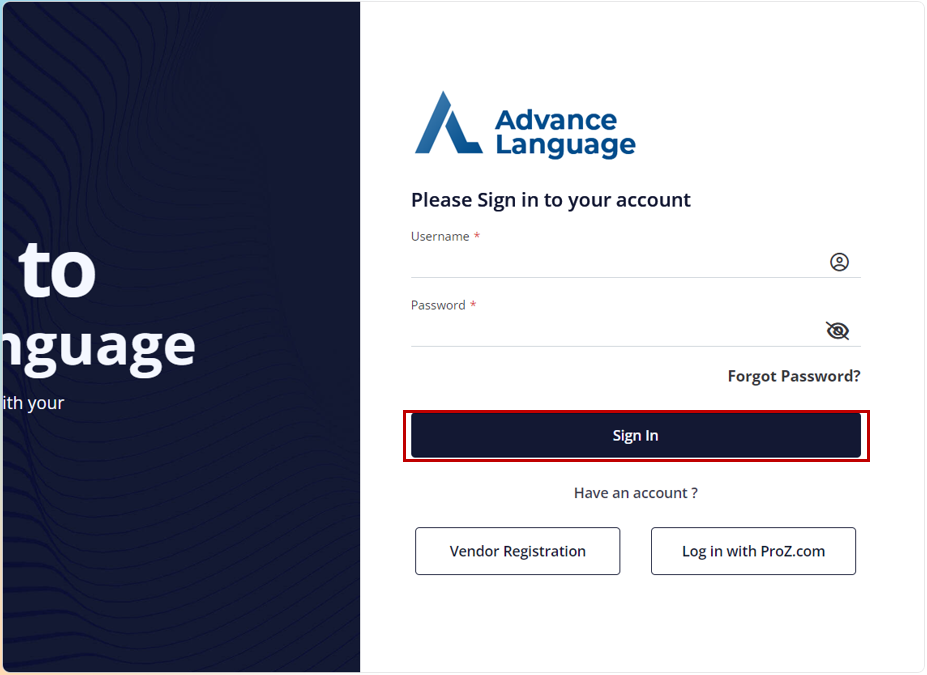
- To register as a vendor for Total Language you will have to go to this URL: https://lsp.totallanguage.com and click on the Vendor Registration button
- If you login from a translation company’s website which is integrated with Total Language then you will be redirected to the registration page directly