1.Add Customer
Move the cursor to the “Manage” icon and choose Customer Management > Customer Details.
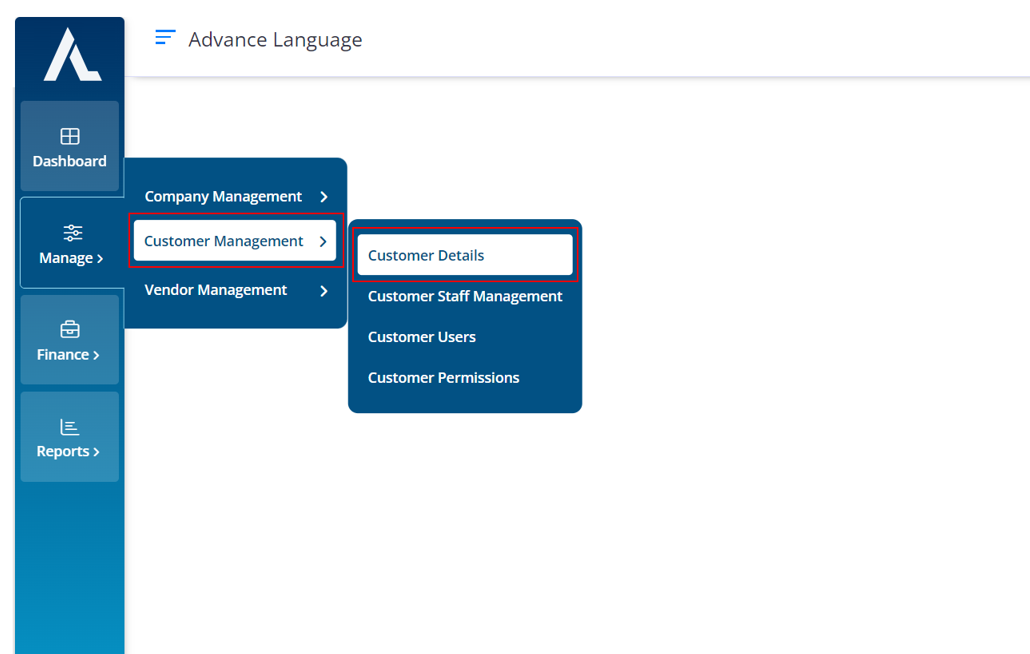
Move the cursor to the “Manage” icon and choose Customer Management > Customer Details.
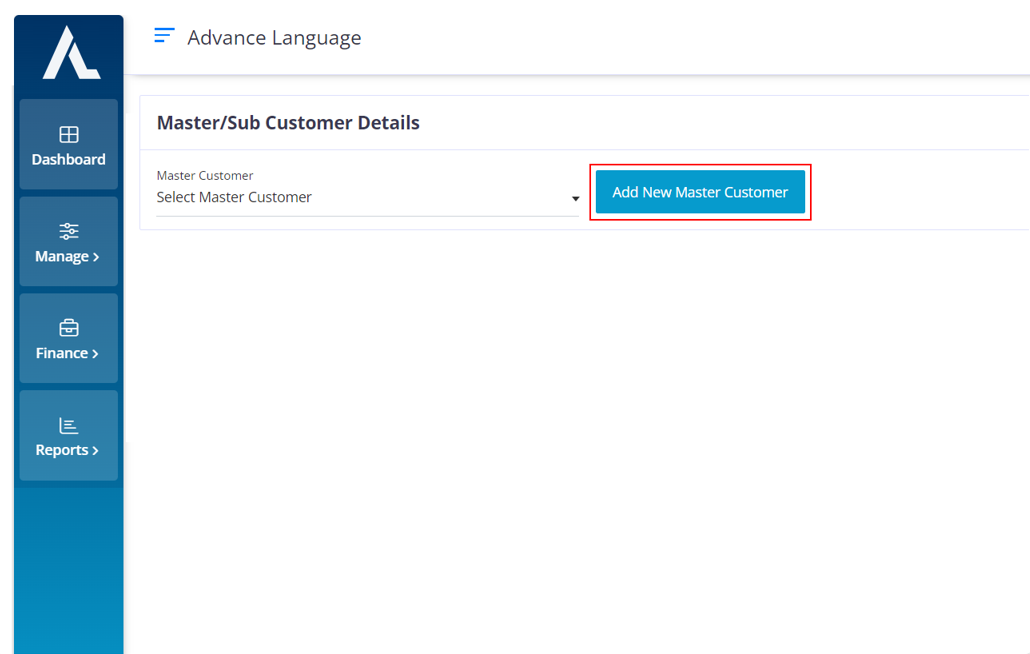
Click on the “Add New Master customer” button.
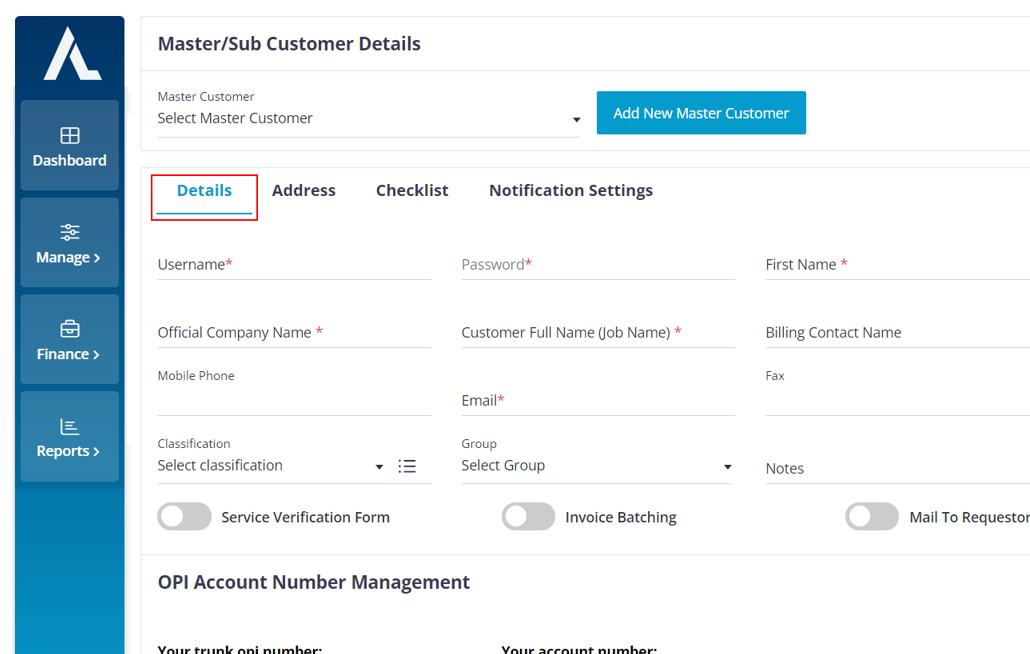
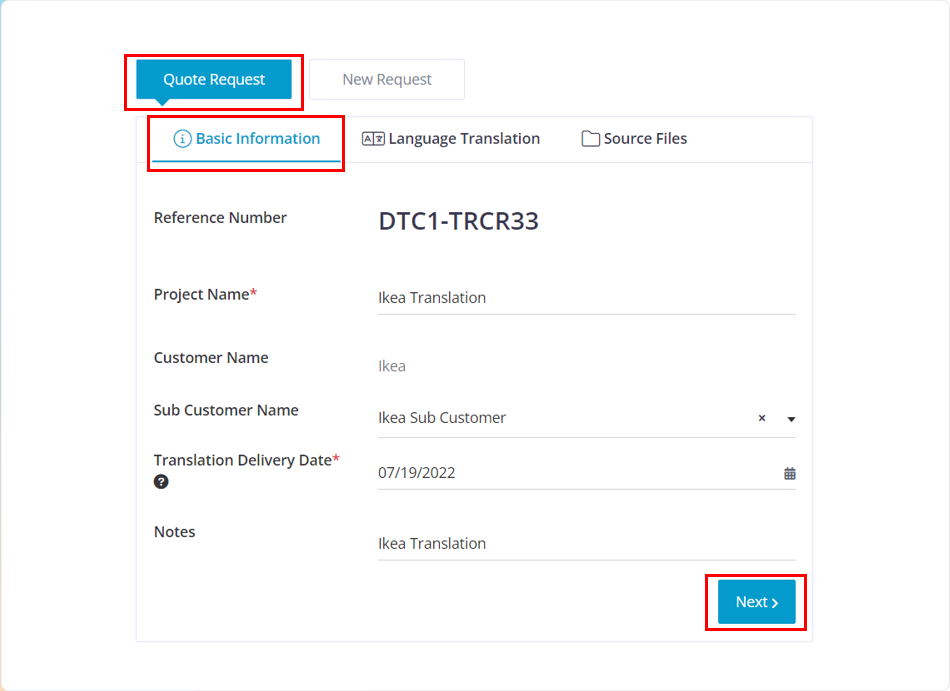
Fill in the required information in the mandatory fields.
Other fields are optional and can be filled based on your company requirements
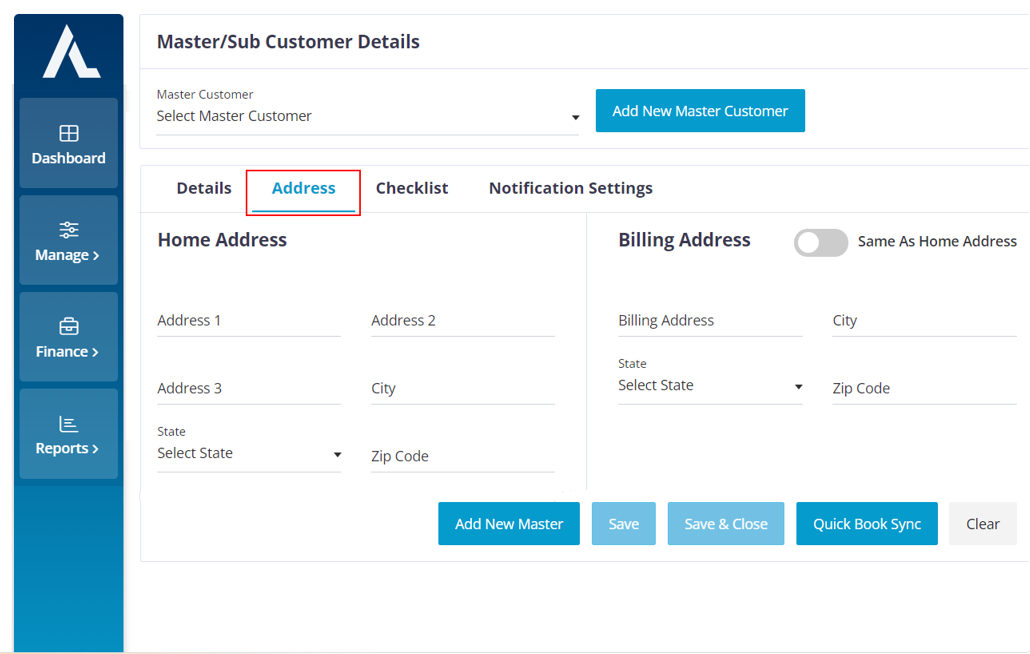
Fill in the appropriate address as this will be used to calculate the mileage for the Interpreter.

To filter out the Interpreters based on the customer’s requirements, choose the options and mention the number hours that are needed for the interpreter to populate for the particular customer
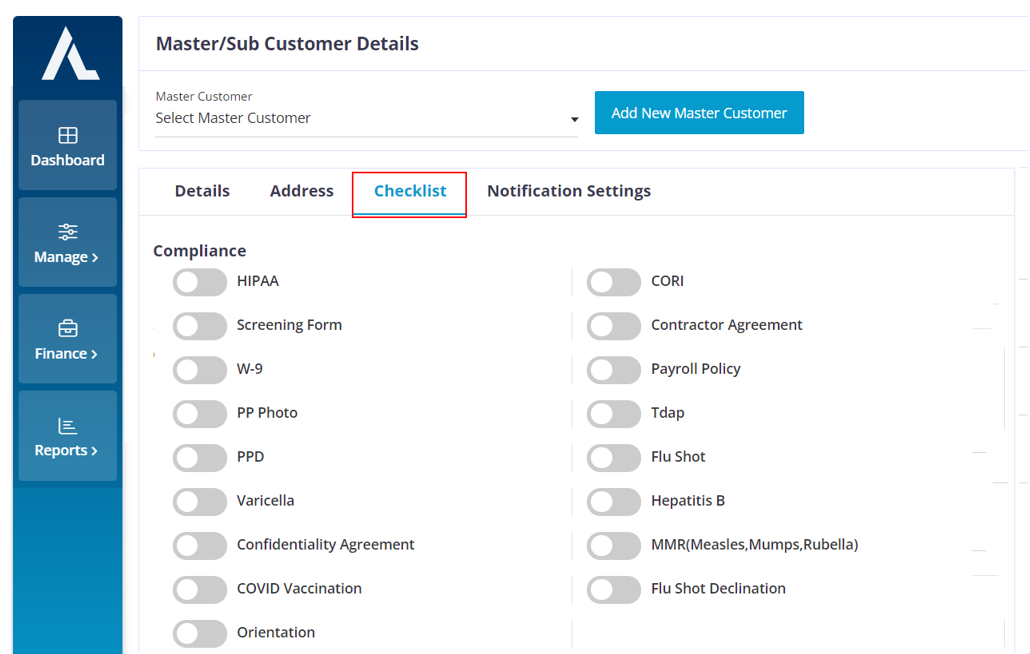
Choose the required compliances that the interpreters need to match in order to populate for the customer.
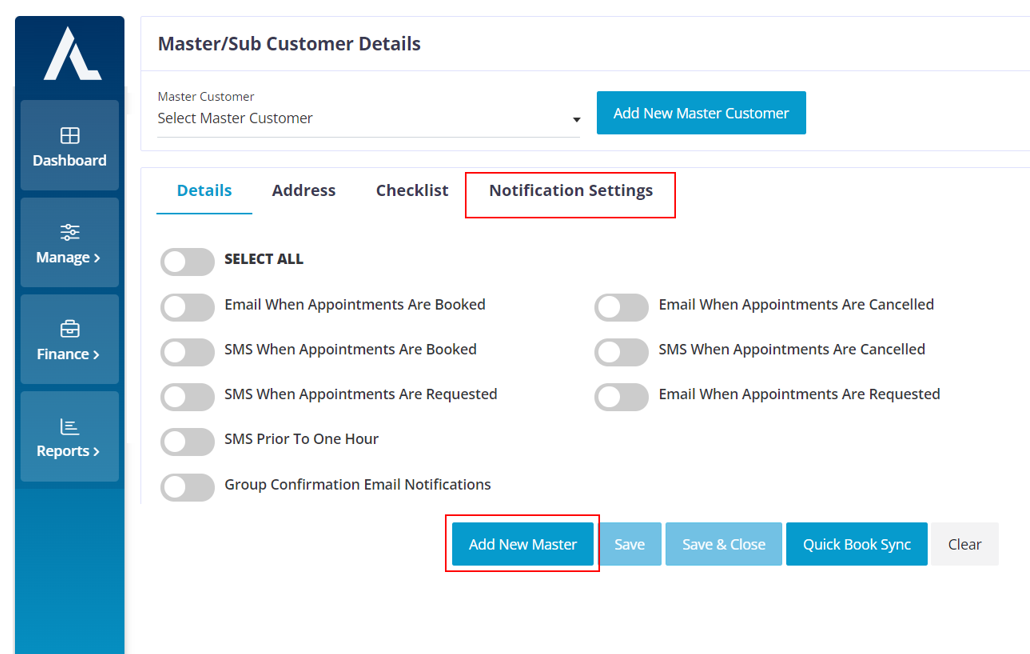
Based on the customer’s requirements you can enable the notifications.
After you are done adding all the customer’s requirements and details click on the “Add New Master” button.
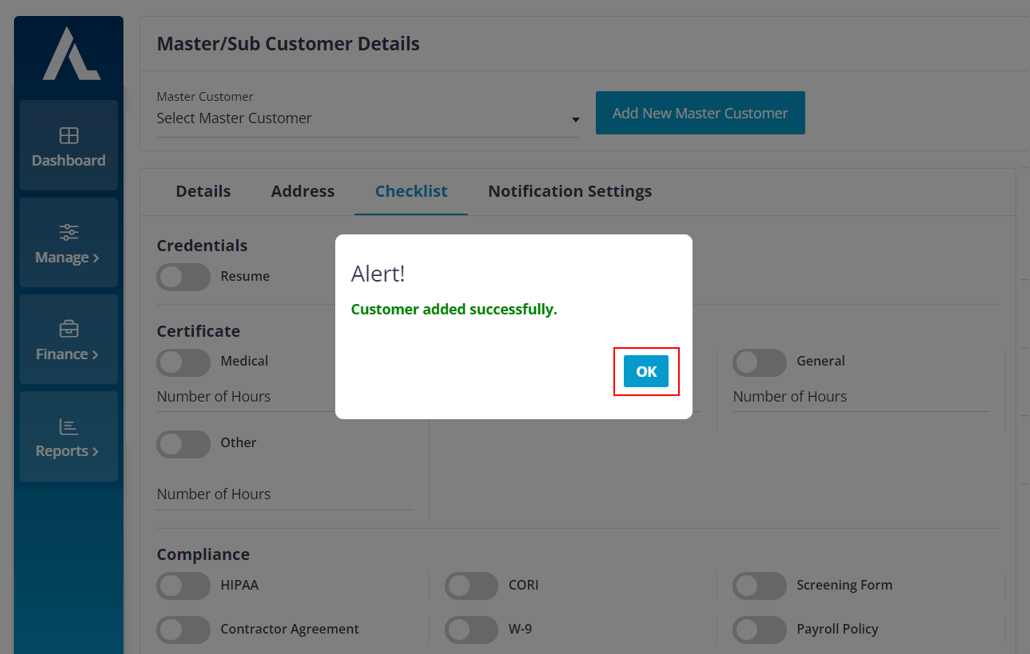
You will get this pop up click on the “OK” button.
Now you have successfully created a new master customer.
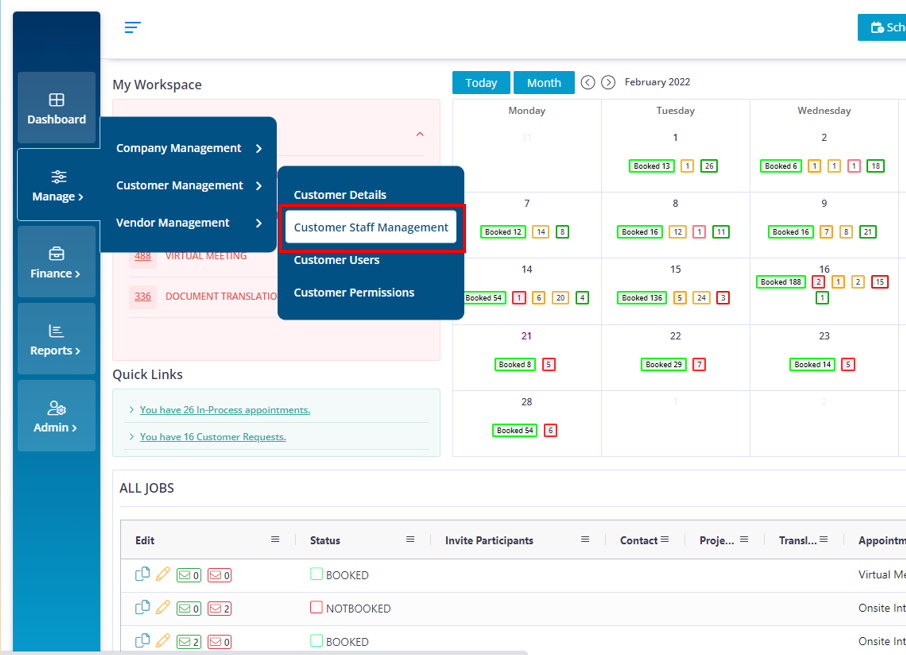
Move your cursor to the “Manage” icon and choose “Customer Management > Customer Staff Management”.
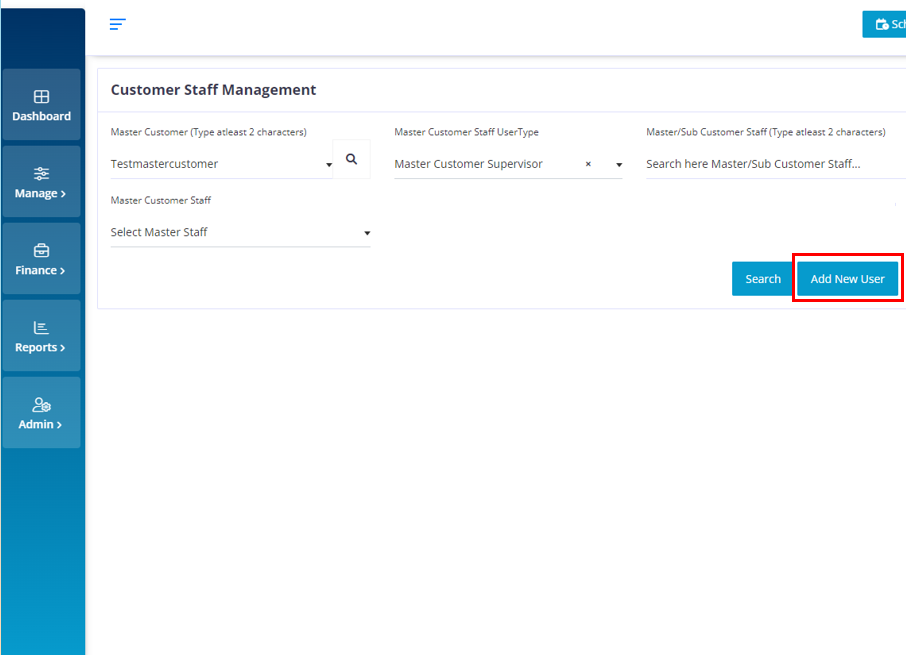
Choose the required Master customer or the Sub-Customer and choose the required user type and click on the “Add New User” button.
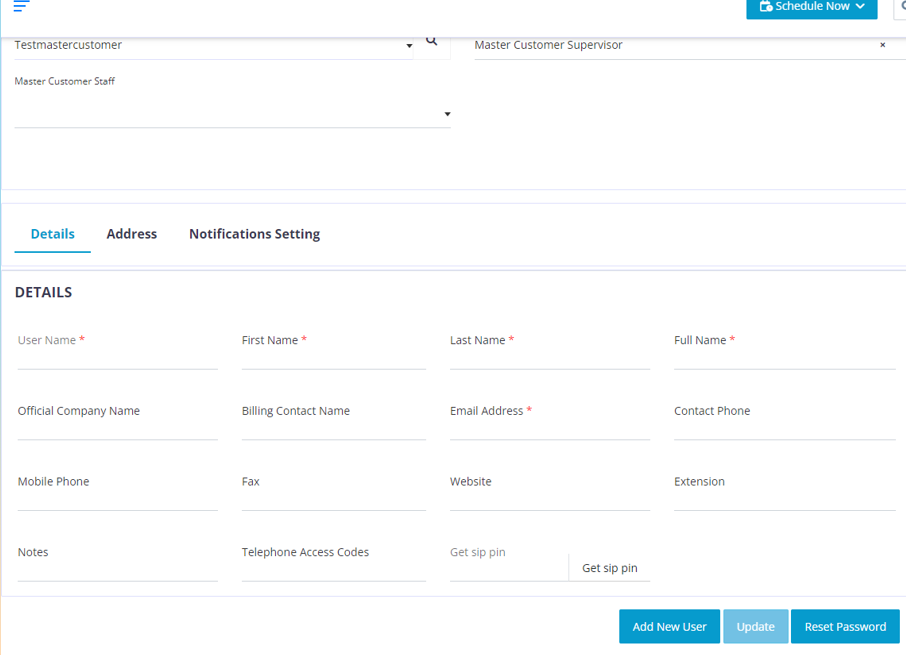
The mandatory fields need to be filled, the other fields are optional and based on company requirements.
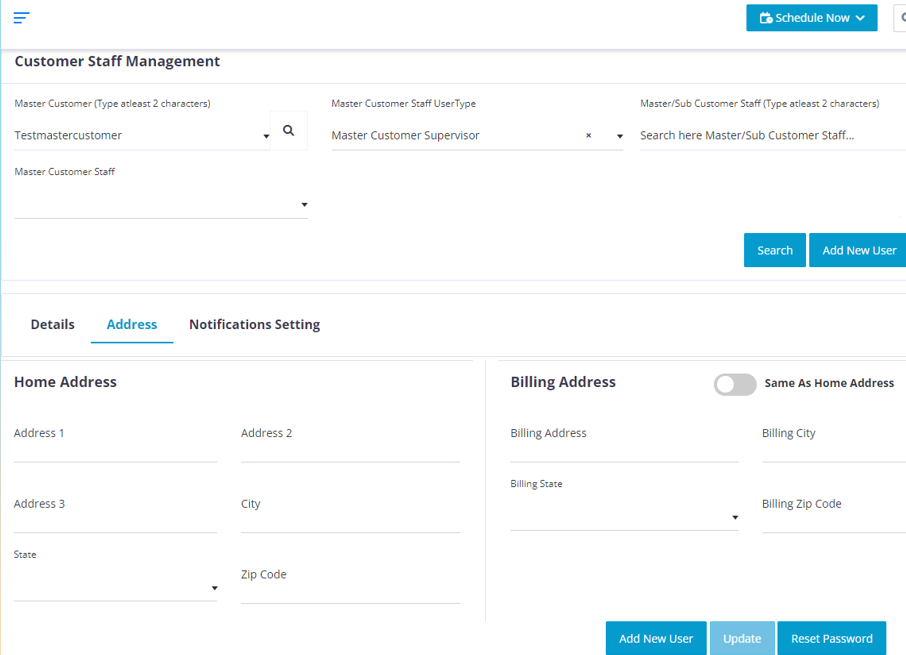
Make sure you fill in the correct address.

If your home address is the same as your billing address, then click on the “Same As Home Address” button and your address from the Home address section will be copied into the Billing address section.
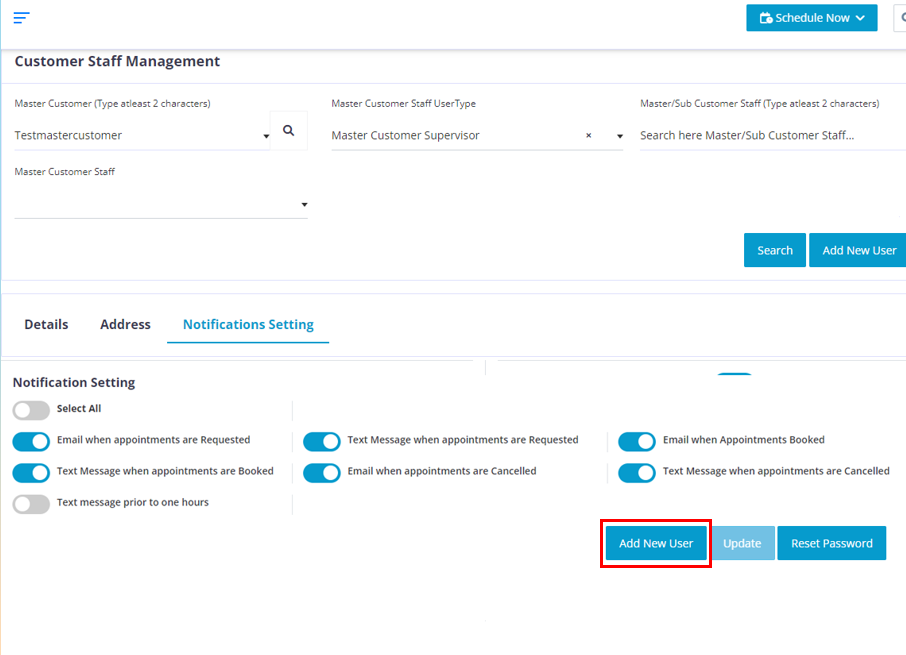
Choose the required options based on you requirements.
Click on the “Add New User” button.
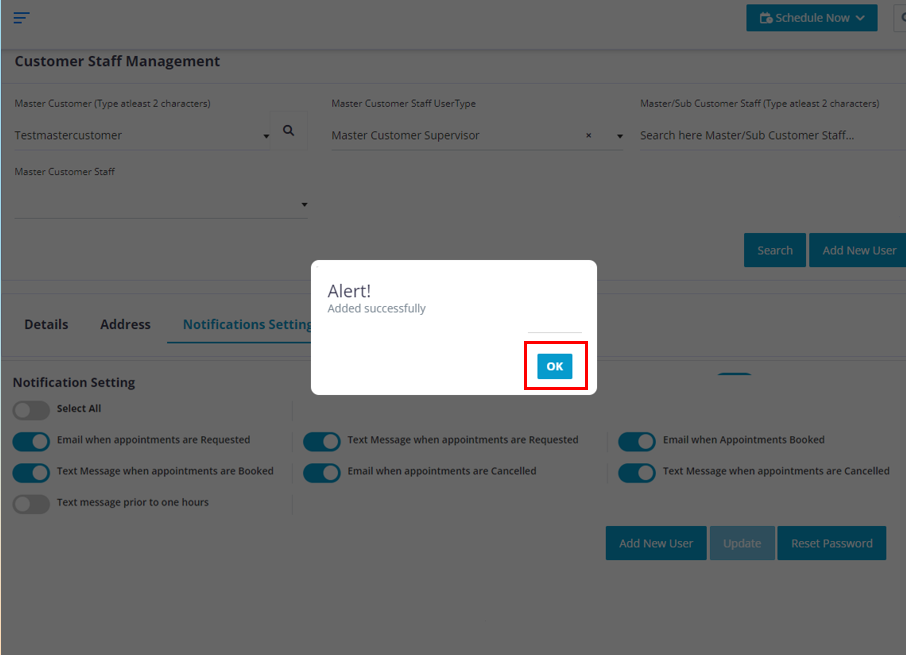
Click on the “OK” button.
(Note: Now a Welcome email containing the username and temporary password will be sent the email that you have entered in the details section).
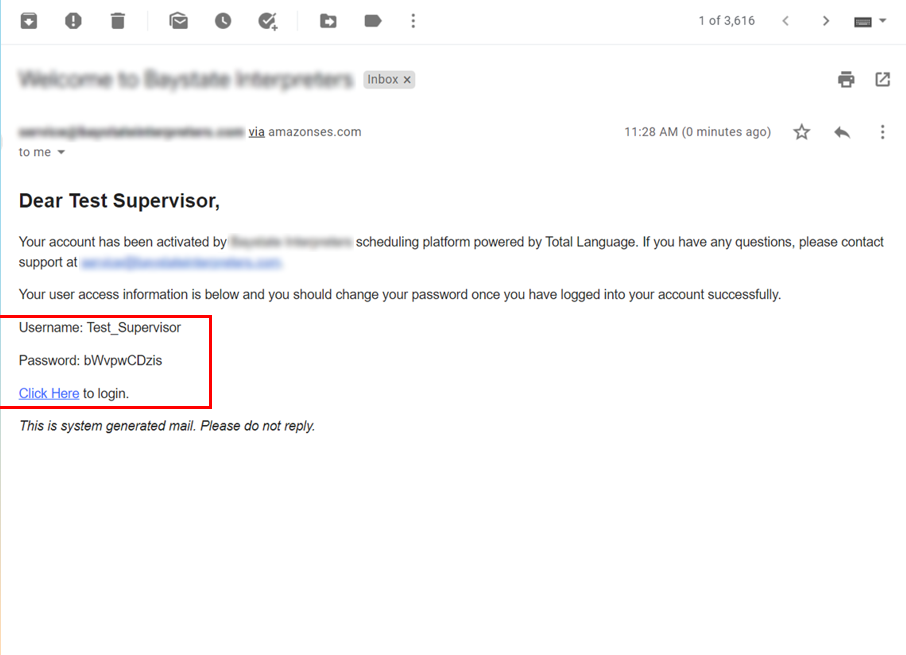
Use these credentials to log into you Total Language account.
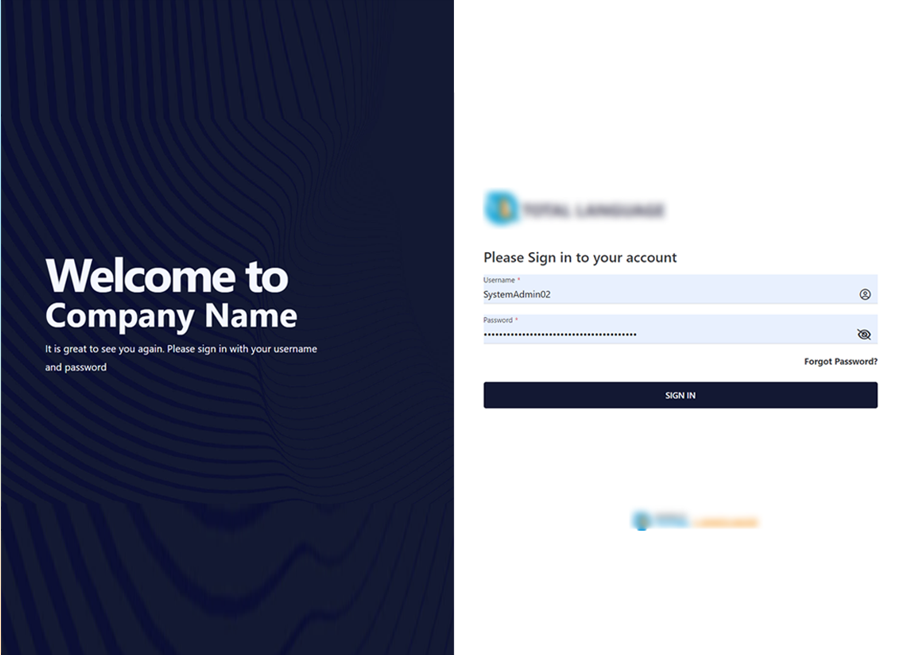
After you on the “click here” hyper link it will redirect you to this page. Use the credentials sent to you to log into you account.
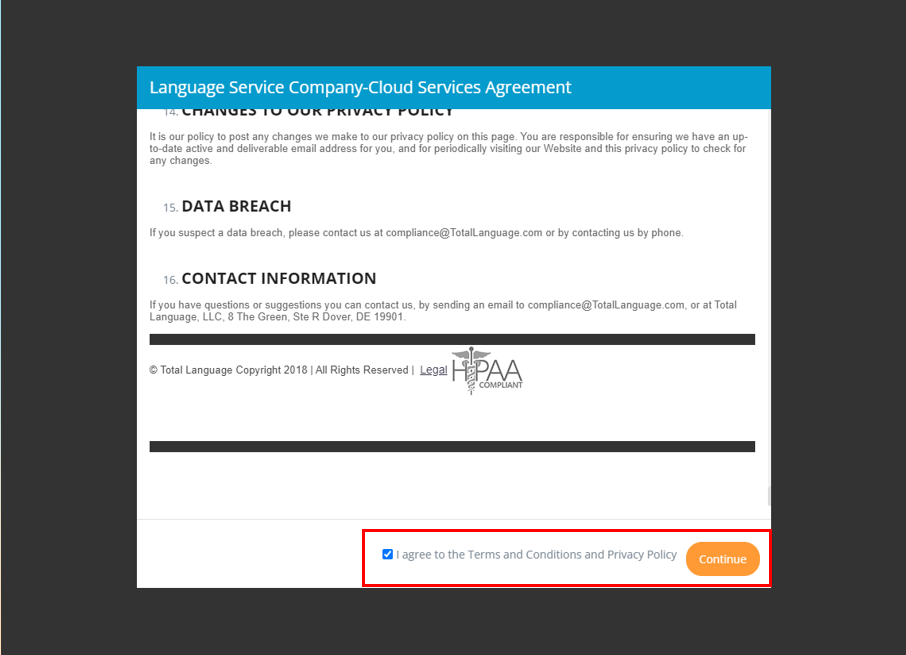
As soon as you log in, you will get the Service Agreement read it carefully. Once done click on the Check box that states that you have agreed to our Terms & conditions.
Click on the “Continue” button.
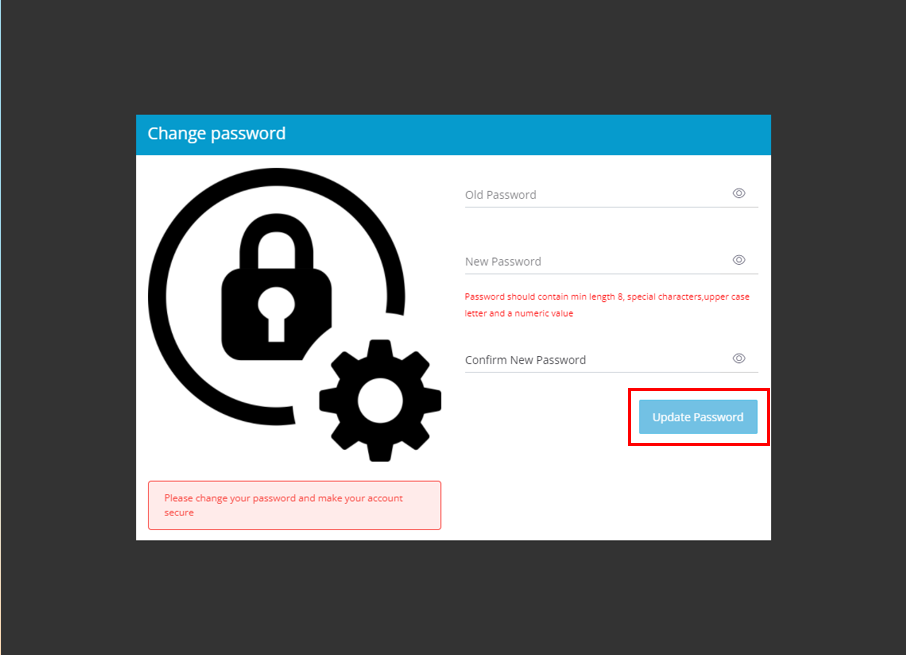
Here you can change your password.
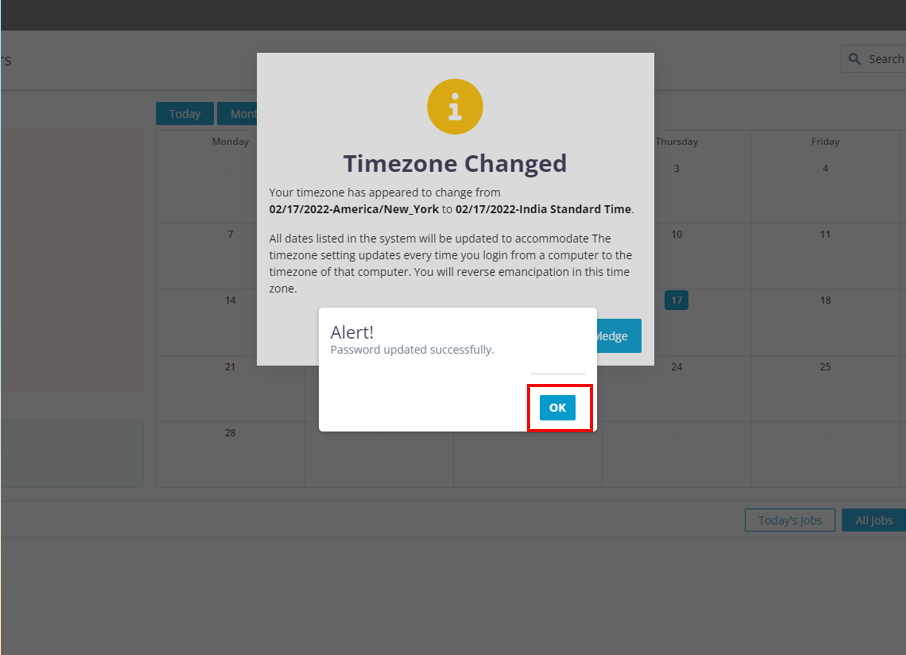
Click on the “OK” button
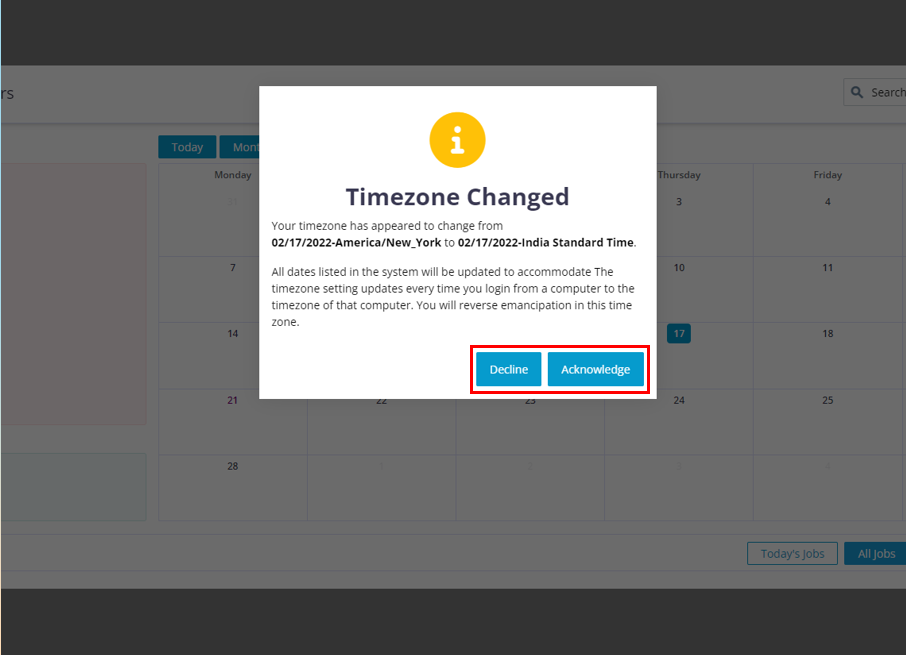
You will get the time zone pop up if you log into a different time zone, you can choose to Acknowledge it or Decline it as per your requirements.
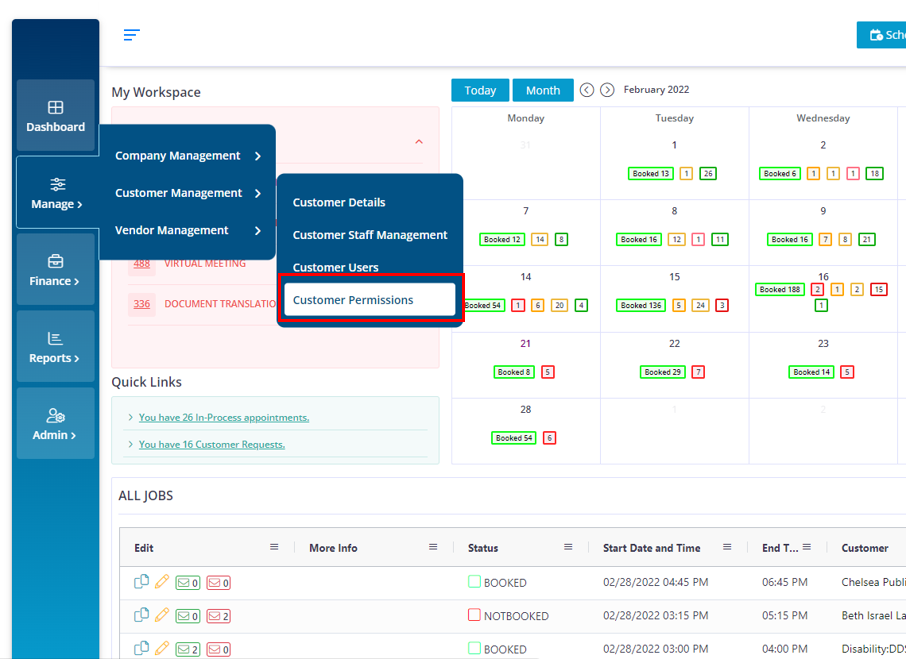
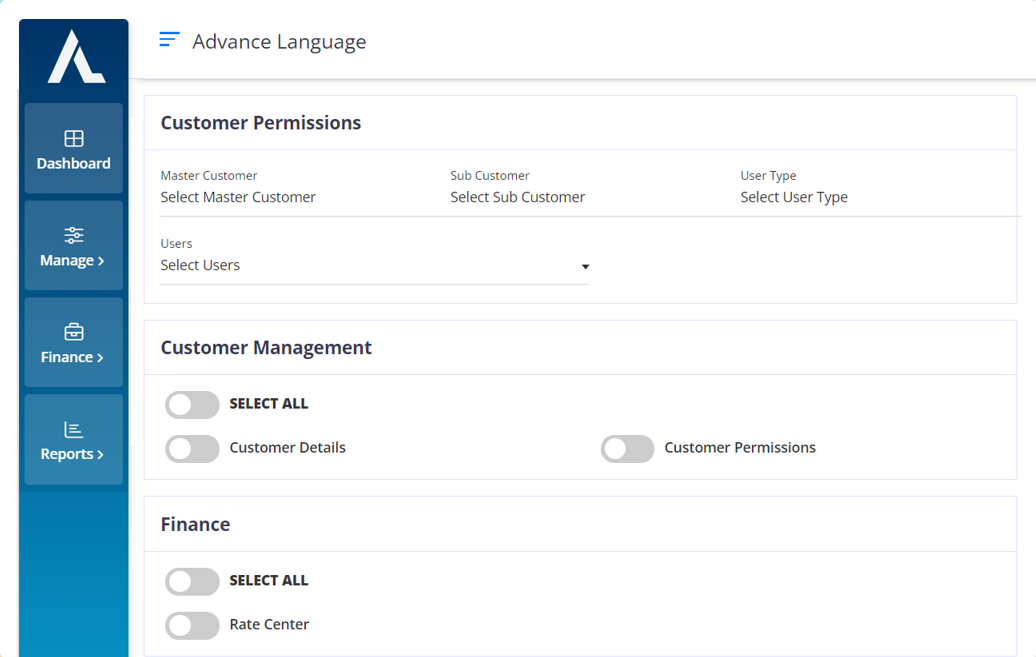
Move your cursor to the “Manage” icon and choose “Customer Management > Customer Permissions”.

Choose the required Master customer or the Sub-customer.
Choose the required user type and if you want to assign permission to a specific user, then choose a specific user from the “User” drop down.
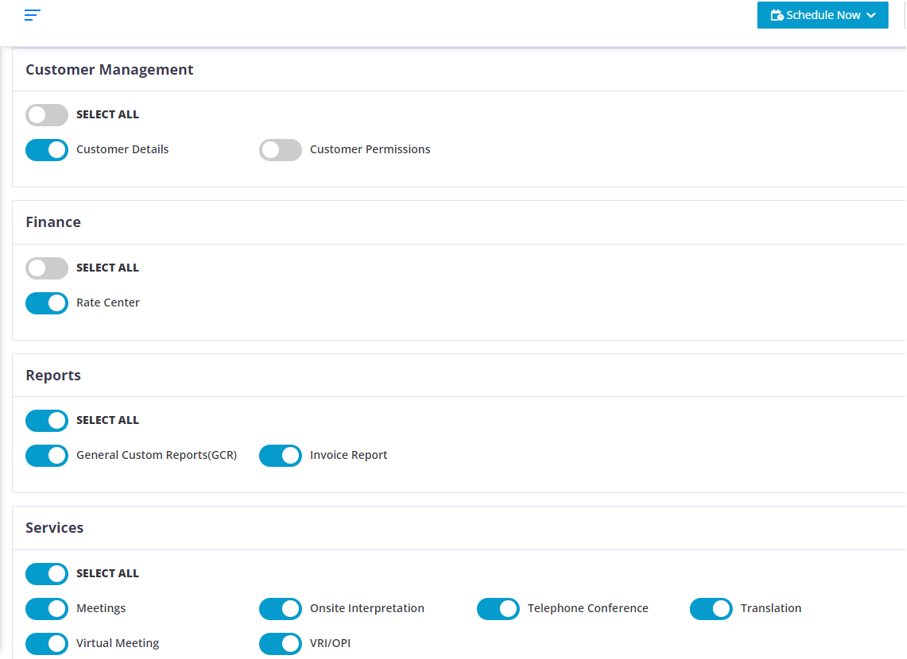
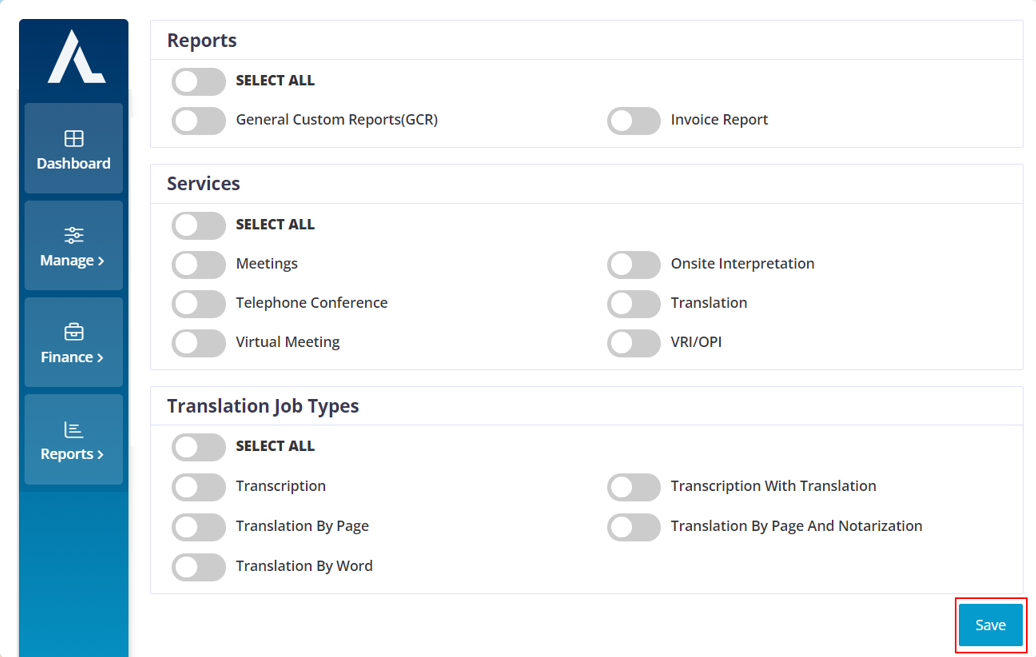
After you choose the required user, You can turn on the permissions for that particular user based on your company requirements.
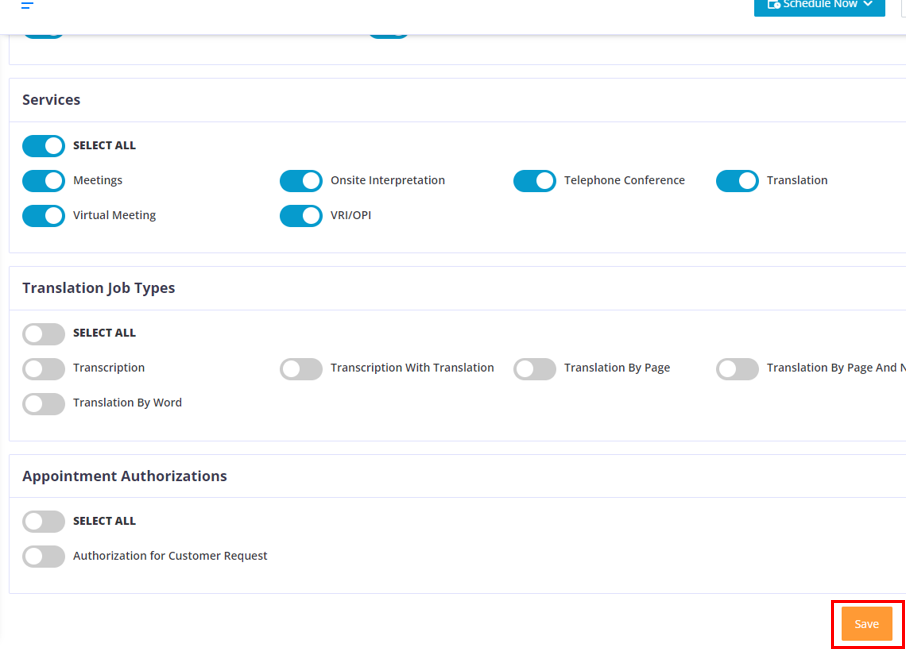
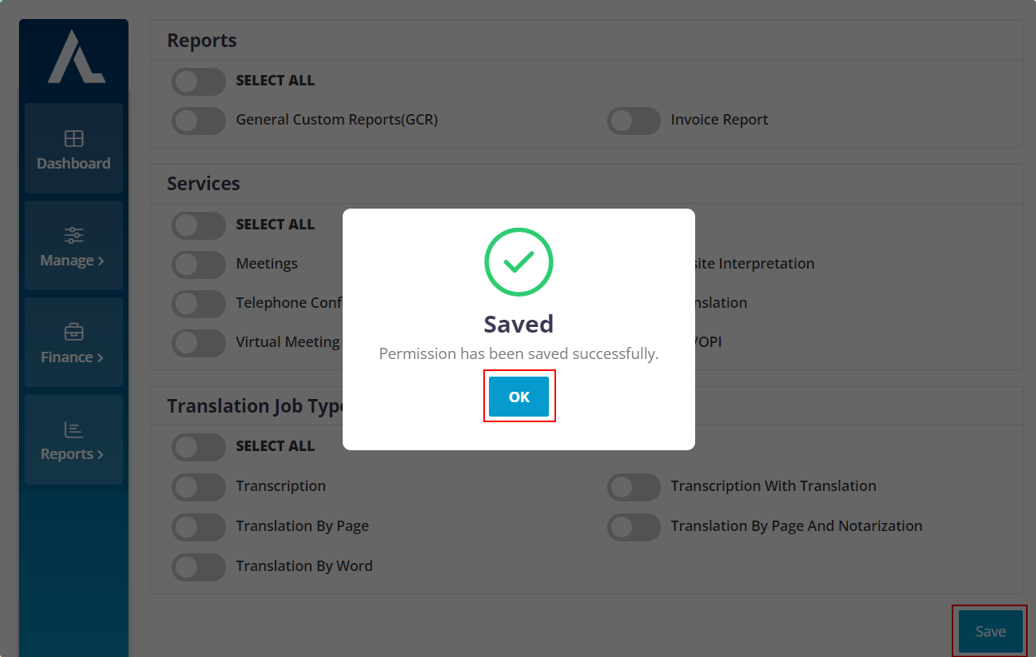
Once you have chosen the required permissions, Click on the “Save” button.
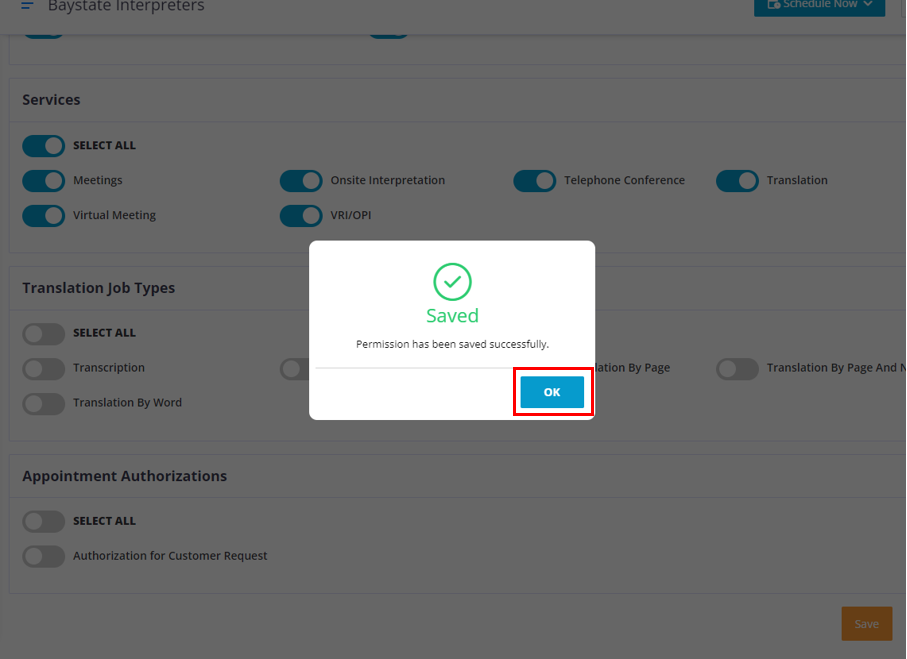
Click on the “OK” button.
Now when that user or user type logs in or refresh their page they will find the permissions that have been assigned to them.

Move the cursor to the “Manage” Icon and choose Customer Management > Customer permissions.
To edit the permission for a Master Customer, choose only the required Master customer from the drop down and ignore the other fields.
To edit the permission for a Master Customer user type, choose the required Master Customer and choose the required user type now the users will populate in the “Users” field choose the required user and edit the permissions.
To edit the permission for a Sub Customer, choose the required Master customer and then choose the required Sub customer from the “Sub Customer” field. Ignore other fields.
To edit the permissions for the Sub customer’s user types, choose the required Master customer and the required Sub Customer now choose the required user type from the “user type” field and you will find the users populating in “users” field. Choose and edit their permissions.
After you complete editing the permissions for a particular customer or it’s user type click on the “Save” button.
Click on the “OK” button.
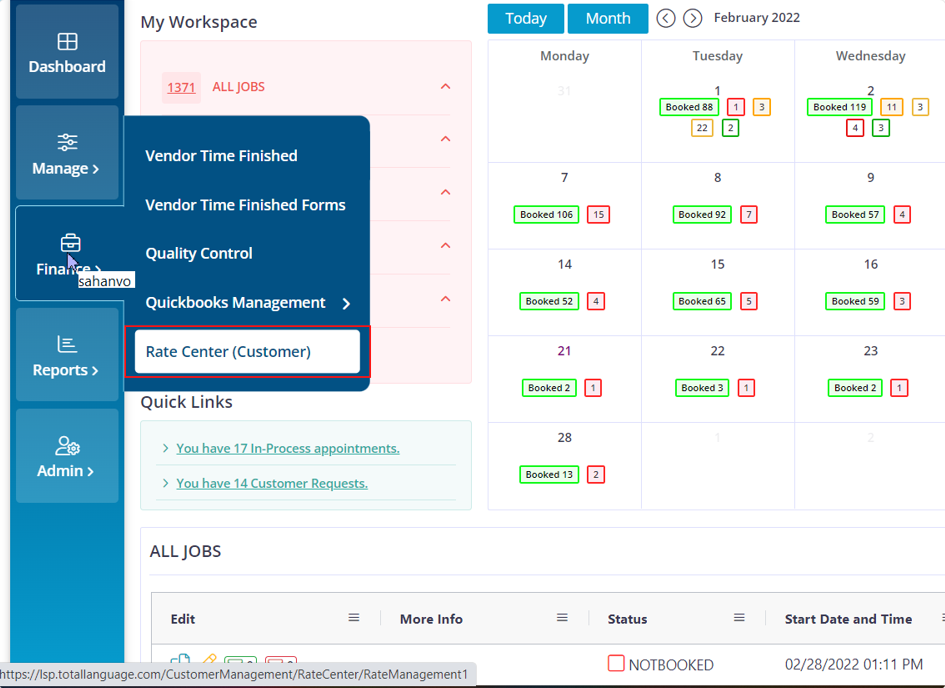
Move your cursor to the Finance icon and choose Rate Center.
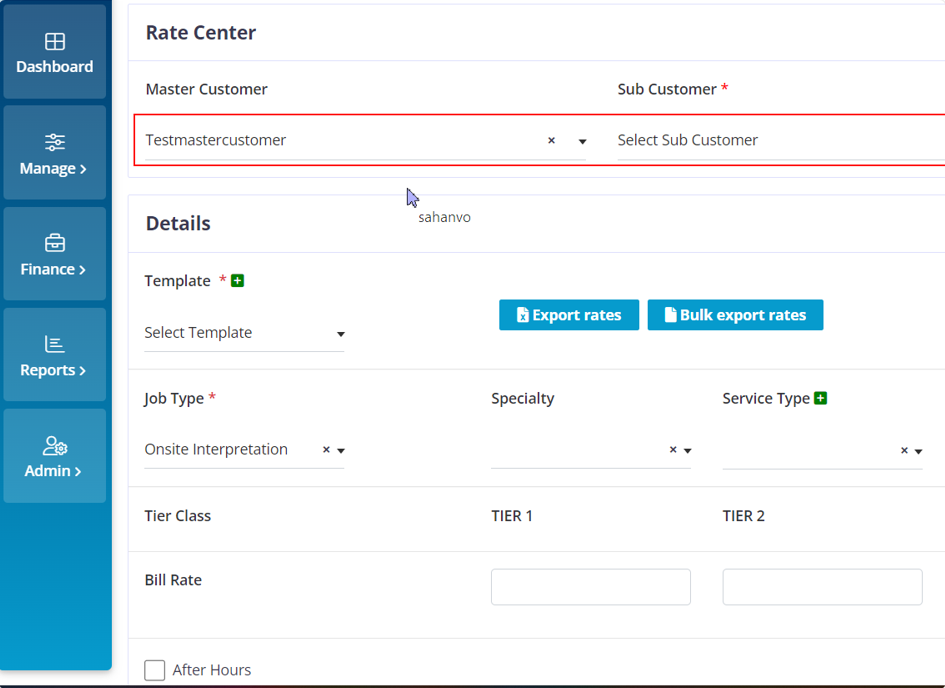
When you choose the required Master customer, the Sub-Customer field will appear. If you want to add rates only for the Master customer then do not choose any users from the Sub-Customer drop down.
If you want to add rates for the Sub-Customer then choose the required User from the drop down.
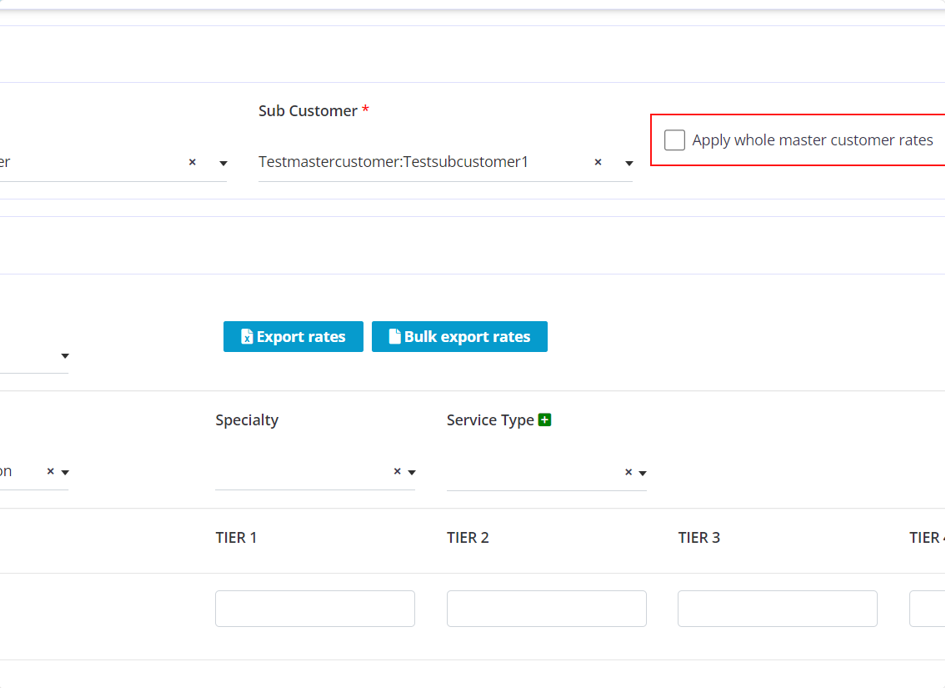
If you have added Rates for the Master customer and you want to copy all those exact rates to the chosen Sub-Customer user, then click on the “Apply whole master customer rates” check box.
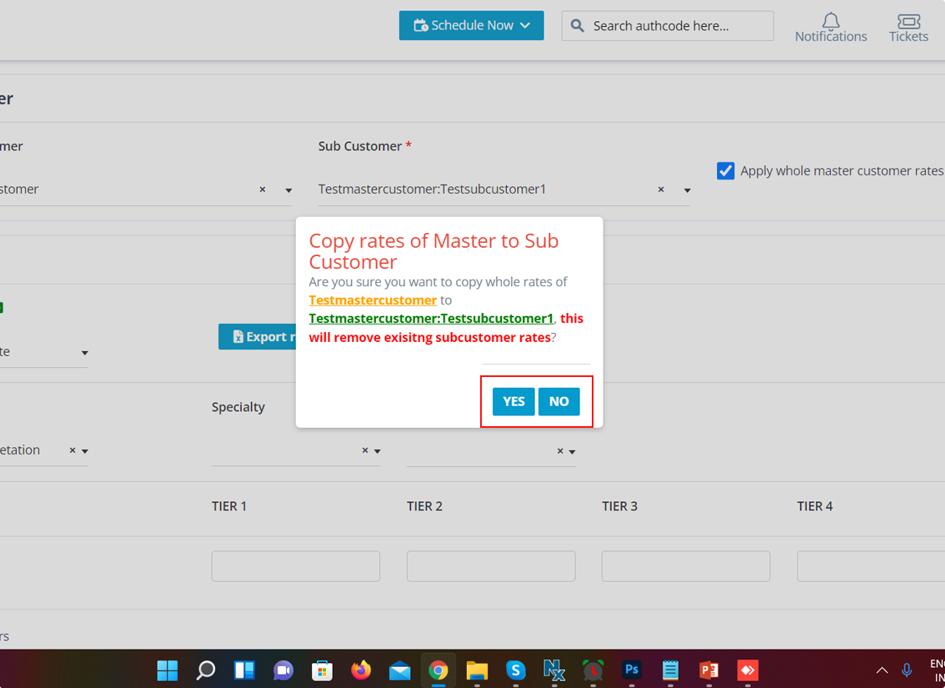
If you want to copy the rates click on the “YES” button.
If you do not want to proceed with it just click on the “NO” button
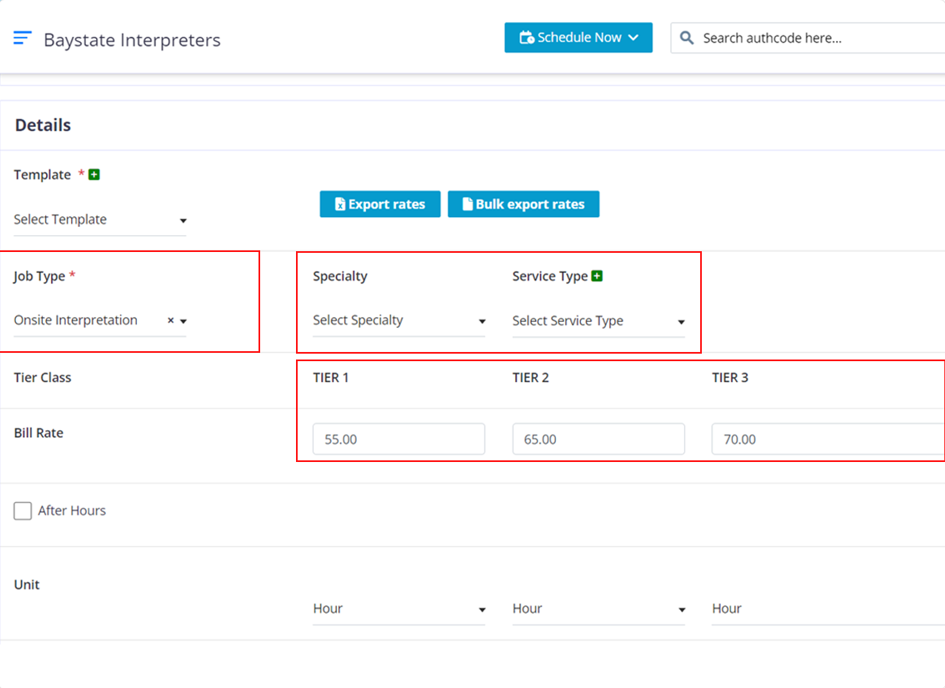
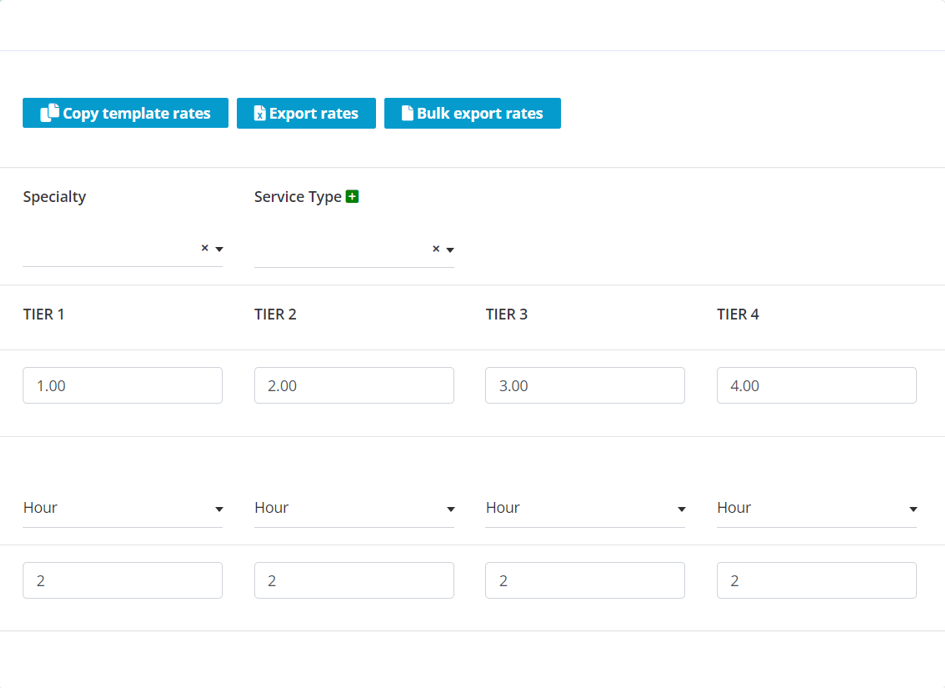
Choose the required Job Type. Choose the required specialty and Service type if needed.
If you want to add a Service Type click on the “+” icon.
Enter the price for the required TIREs as per your company requirements.
Click on the Units drop down to choose between Hour, Min, Per Page, Per Word.
Click on the check box for the language that you want to send into the required TIER.
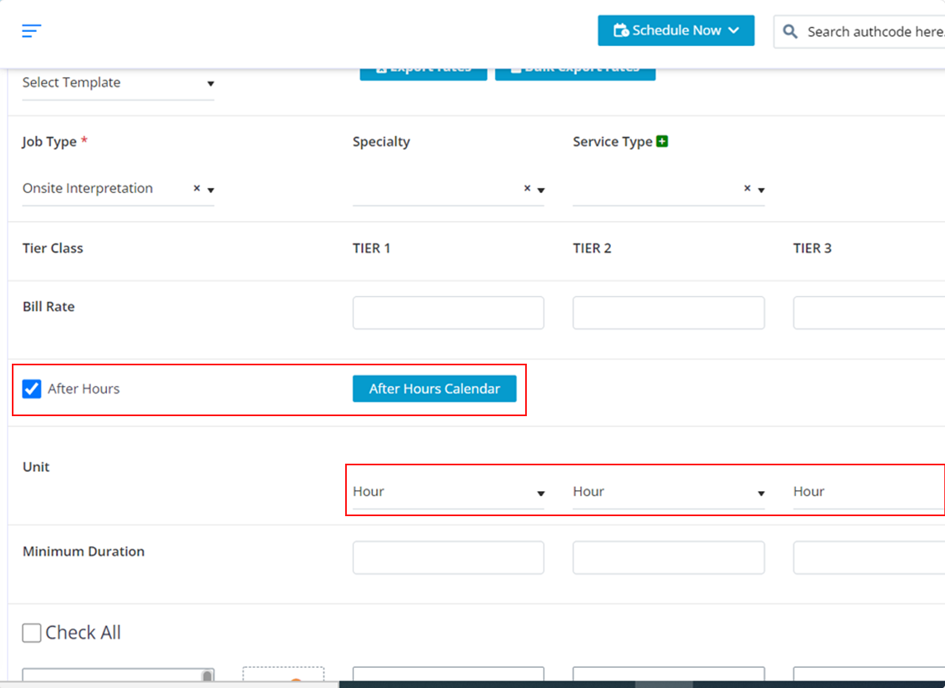
As per your company requirements you can enter the minimum duration for the chosen Job type to be billed.
To add After Hours click on the check box and the “After Hours Calendar” button will appear, click on it.
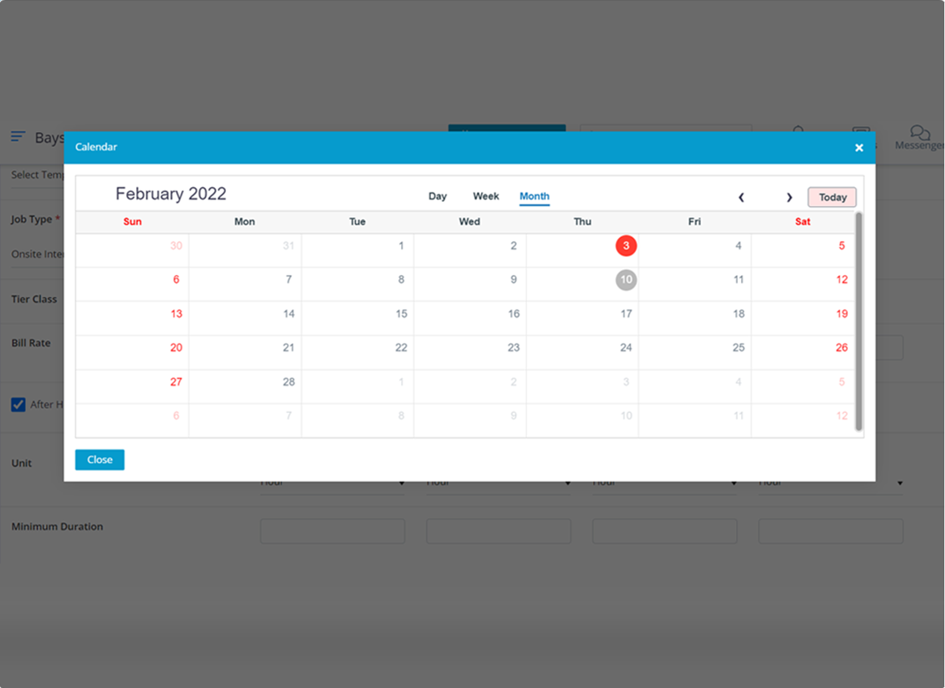
Click on the required date.
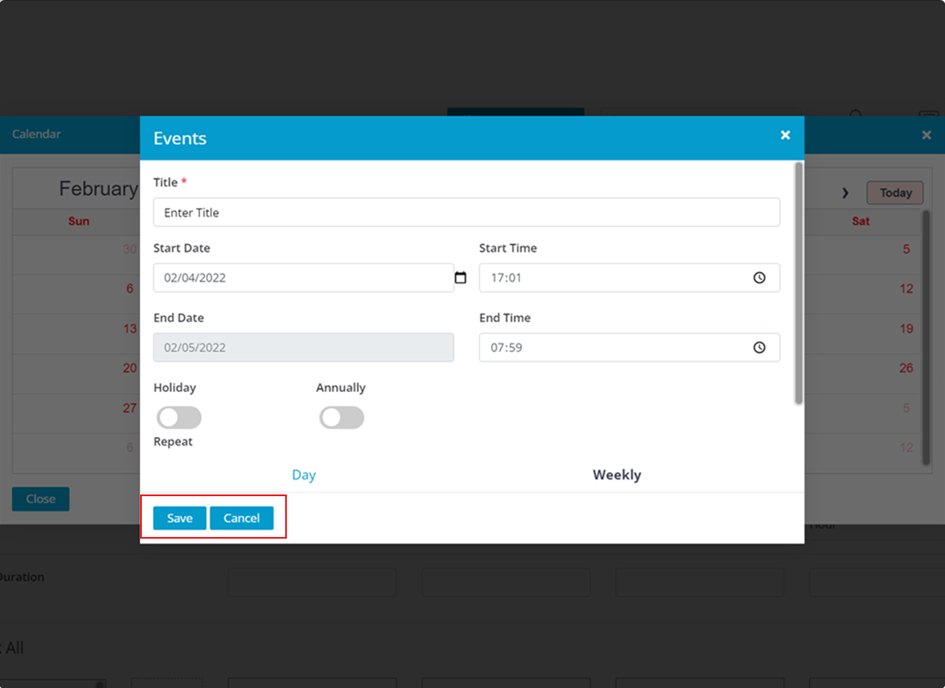
Mandatory fields are needed to be filled and the others are based on your company requirements.
Click on the “Save” button.
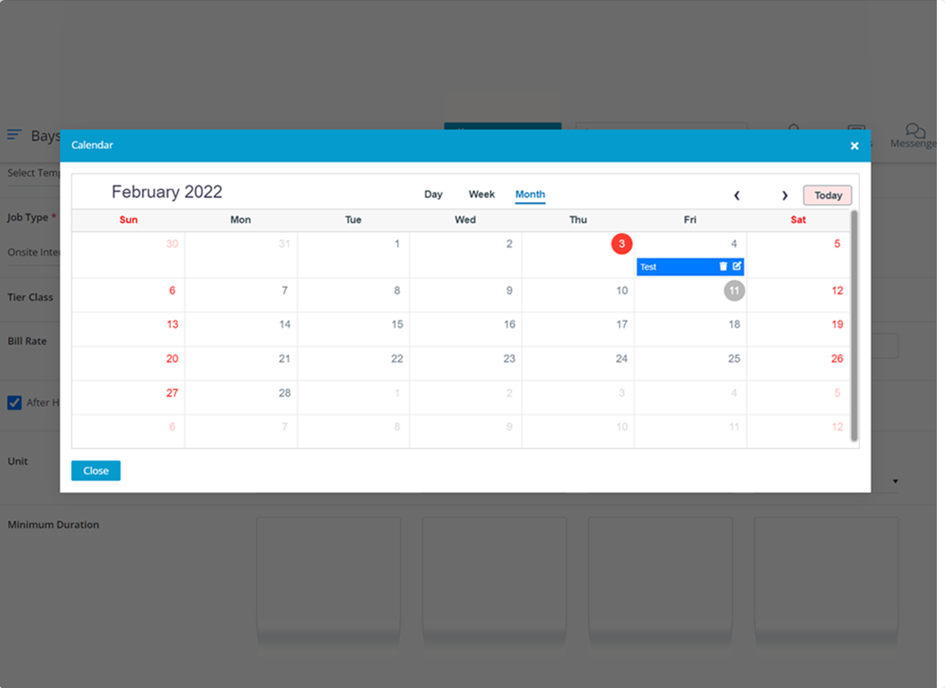
This is how it would look after you save the required data.
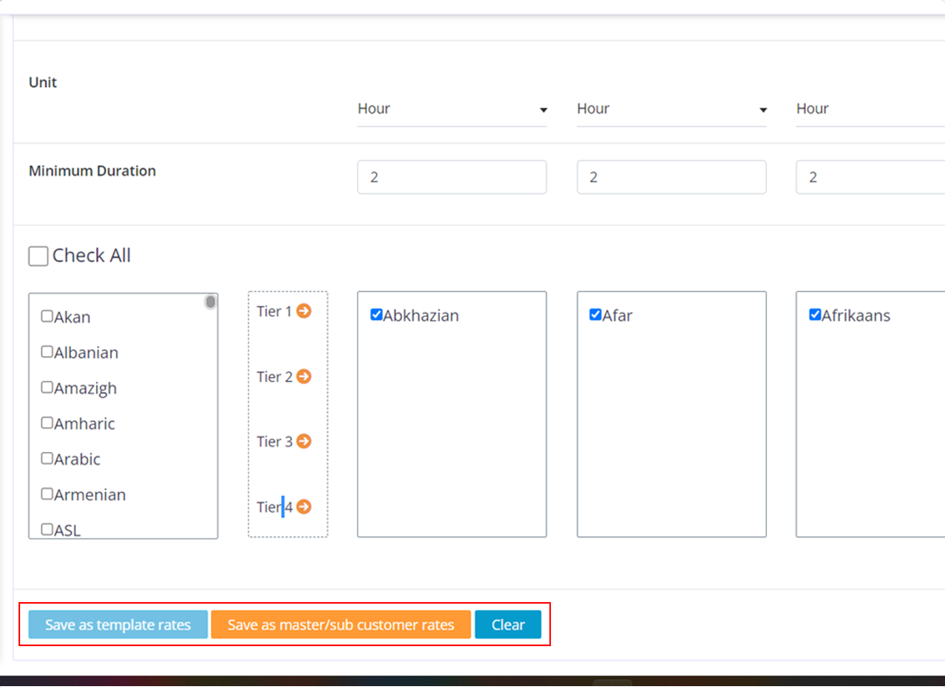
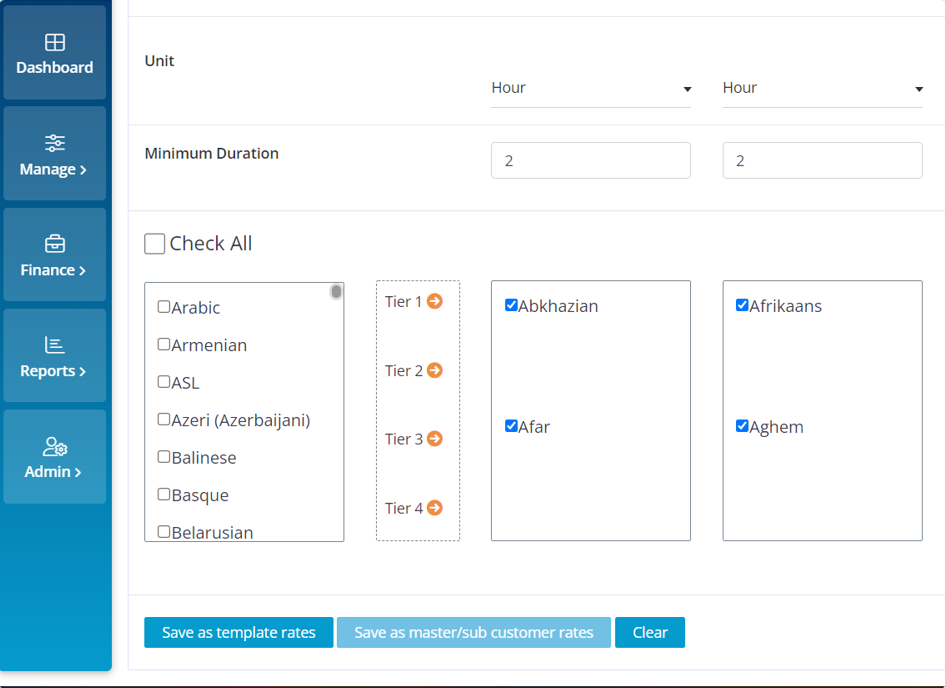
Move the chosen language to the required TIRE.
(Note: The languages under the TIRE will be billed for the price, units and minimum duration that you have entered under the TIRE),
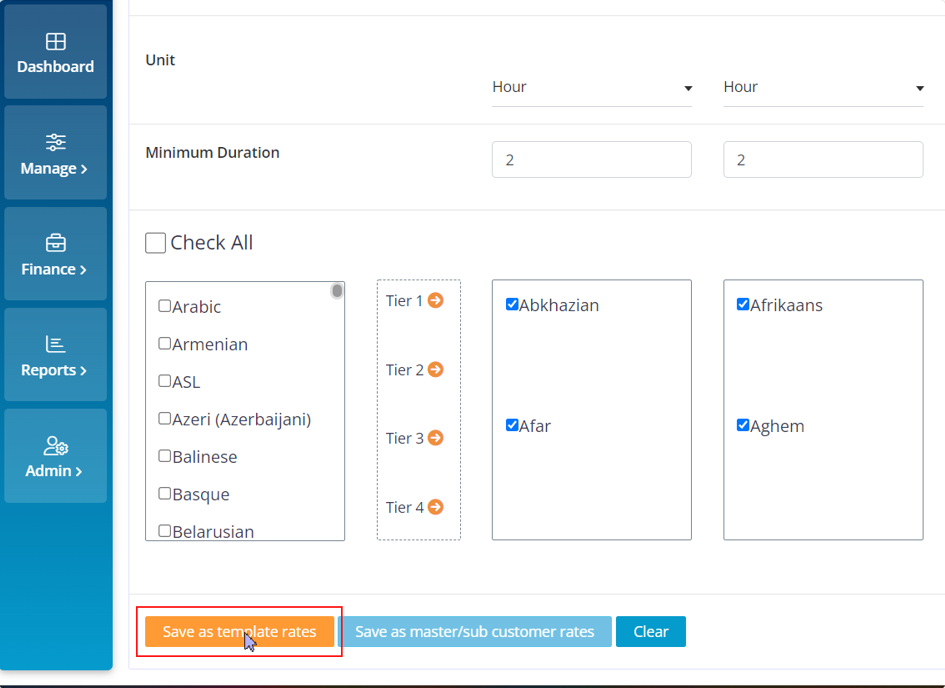
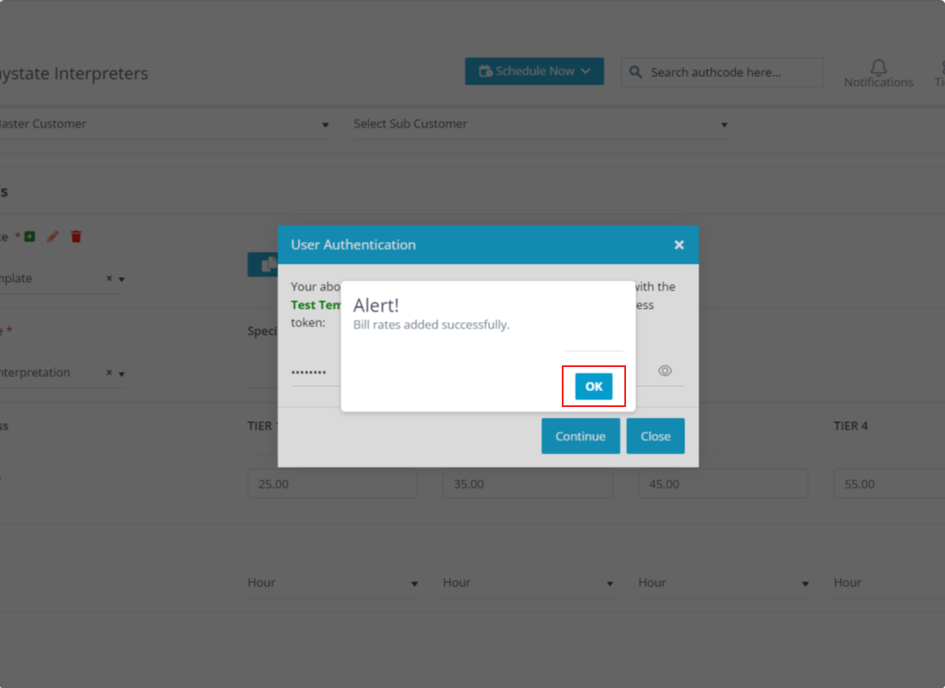
Only you have enter the required the data click on the “Save as master/sub customer rates” button.
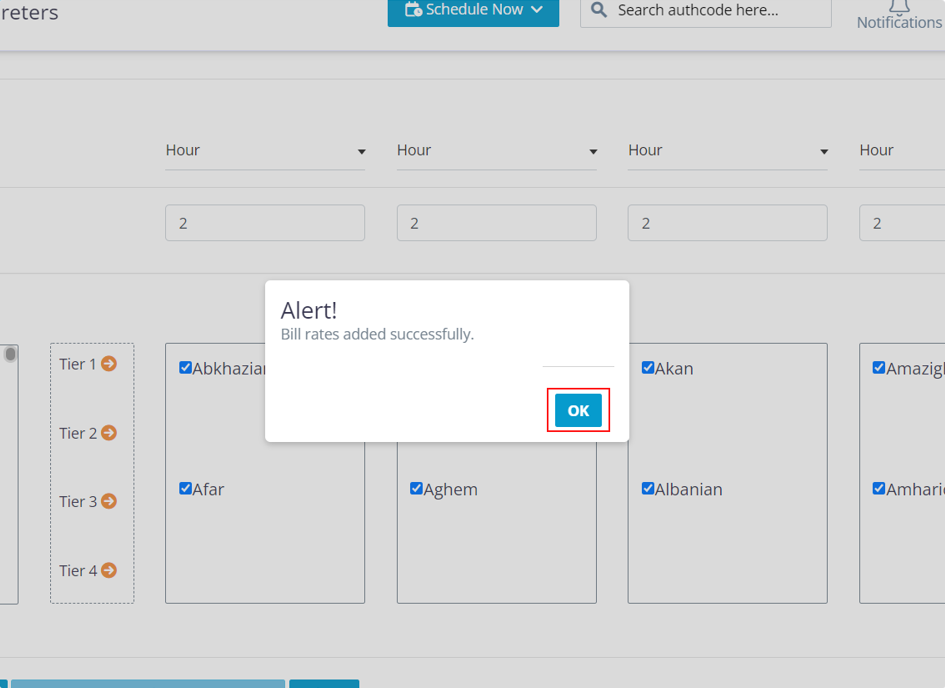
Click on the “OK” button.
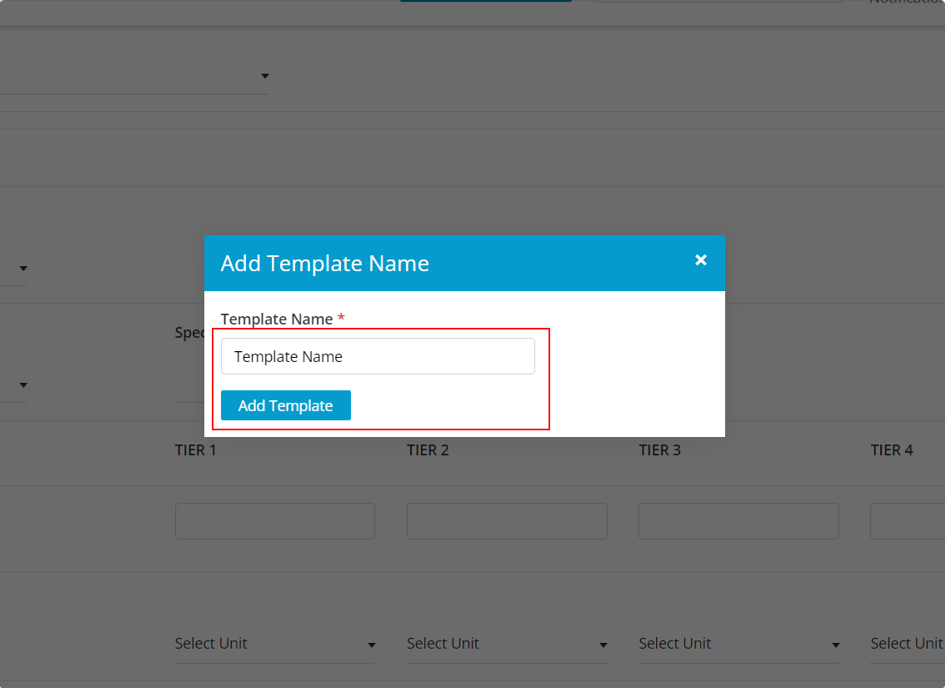
To add a new template click on the “+” icon that you will find above the template field.
Once you click on it you will get this pop up, enter the required template name and click on the “Add template” button.
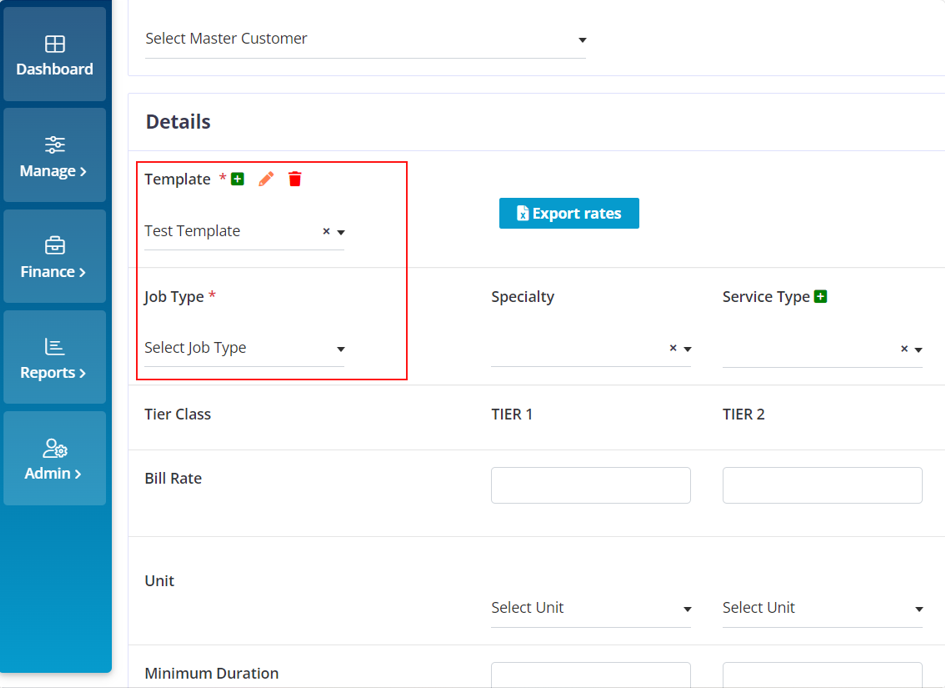
Choose the Required template. Choose the required Job Type.
Choose the required fields and fill in the data in the required fields that you want to save in your template.
As per your requirements fill in the data in the fields.
Choose the required languages and send them into the required TIREs for them to be billed for the entered Price, unit, and minimum duration.
Click on the “Save” Template button.
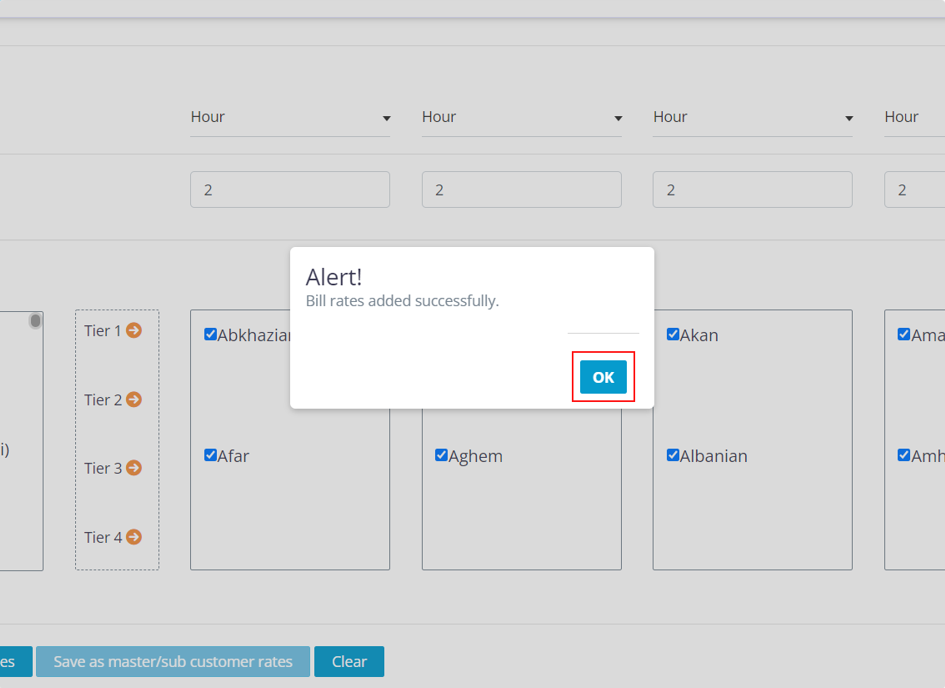
Click on the “Ok” button.
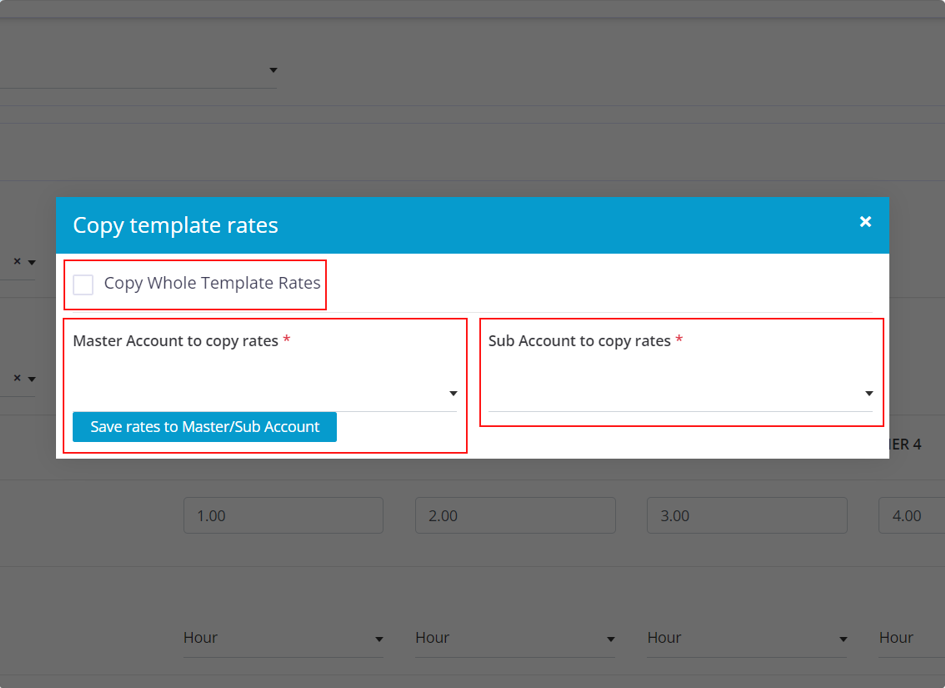
To copy the template rates to the customer/sub-customer, click on the “copy template rates”.
You will get this pop up.

If you to copy the whole template rate, click on the “Copy Whole Template Rates” check box.
Choose the Master Customer, If needed choose the required sub customer to add the templates rates to.
Click on the “Save rate to the Master/sub Account” button.
If you to copy the whole template rate, click on the “Copy Whole Template Rates” check box.
Choose the Master Customer, If needed choose the required sub customer to add the templates rates to.
Click on the “Save rate to the Master/sub Account” button.

Move your cursor to the “Admin” icon and choose Staff Access Tokens”
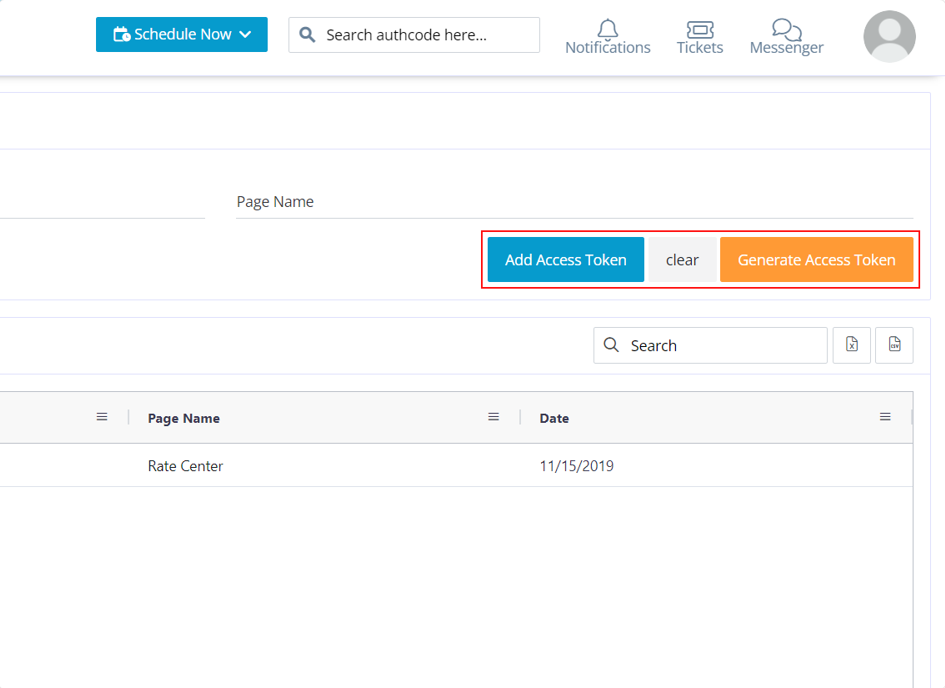
Click on the “Generate Access Token” button.
Click on the “Add Access Token” button.
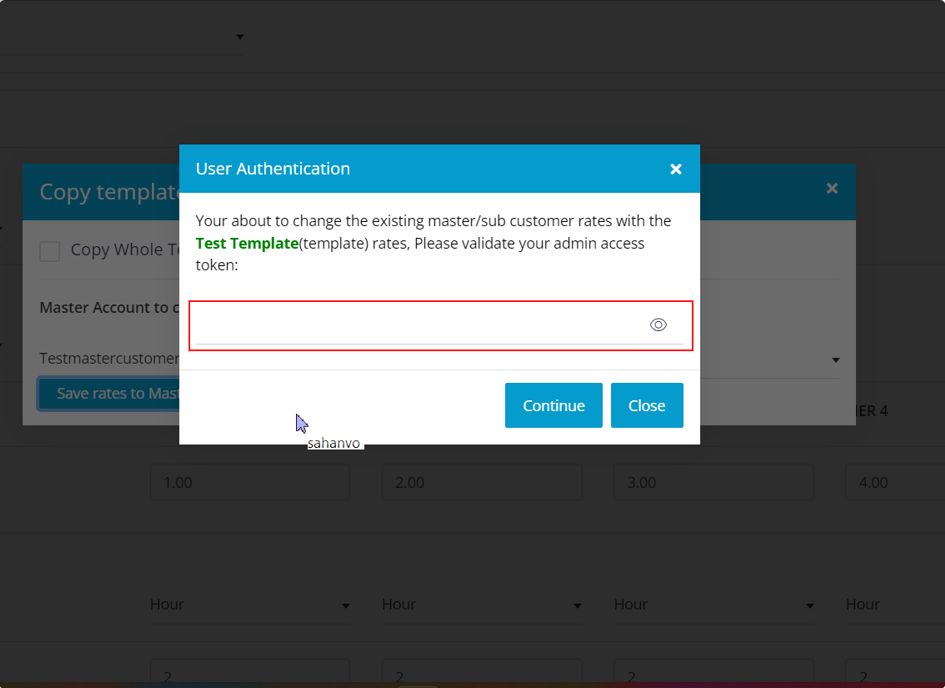
Copy the Access token number and go back to the rate center page.
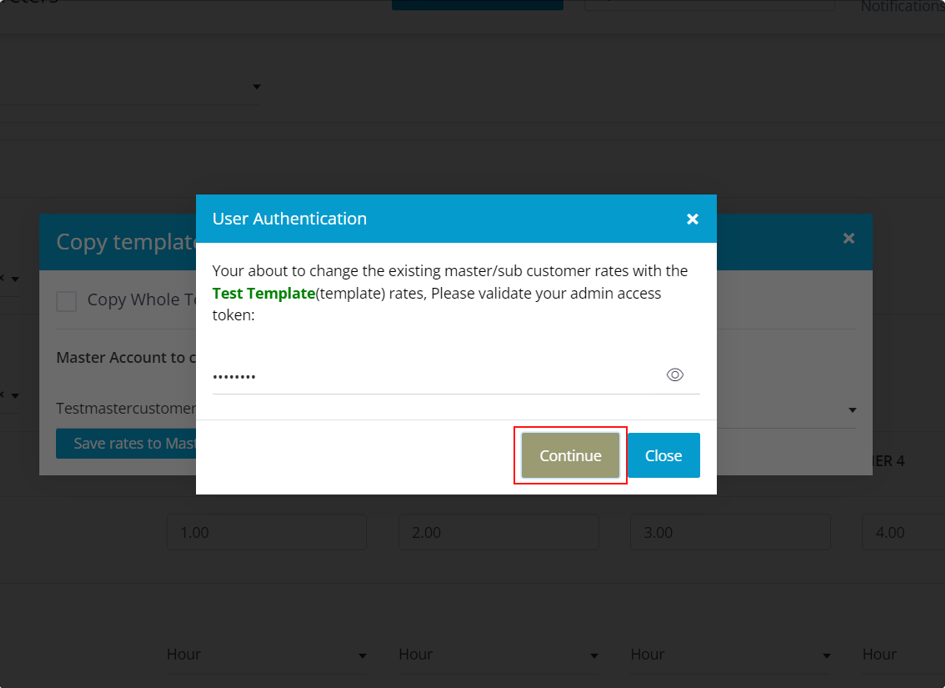
Paste the access token number that you have copied into the pop up and click on the “continue” button.
Click on the "OK" button.
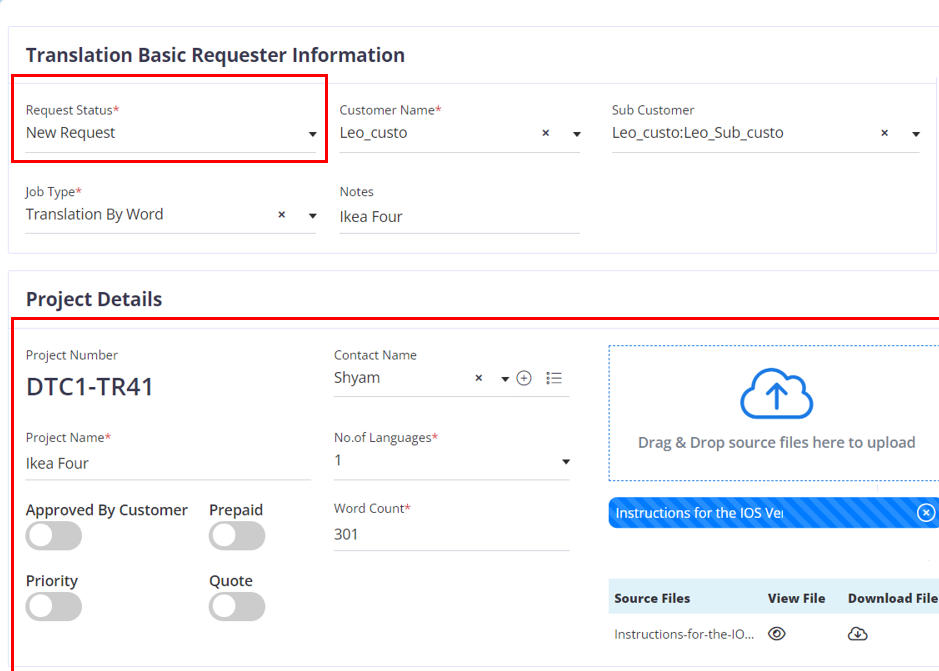
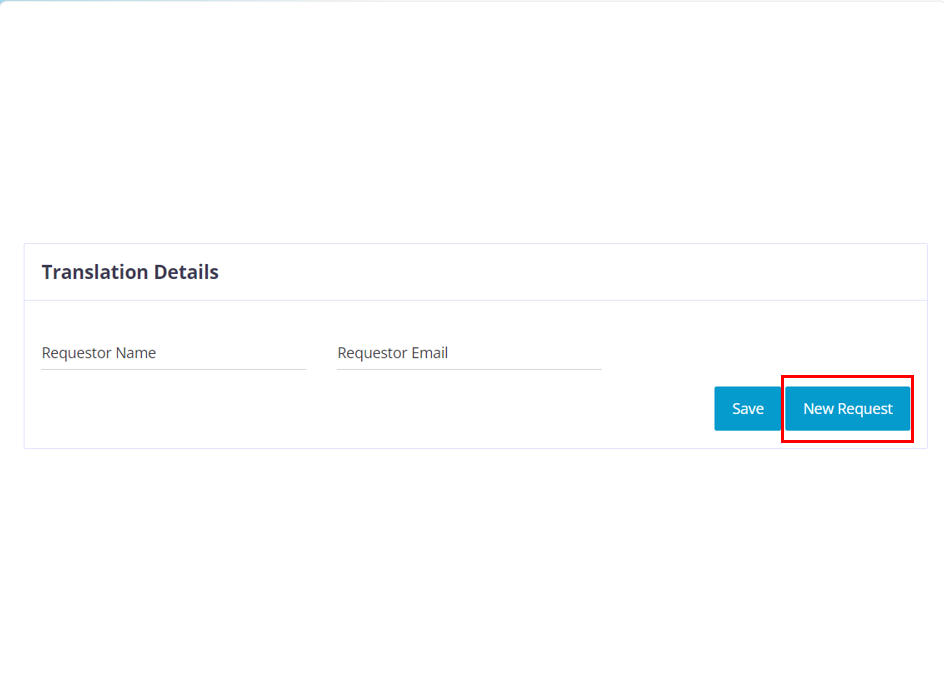
If you want to send out an email to the person who requested for this job, then enter the name and email of the person who requested for the job and click on the New Request button.
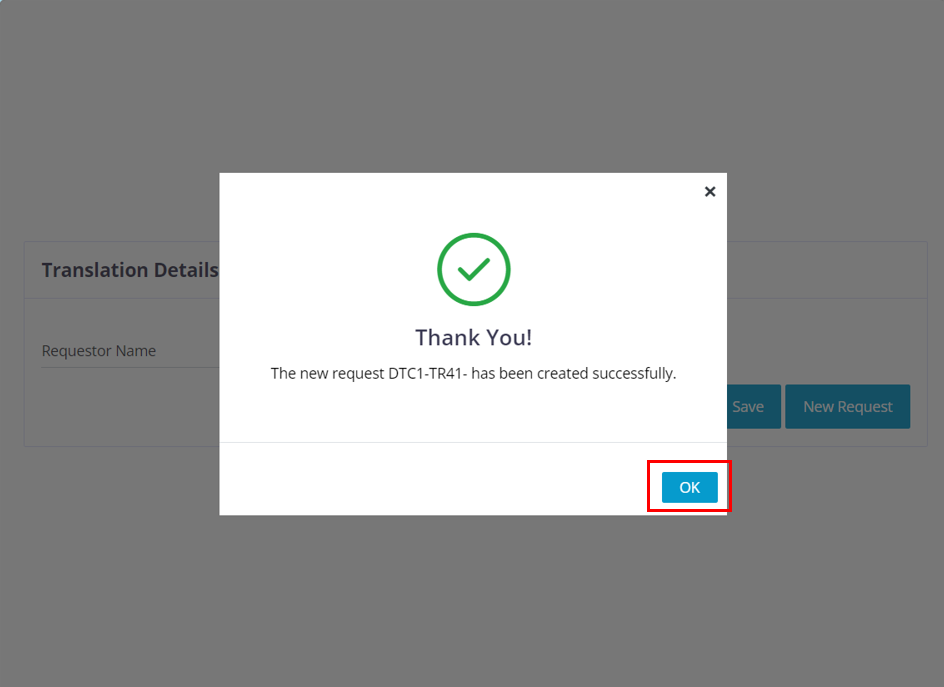
Click on the OK button.
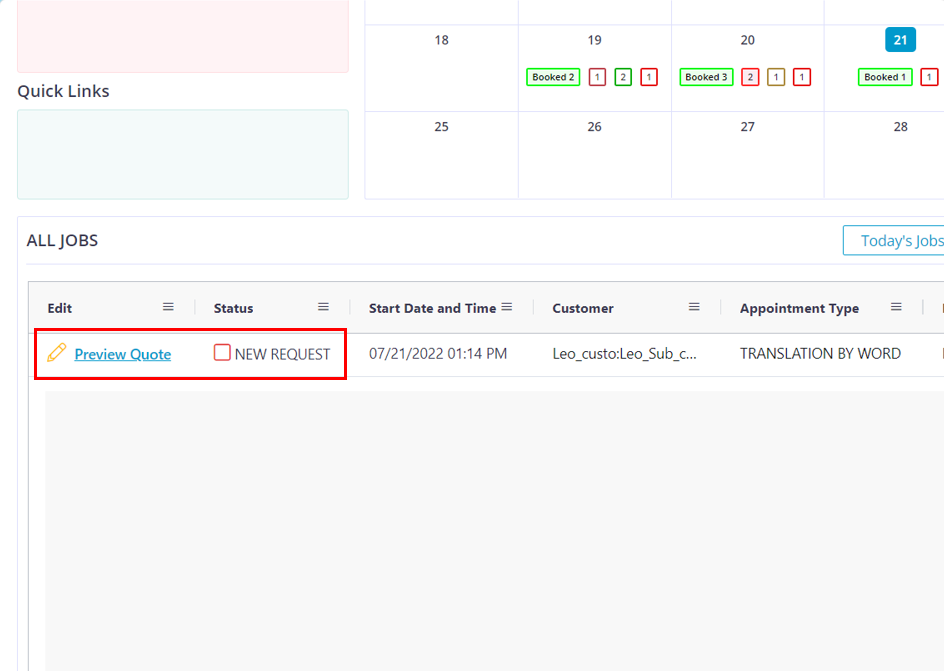
Now the job will appear as a new request in the data table.
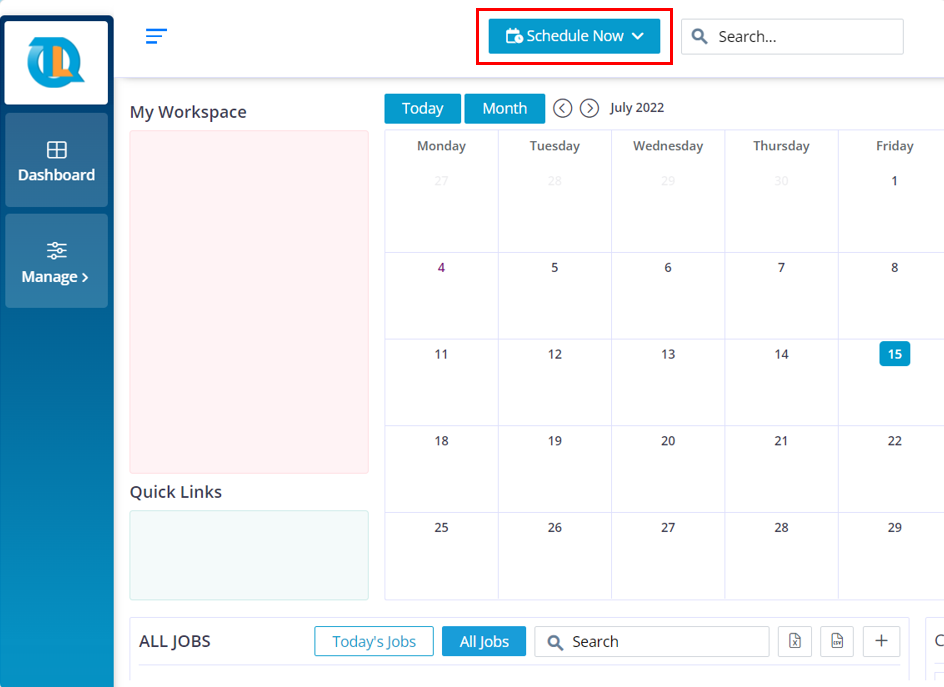
To generate a quote from the company staff’s side, please follow the below steps.
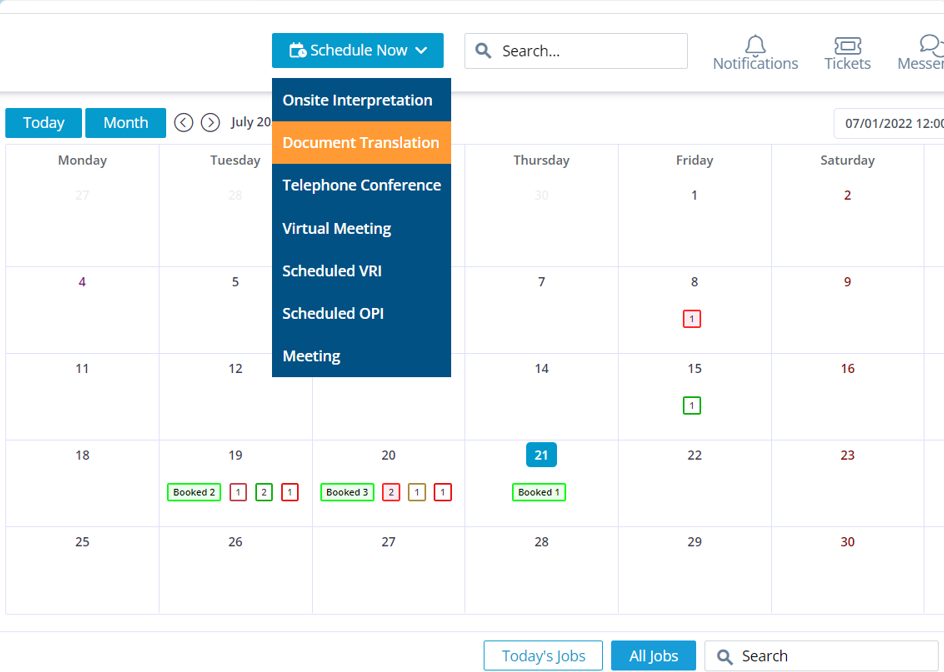
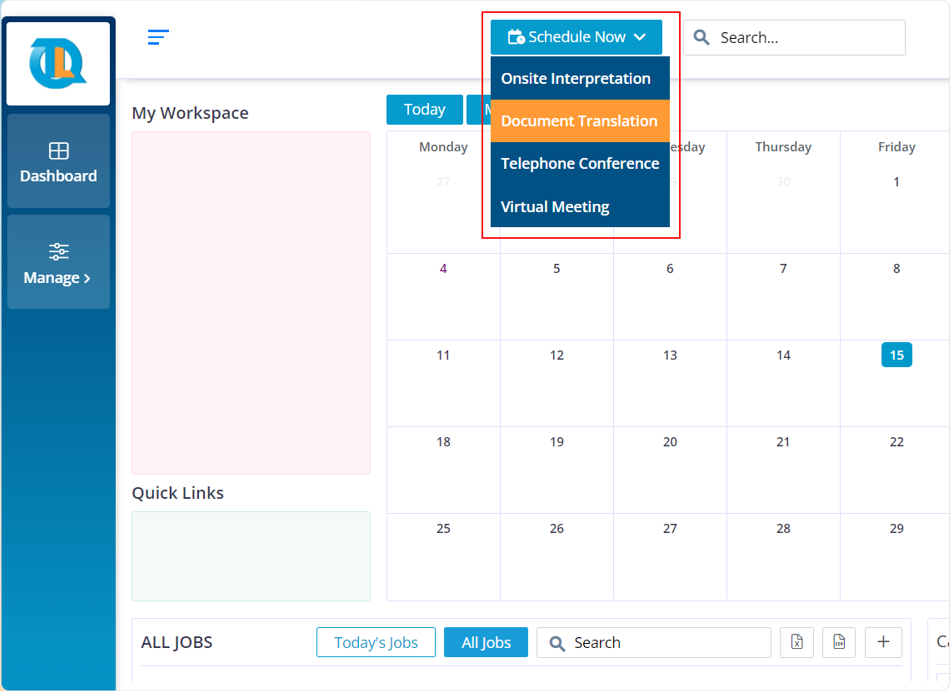
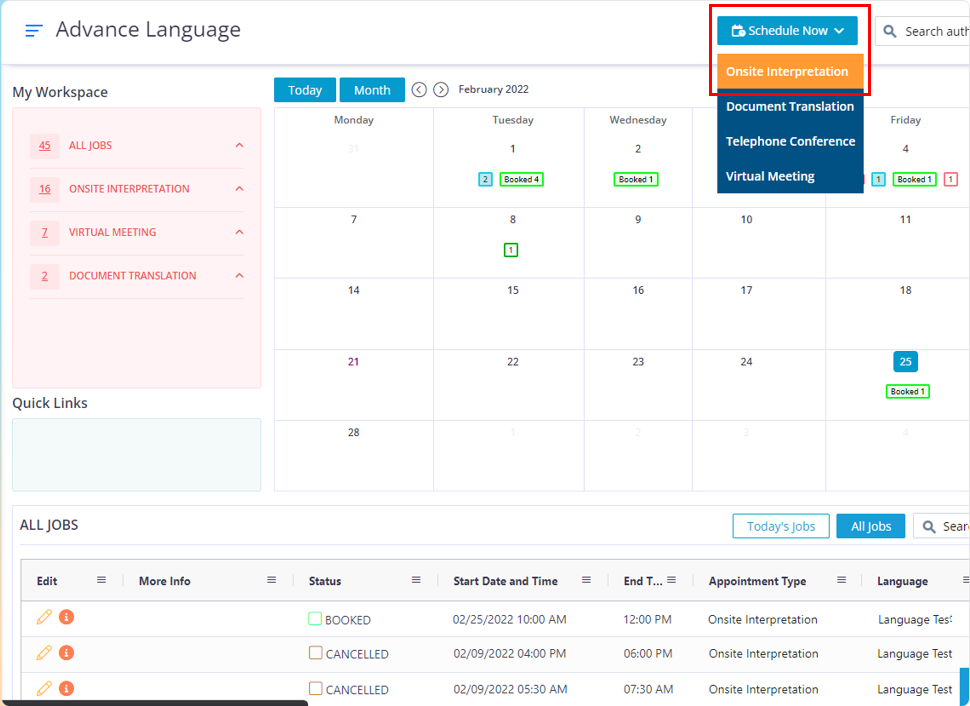
Move your cursor to the Schedule Now button.
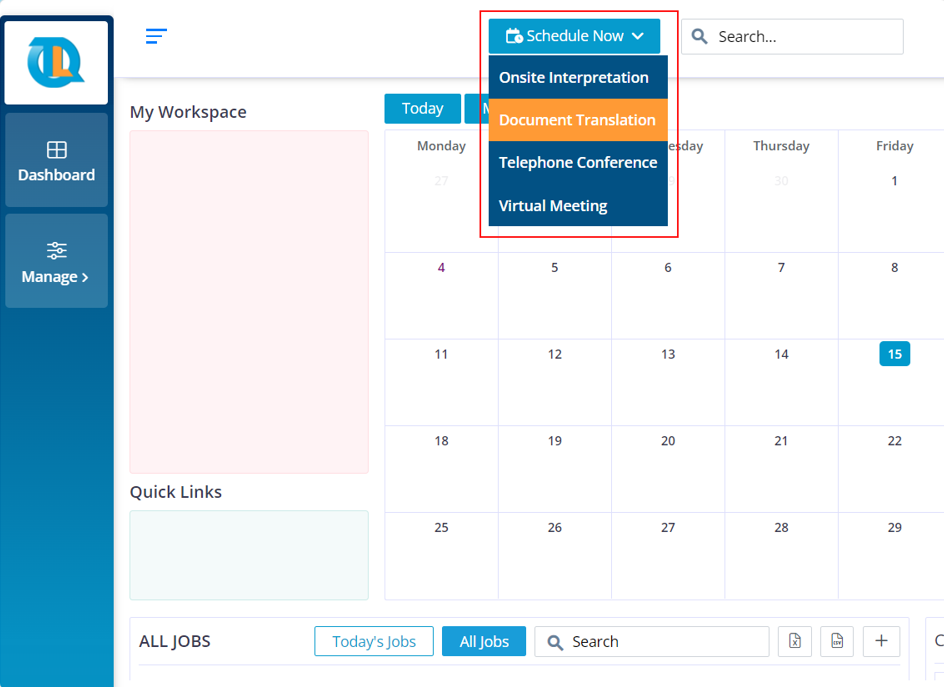
Click on the Document Translation option.

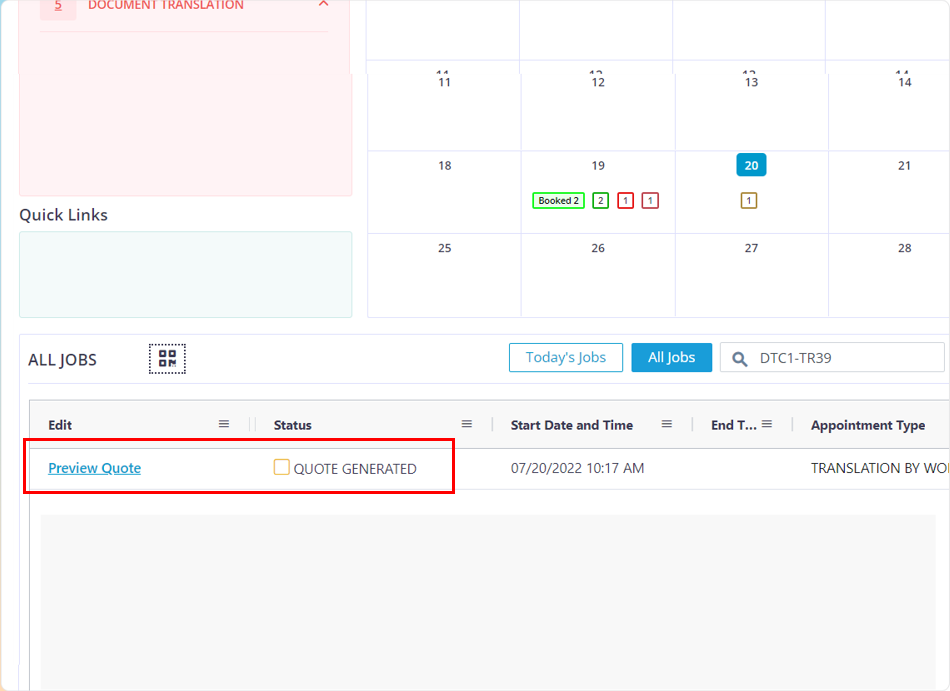
Now the customer will receive the Quote that has been generated by the company staff. They can view the quote by clicking on the Preview Quote. Once you receive the translated files from the vendor, then you can complete the job by submitting the translated files to the customer
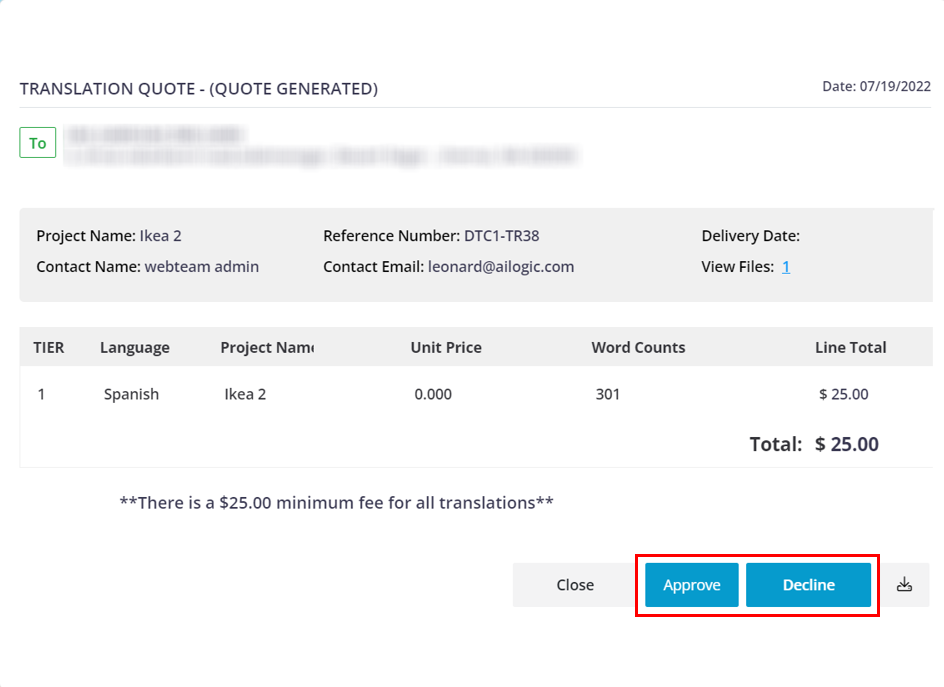
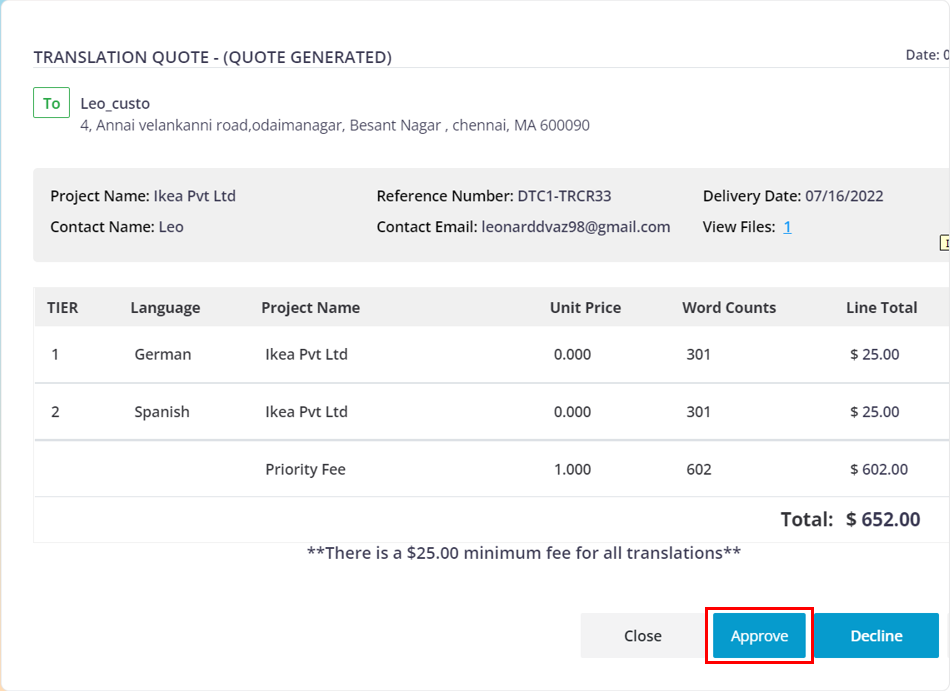
The customer can approve or decline the quote
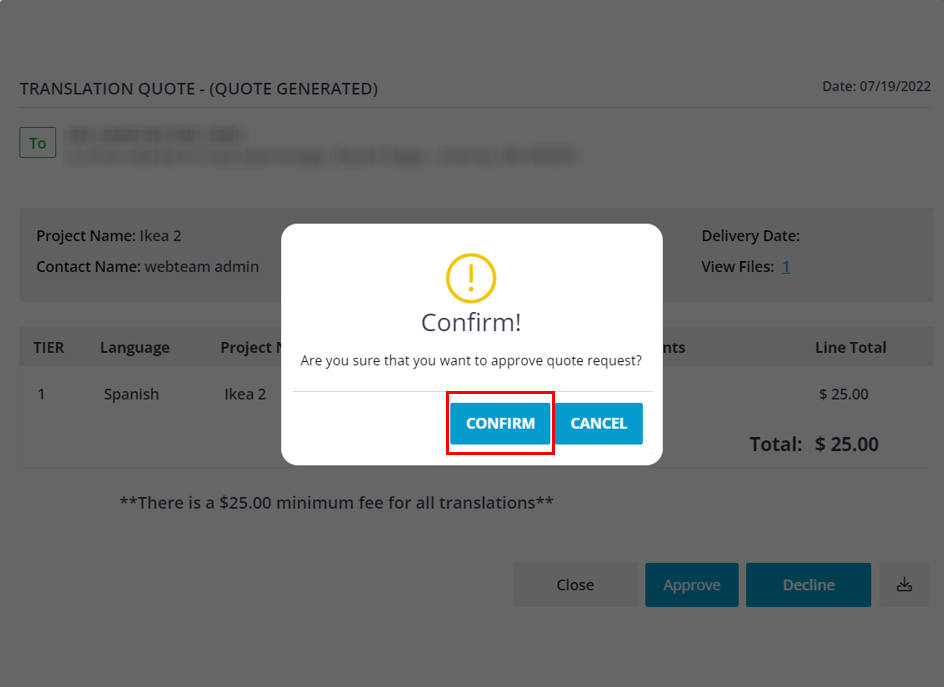
Click on the Confirm button.
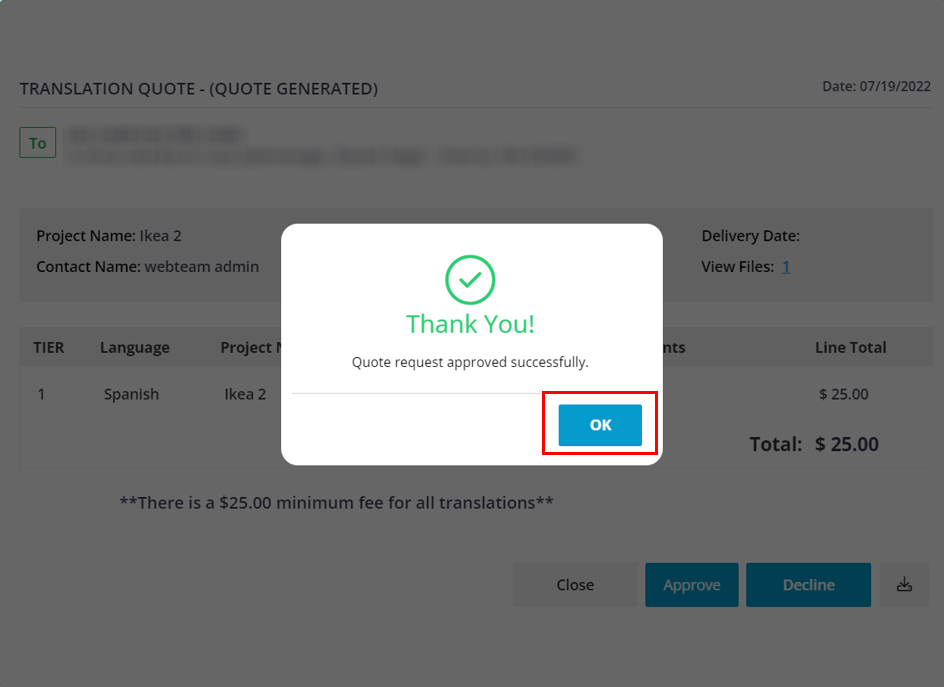
Click on the “OK” button.
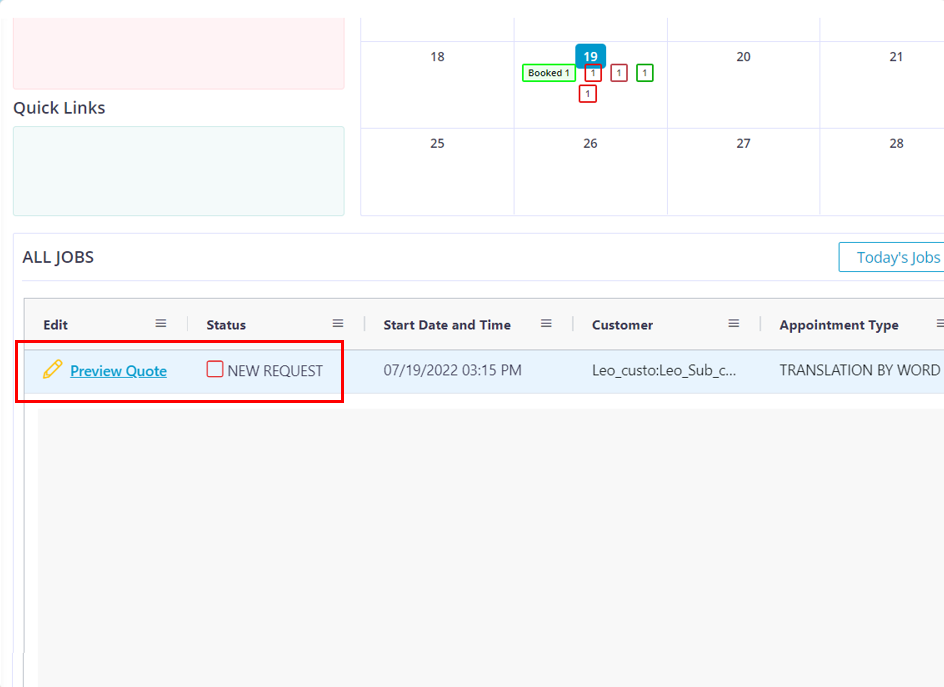
Once the customer approves the quote it will turn into a New request.
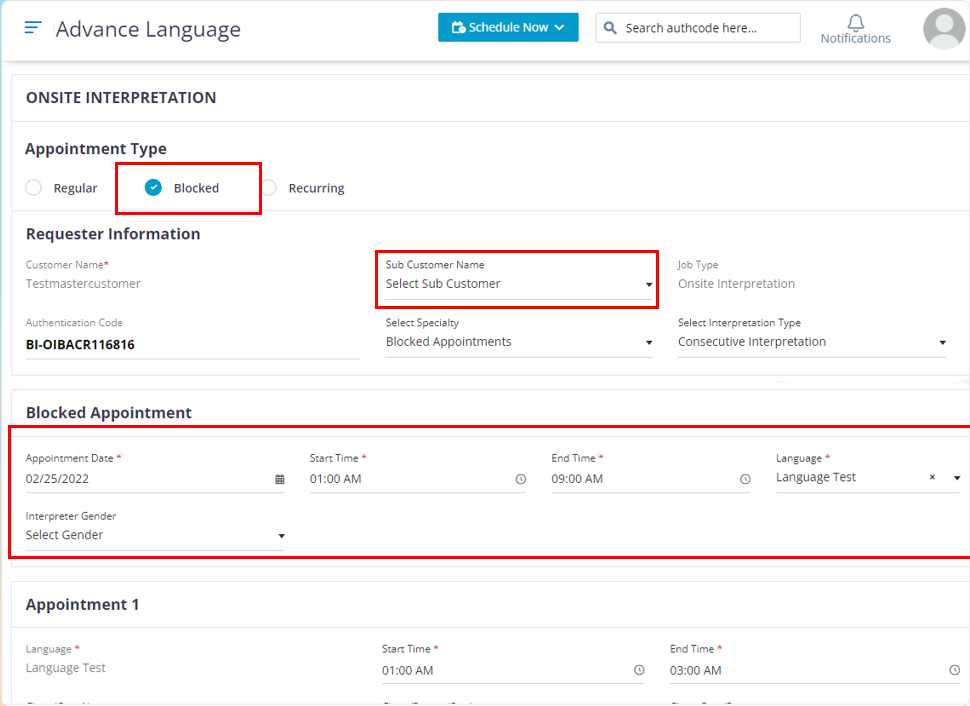
To create an onsite blocked appointment, please follow the below steps.
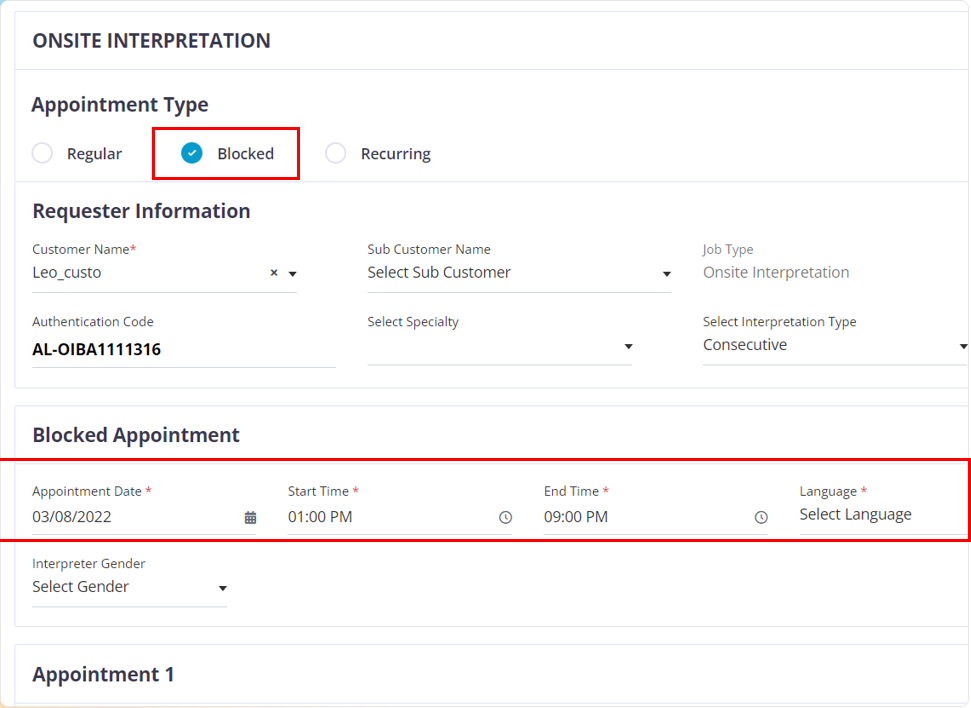
Move your cursor to the “Schedule Now Button” and click on the Onsite Interpretation option.
In the Appointment type section choose “Blocked”.
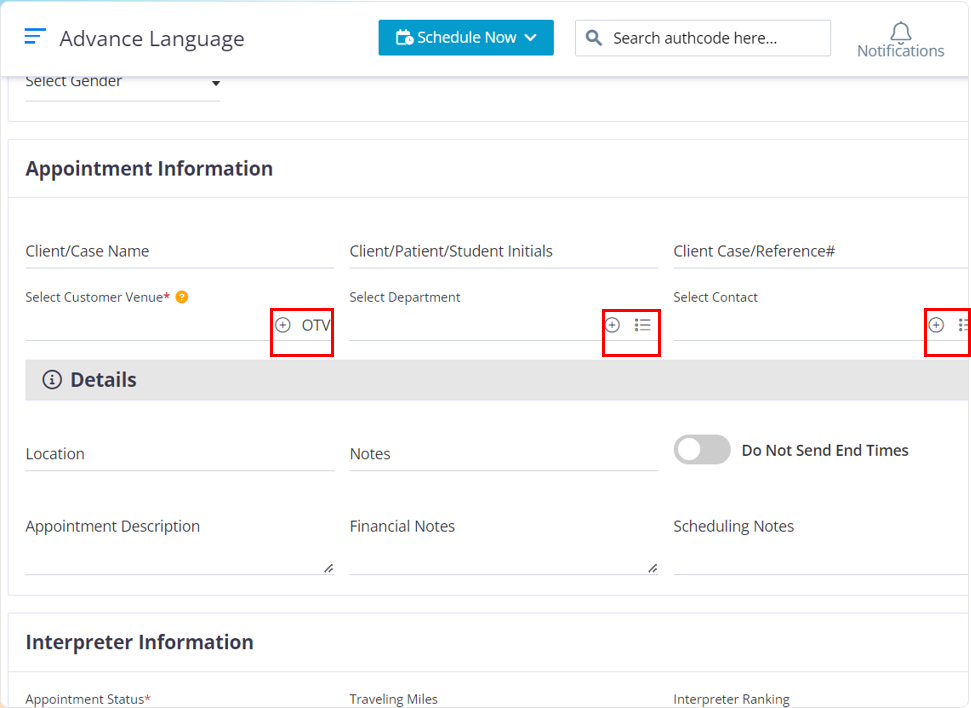
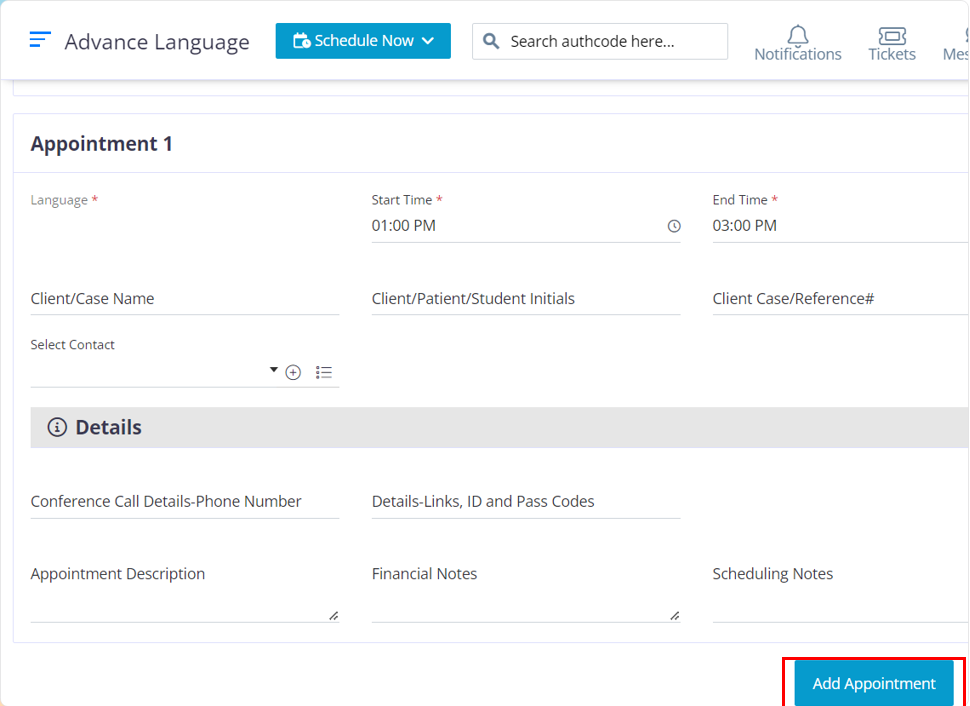
The fields that have a red star at the top of them are mandatory fields. The other fields are optional and can be filled based on your company requirements.
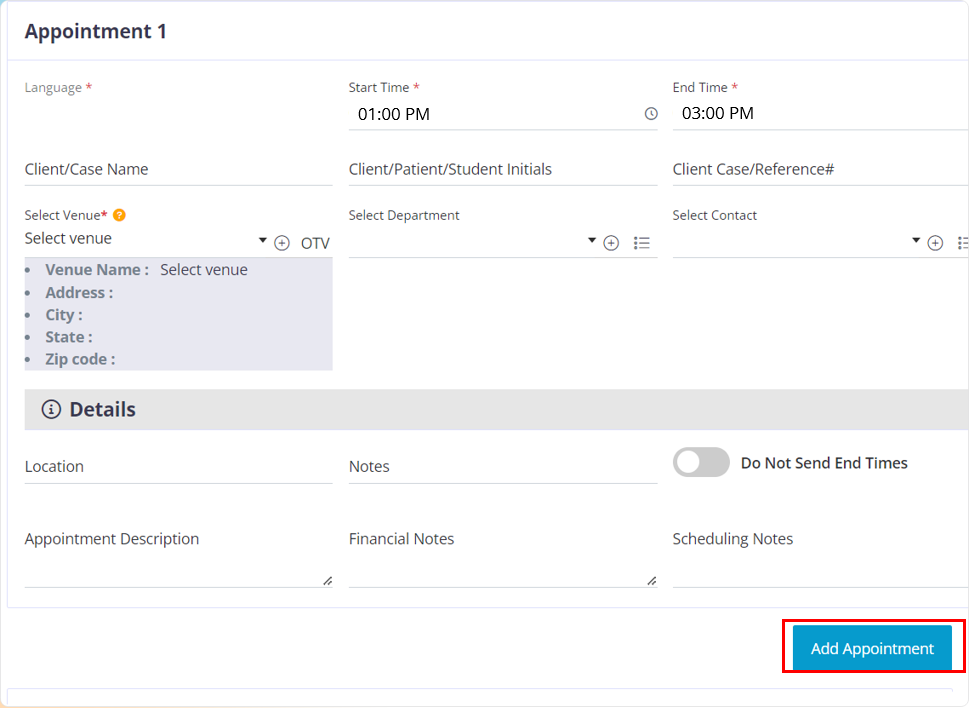
After you choose the required venue and complete entering the required appointment information, click on the “Add Appointment” button.
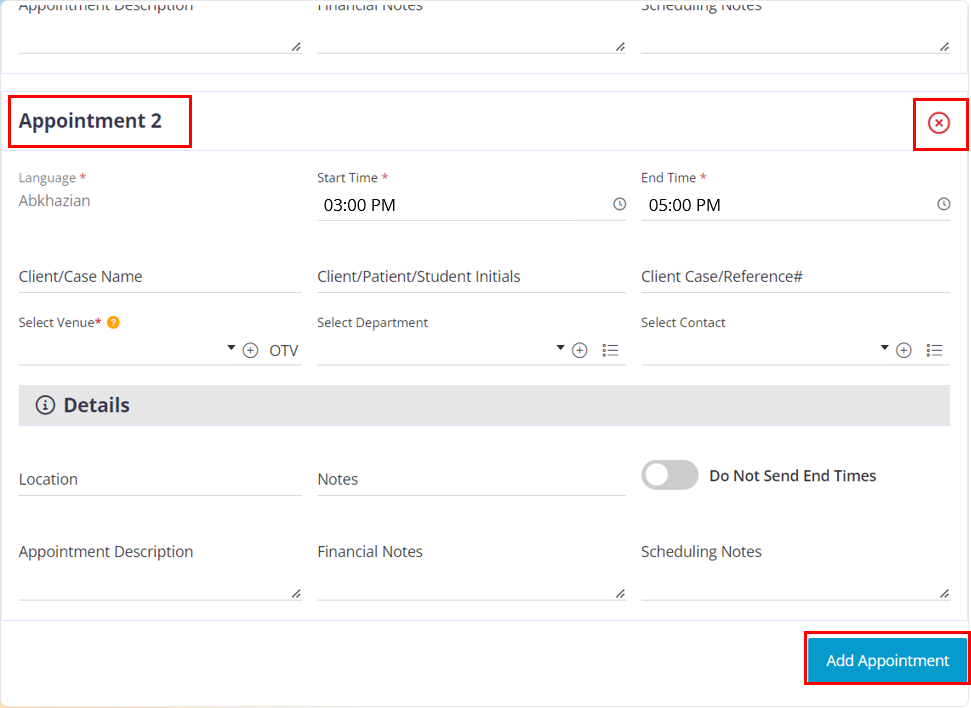
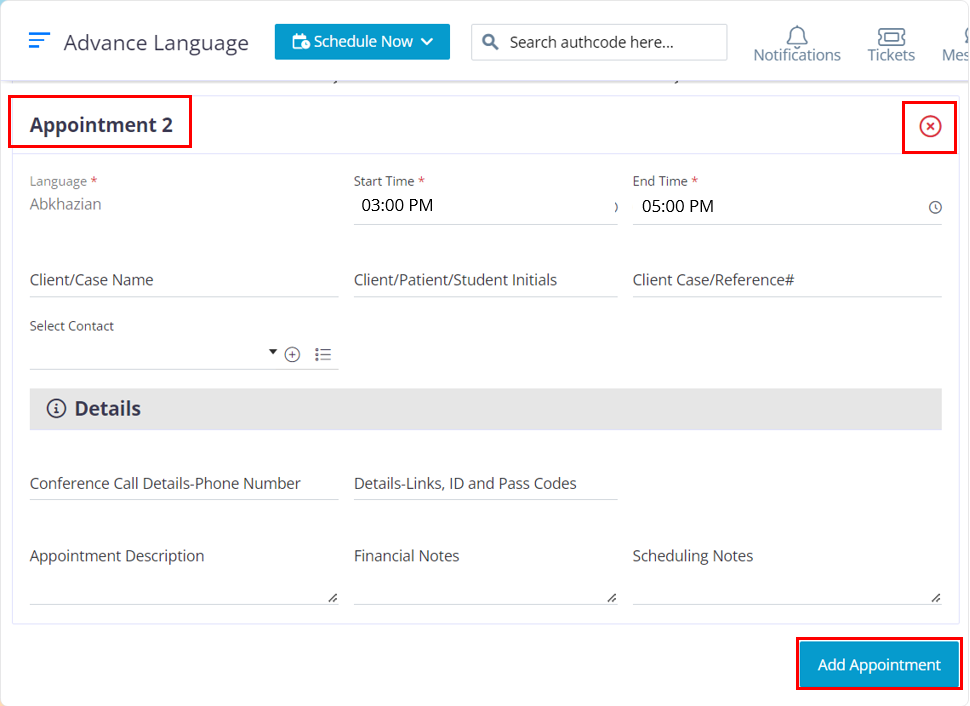
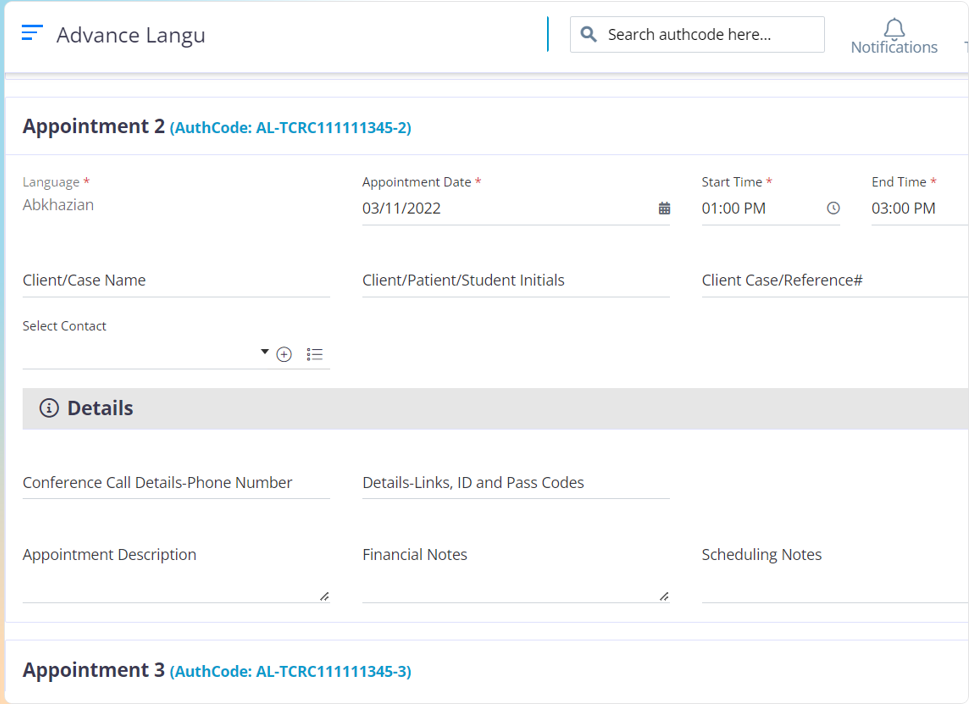
This is how a new block would look, the block will appear in the order of Appointment 2, Appointment 3, and Appointment 4. You can create a maximum of 4 blocks per authentication code. In case if you want to cancel a block click on the “x” icon.
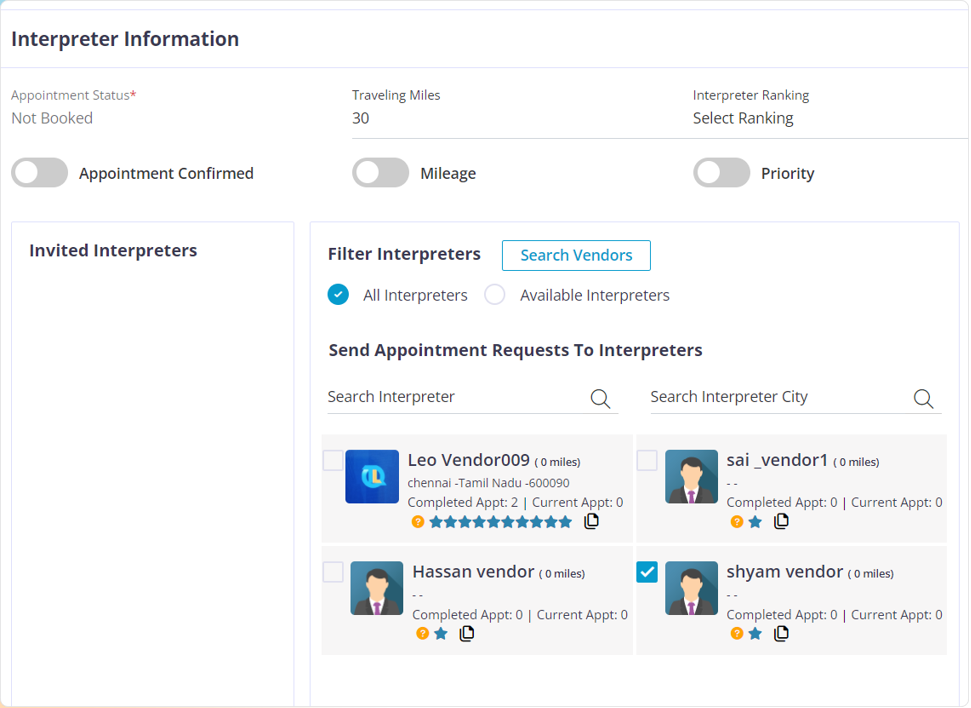
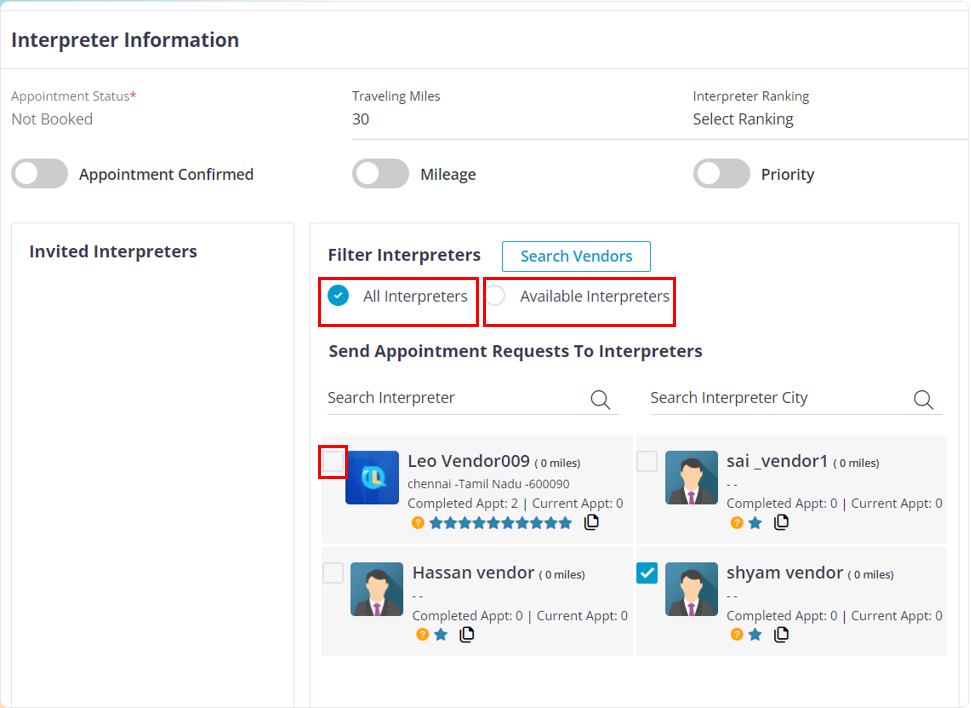
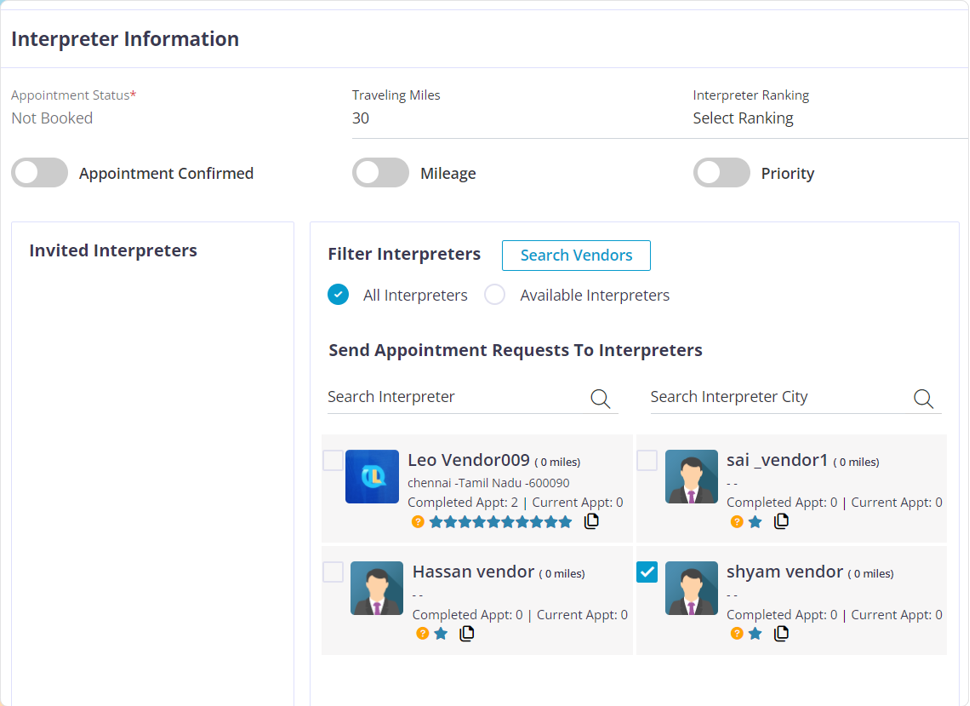
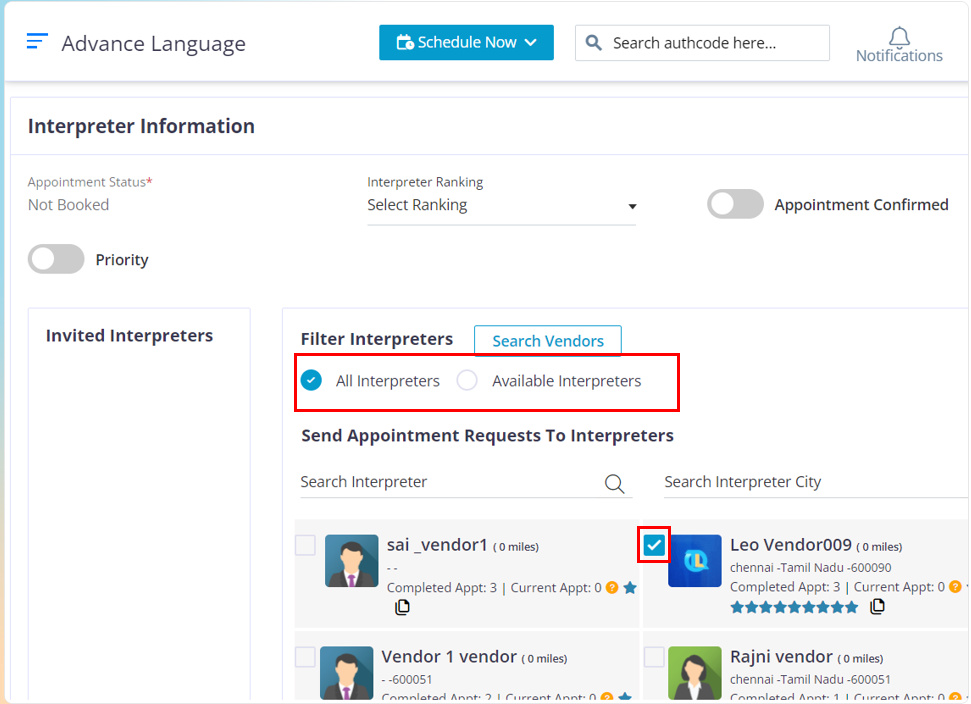
After you have entered the required appointment information into the blocks, Uses the “Available filter or All Interpreters” options to filter out and find the appropriate vendor.
Available Interpreters: When you click on this options, the vendors that are not booked on any other appointment within the chosen time in this appointment will appear here.
All Interpreters: All the vendors will be shown regardless of their schedule. If you choose a vendor that is already booked within the selected date and time range then, you will get a pop up that intimates you that this vendor is already booked on another appointment and are you sure that you want to over-ride it and book this vendor, If yes, you will have to use your account password to validate your identity and book the vendor for this appointment too.

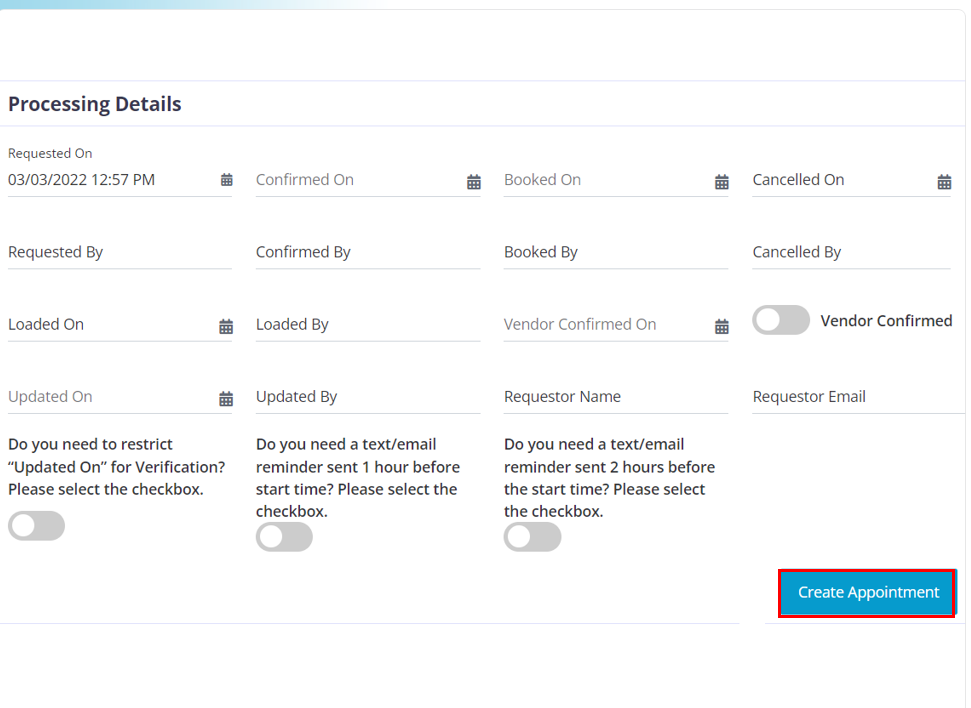
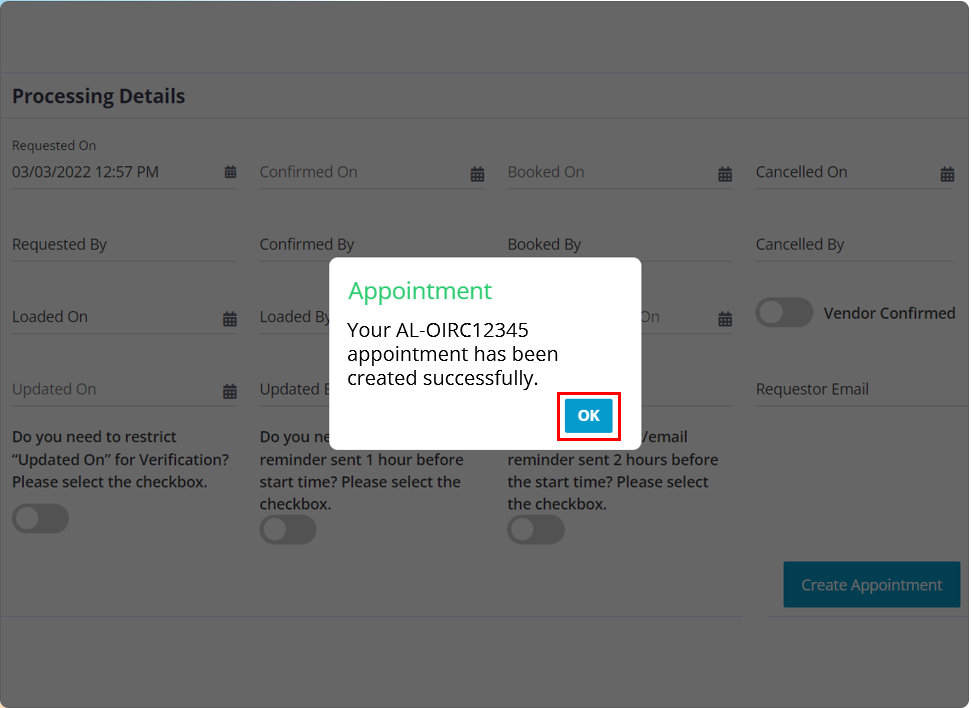
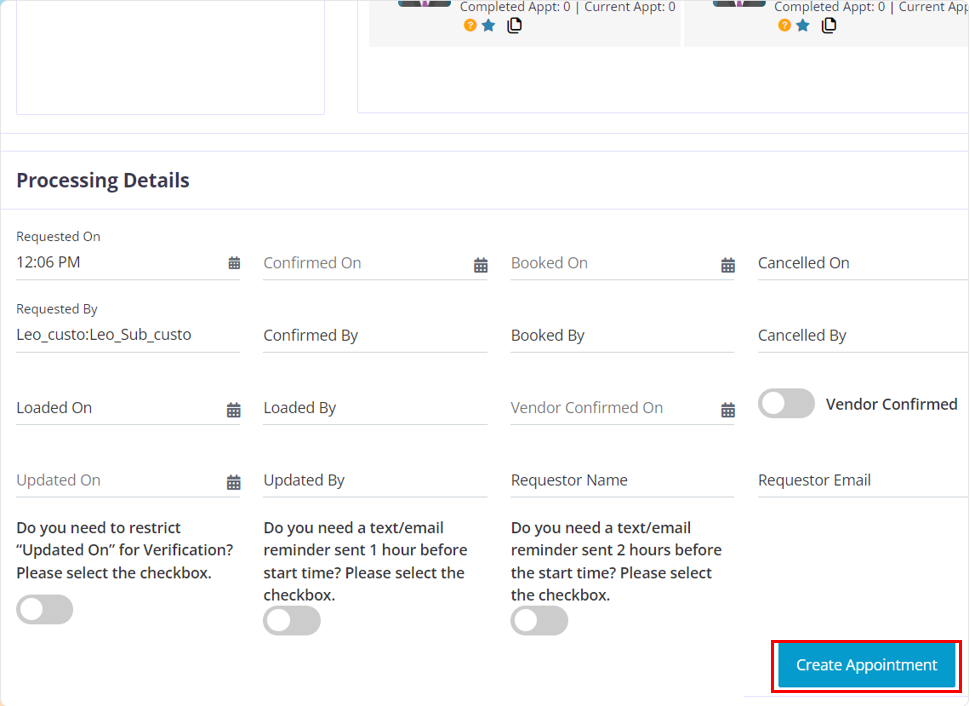
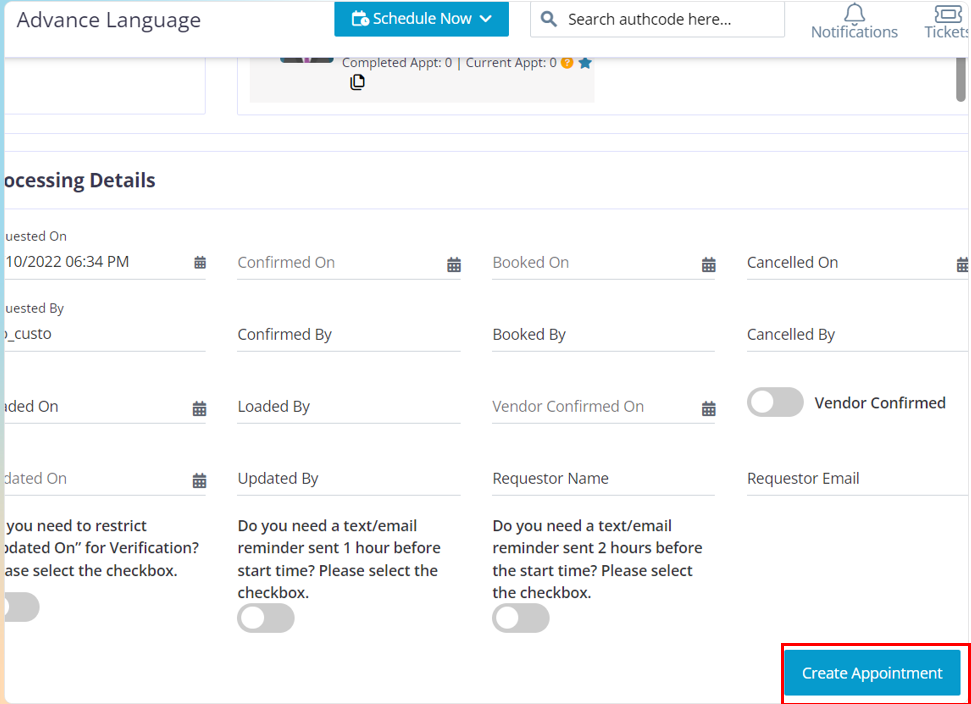
After you have chosen the required vendors to who you want to send out the availability Inquiry, click on the “Create Appointment” button.

After you click on the “OK” button you will be re-directed to the dashboard where you can view the appointments.
To create an onsite recurring appointment, please follow the below steps.
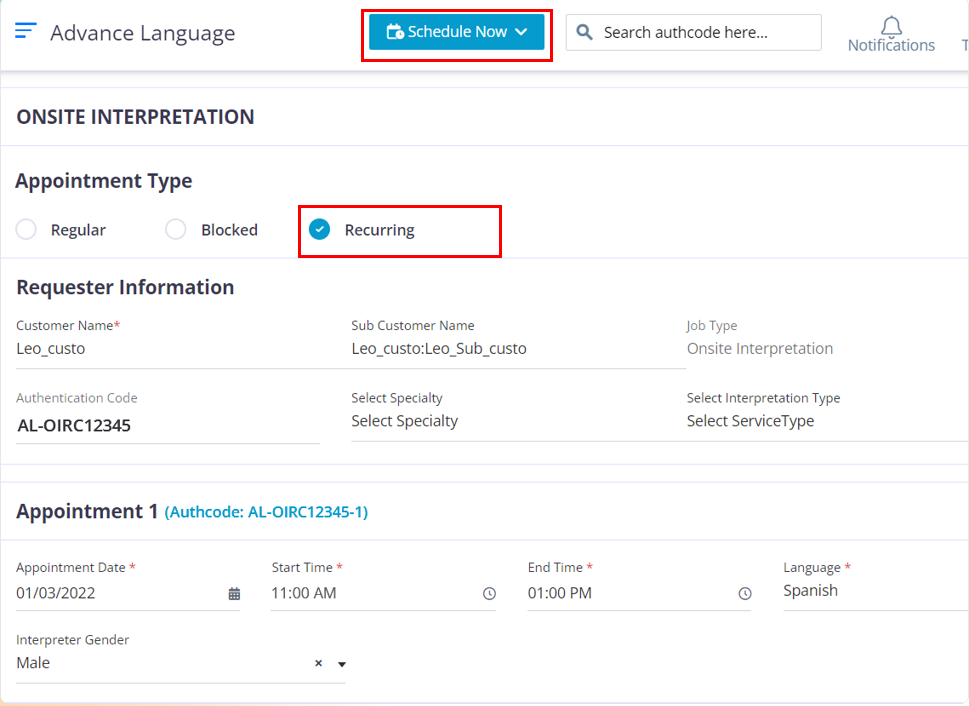
Move your cursor to the “Schedule Now Button” and click on the Onsite Interpretation option.
In the Appointment type section choose “Recurring”
The fields that have a red star at the top of them are mandatory fields. The other fields are optional and can be filled based on your company requirements.
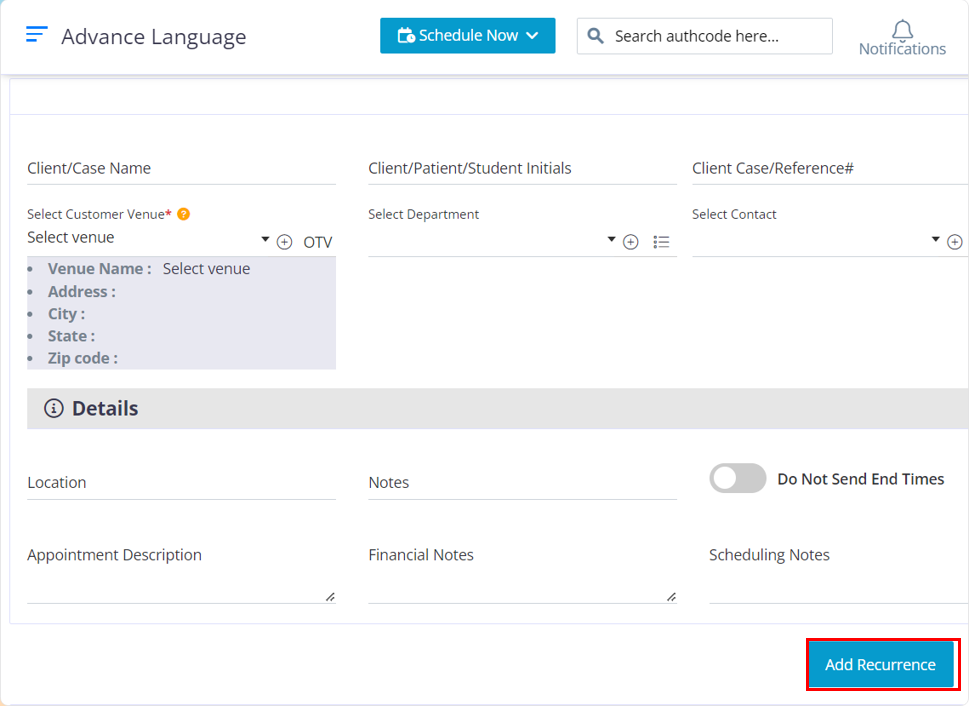
After you complete filling up the required data for appointment 1, click on the “Add Recurrence” button
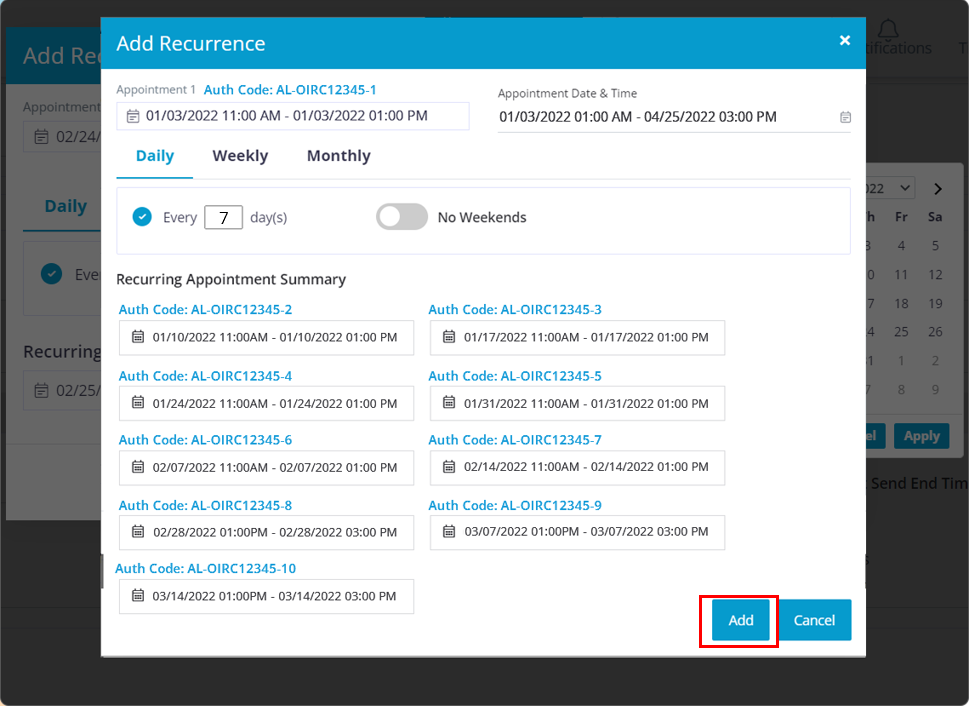
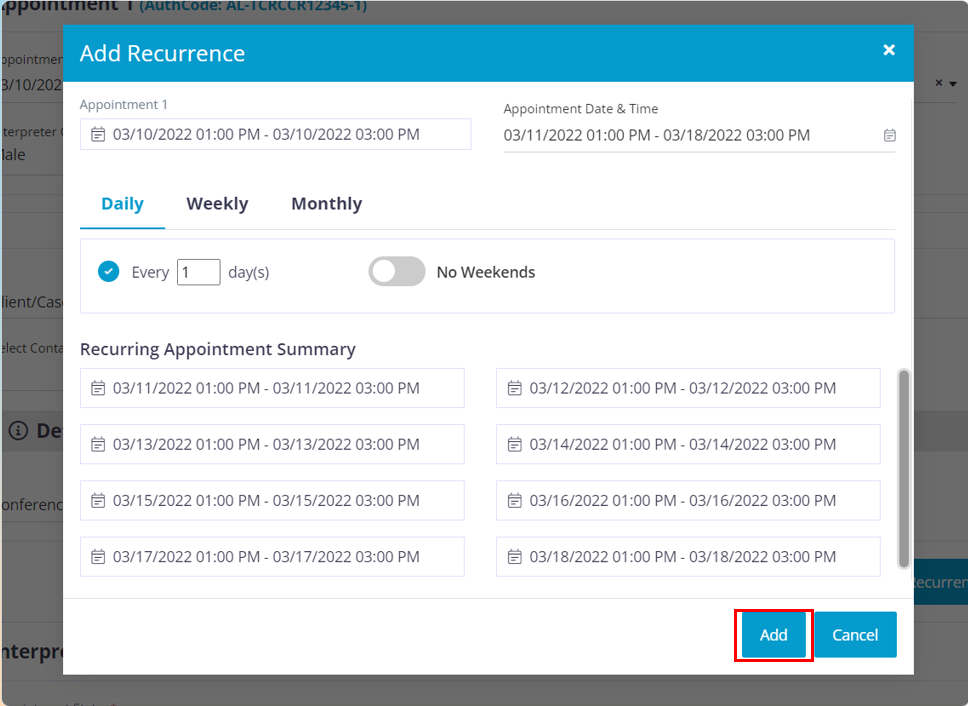
In this pop up, you need to choose the required date range, say from January to April, after you choose the required date range, there are 3 filter options that you can use to alter the recurring pattern for the appointments and those filters are Daily, Weekly, and Monthly.
Daily section, The Every Day(s) filter helps you to set a recurring pattern. For example: The chosen date range is from January 1st to April 25th. assume today is a Monday and you have entered 7 in the Every day(S) box. It will set the recurring pattern to choose the next available date after every 7 days, so all the Mondays within the selected date range will be chosen. You have an option to exclude the weekends too.
Weekly, This functionality helps you to choose selected days. Example: you choose Jan 1st to 31st as the date range and now you choose the weekly option, you will find all the days in a week (Monday to Sunday). If you choose Monday and Tuesday from the days displayed in the option, the software will calculate the available Mondays and Tuesdays with in the selected date range and it will populate the appointment below.
Monthly This helps you to set a monthly pattern for your recurring appointment. Once you have set the recurring pattern the available days will be chosen you will find the required appointments below. Click on the “Add” button.
Now in your appointment page you will find all the appointments within the chosen date and their unique number listed in order.
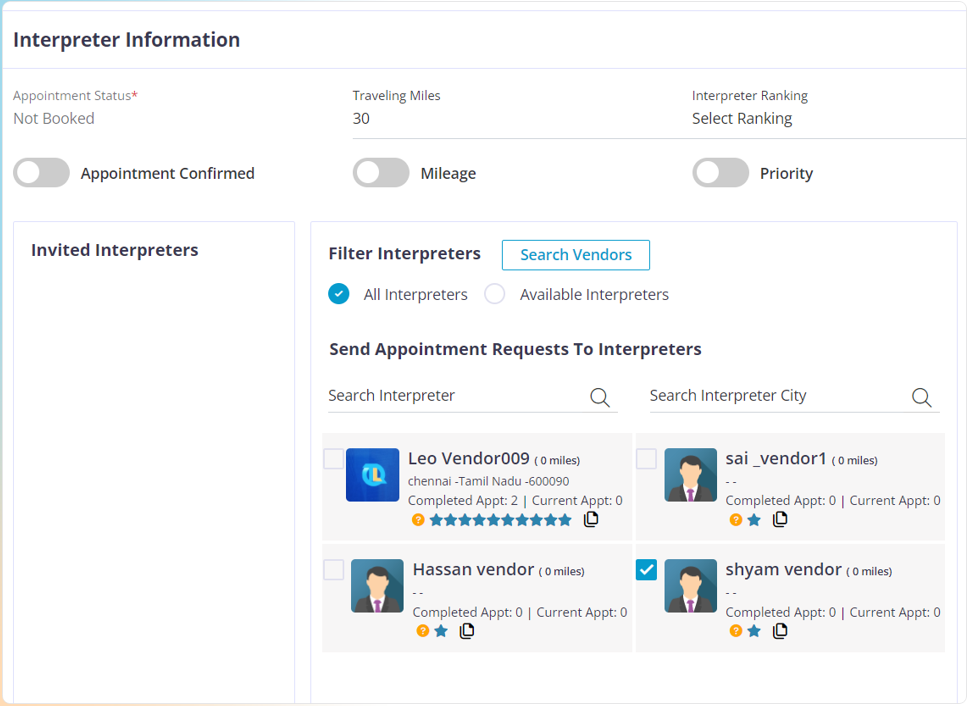
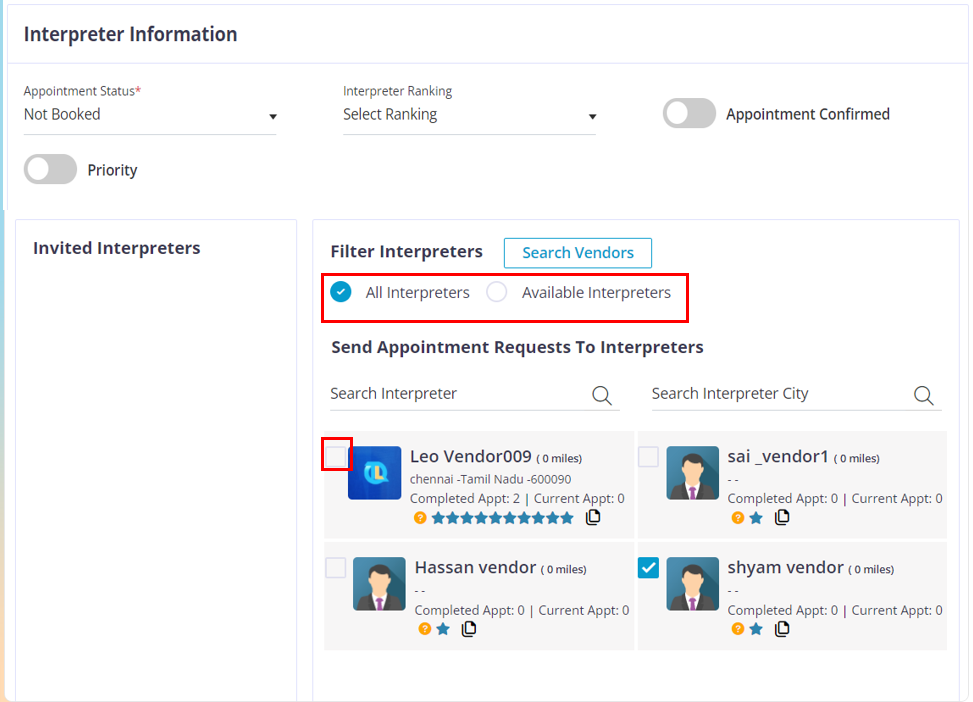
After you have set the required recurring pattern, choose the required vendors by clicking on their check box to send out the availability inquiry.
Available Interpreters: When you click on this options, the vendors that are not booked on any other appointment within the chosen time in this appointment will appear here.
All Interpreters: All the vendors will be shown regardless of their schedule. If you choose a vendor that is already booked within the selected date and time range then, you will get a pop up that intimates you that this vendor is already booked on another appointment and are you sure that you want to over-ride it and book this vendor, If yes, you will have to use your account password to validate your identity and book the vendor for this appointment too.
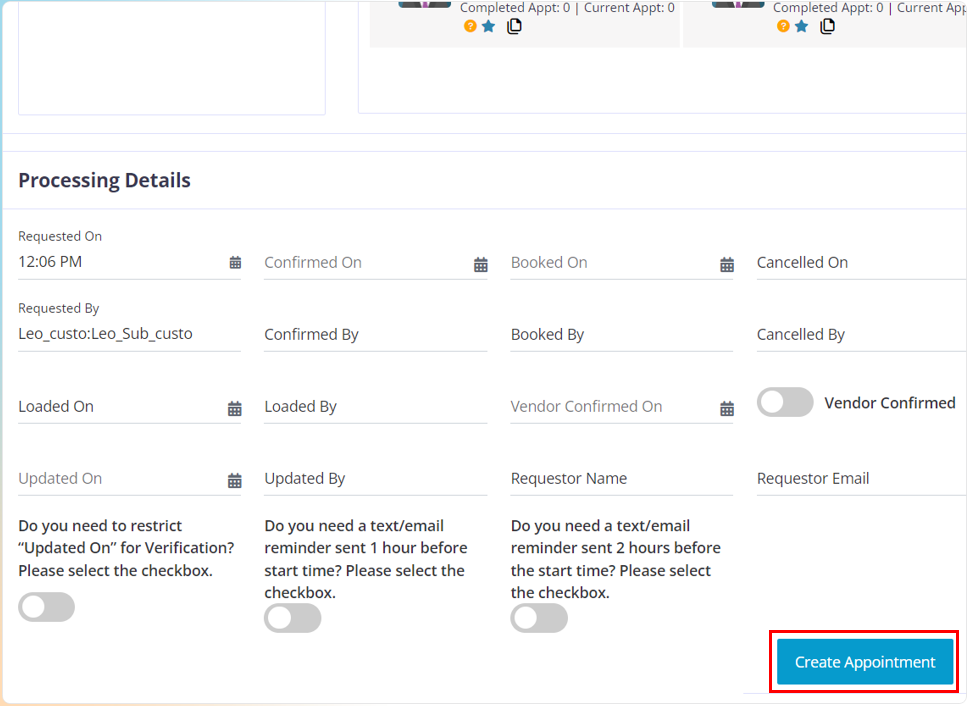
After you have chosen the required vendors to send out the availability, click on the “Create Appointment” button.
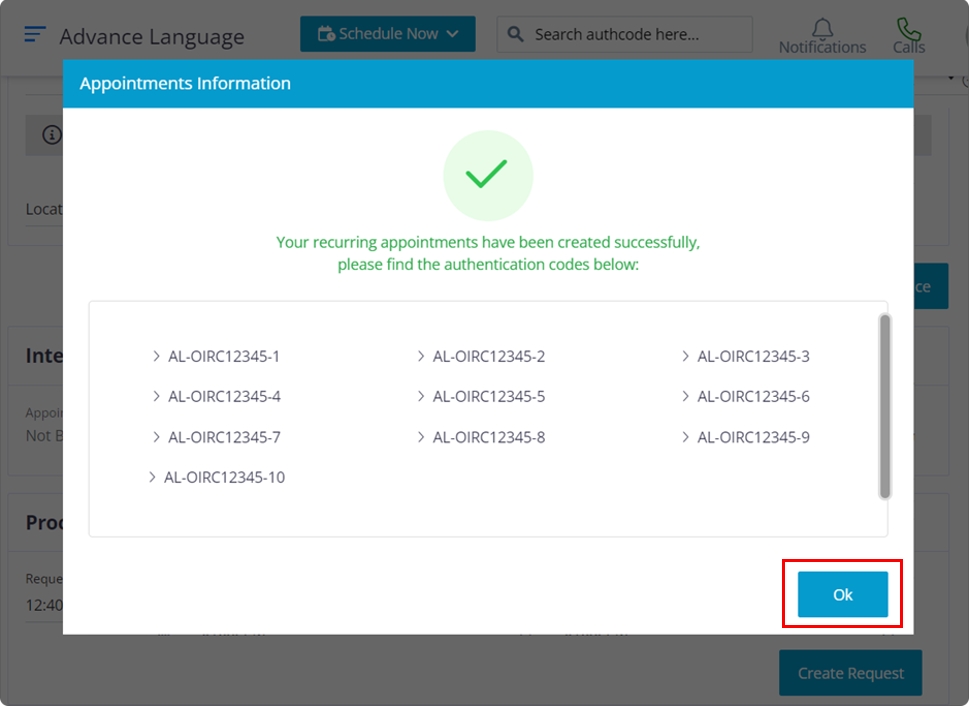
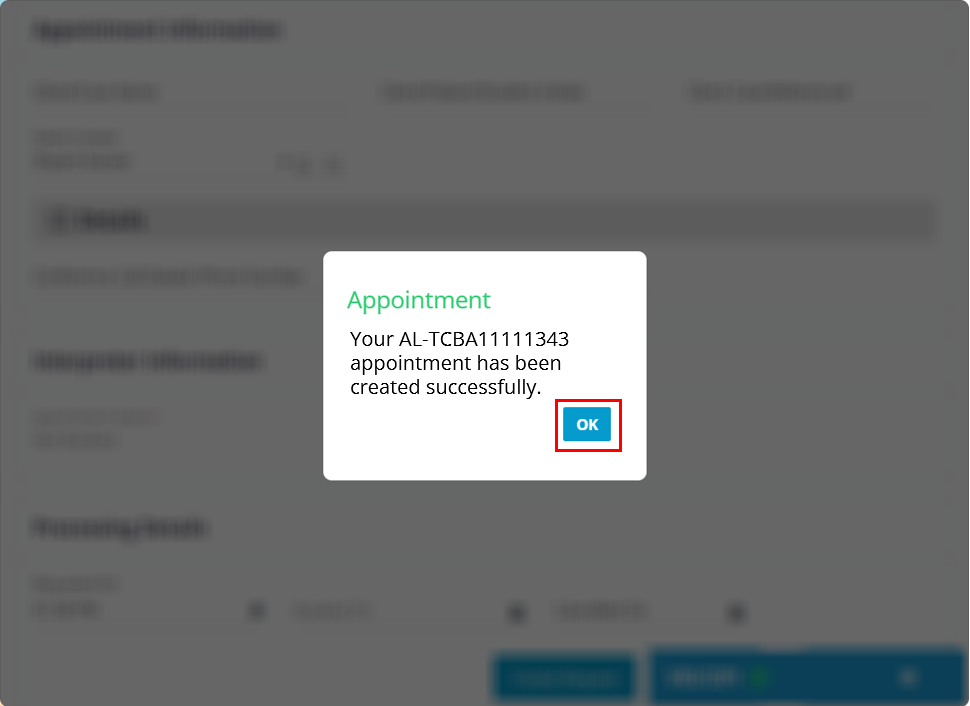
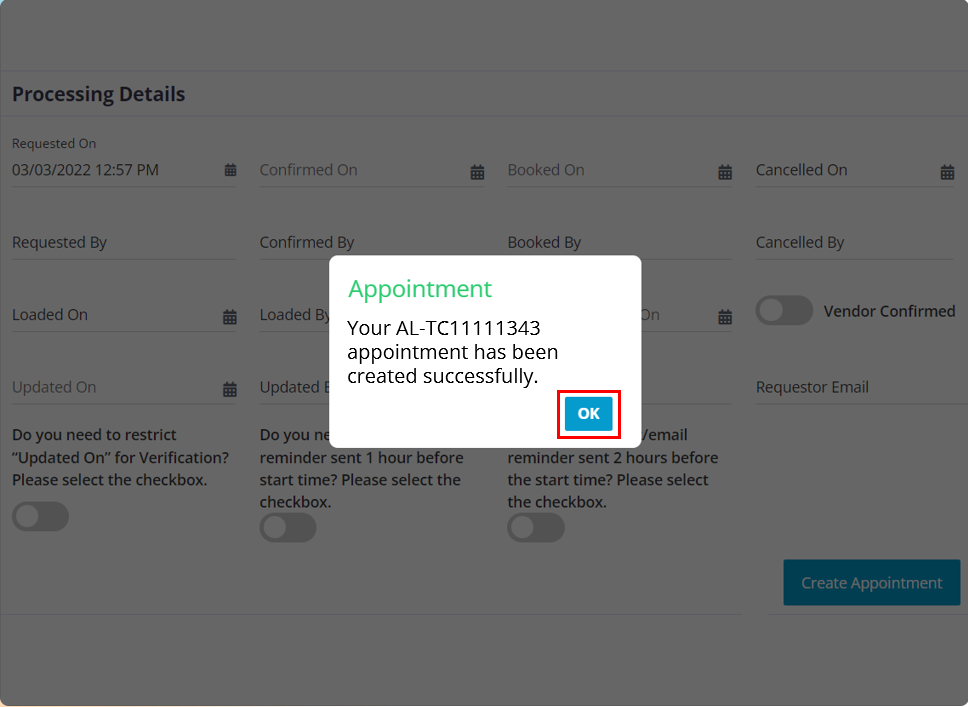
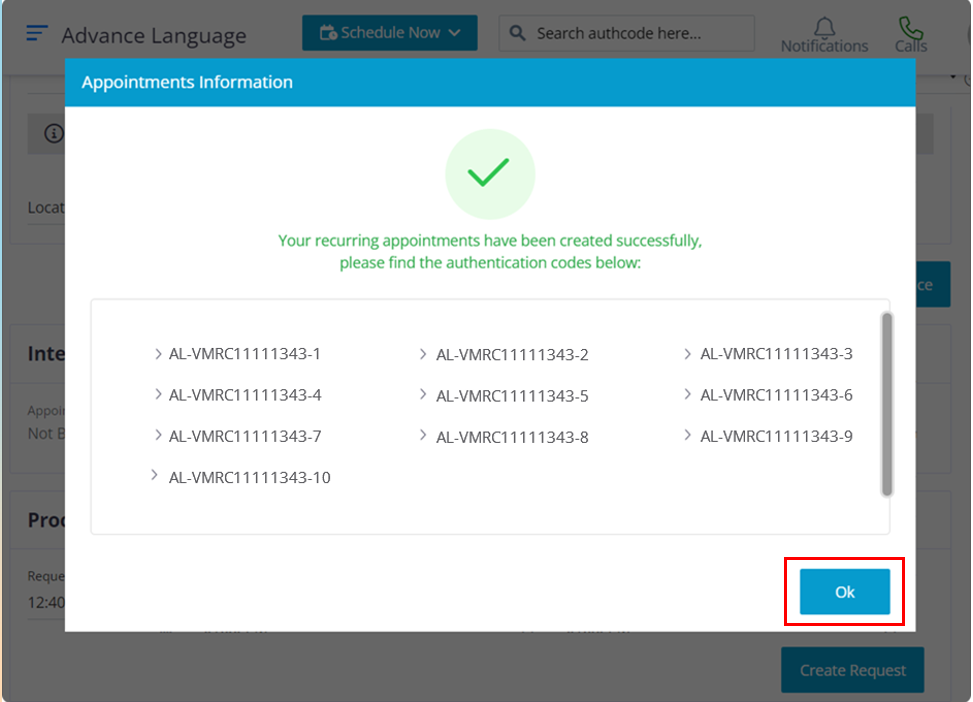
Click on the “OK” button, The pop up displays all the authentication code for the recurring appointments that you have created.
After you click on the “OK” button you will be re-directed to the dashboard where you can view the appointments.
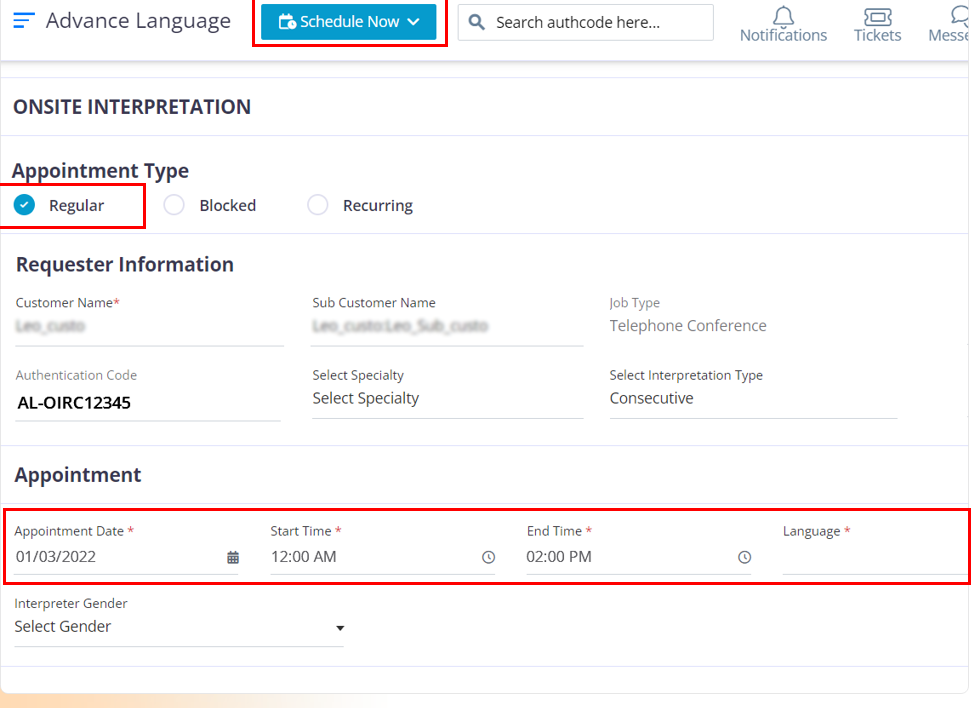
To create a regular Onsite Interpretation appointment by using the company staff’s credentials, please follow the below steps.
After you have entered the required appointment information, Uses the “Available” filter or “All Interpreters” options to filter out and find the appropriate vendor
Available Interpreters: When you click on this options, the vendors that are not booked on any other appointment within the chosen time in this appointment will appear here.
All Interpreters: All the vendors will be shown regardless of their schedule. If you choose a vendor that is already booked within the selected date and time range then, you will get a pop up that intimates you that this vendor is already booked on another appointment and it will ask you, if you are sure that you want to over-ride it and book this vendor, If yes, you will have to use your account password to validate your identity and book the vendor for this appointment too.
After you have entered the required details for the appointment and chosen the required vendor, then click on the “Create Appointment” button.
In the pop up you will find the authentication code, that you can use to pull up the appointment for future purposes.
Click on the “OK” button and it will redirect you to the dashboard.
After you click on the “OK” button, you will be re-directed to the dashboard where you can view the appointment and it’s status.
To create an onsite blocked appointment, please follow the below steps.
Move your cursor to the “Schedule Now Button” and click on the Onsite Interpretation option.
In the Appointment type section choose “Blocked”
The fields that have a red star at the top of them are mandatory fields. The other fields are optional and can be filled based on your company requirements.
After you choose the required venue and complete entering the required appointment information, click on the “Add Appointment” button.
This is how a new block would look, the block will appear in the order of Appointment 2, Appointment 3, and Appointment 4. You can create a maximum of 4 blocks per authentication code. In case if you want to cancel a block click on the “x” icon.
After you have entered the required appointment information into the blocks, Uses the “Available filter or All Interpreters” options to filter out and find the appropriate vendor.
Available Interpreters: When you click on this options, the vendors that are not booked on any other appointment within the chosen time in this appointment will appear here.
All Interpreters: All the vendors will be shown regardless of their schedule. If you choose a vendor that is already booked within the selected date and time range then, you will get a pop up that intimates you that this vendor is already booked on another appointment and are you sure that you want to over-ride it and book this vendor, If yes, you will have to use your account password to validate your identity and book the vendor for this appointment too.
After you have chosen the required vendors to who you want to send out the availability Inquiry, click on the “Create Appointment” button.

After you click on the “OK” button you will be re-directed to the dashboard where you can view the appointments.
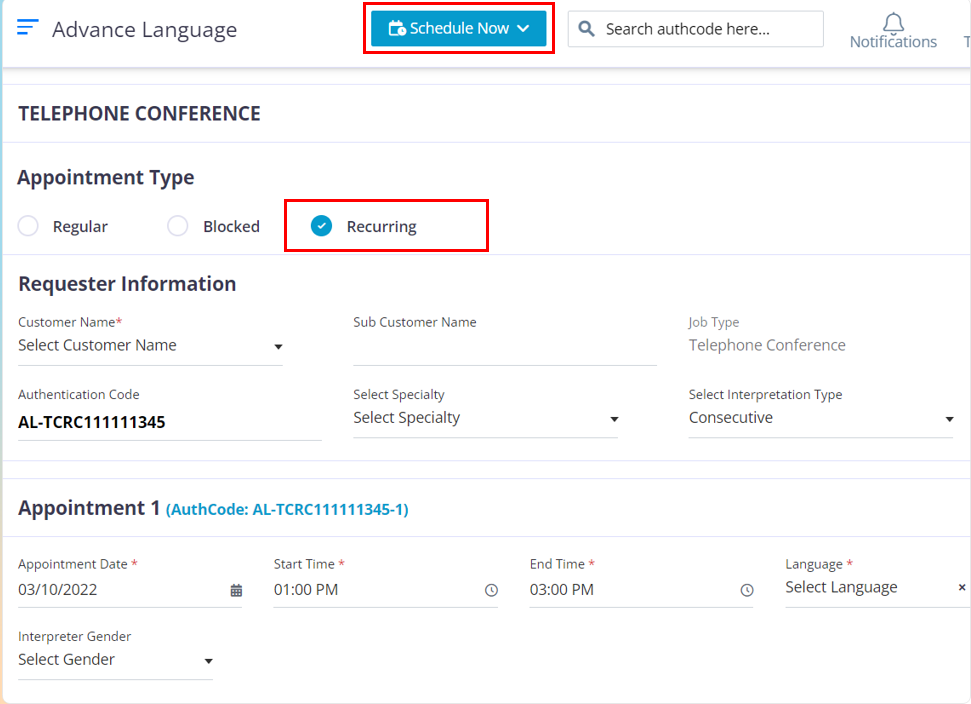
To create a Telephone conference recurring appointment buy using the company staff’s credentials, please follow the below steps.
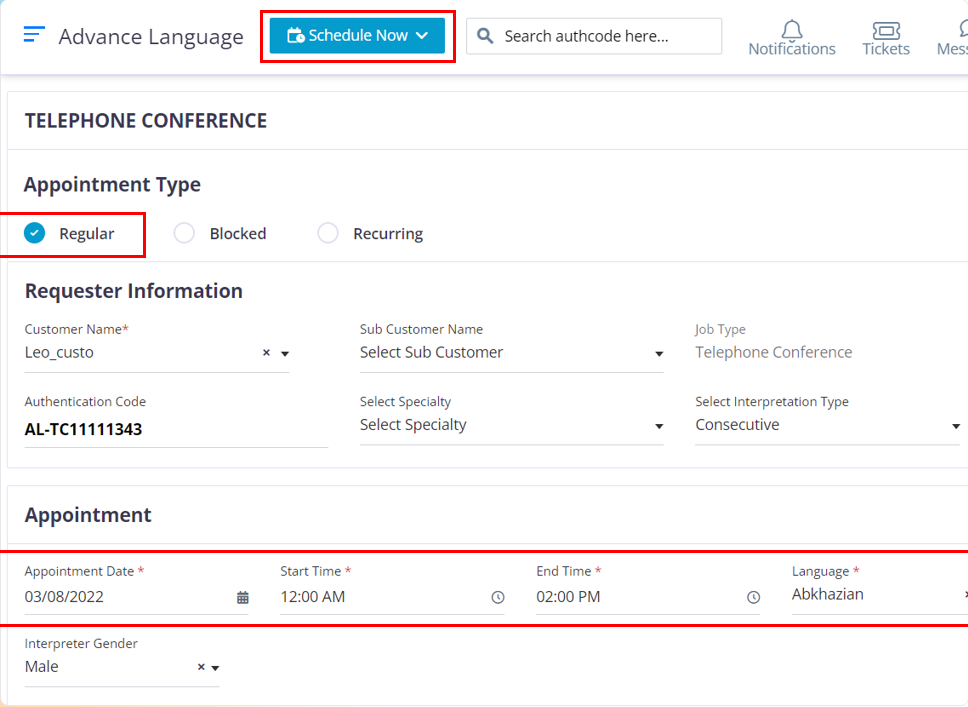
Move your cursor to the “Schedule Now Button” and click on the Telephone conference option.
In the Appointment type section choose “Recurring”
The fields that have a red star at the top of them are mandatory fields. The other fields are optional and can be filled based on your company requirements.
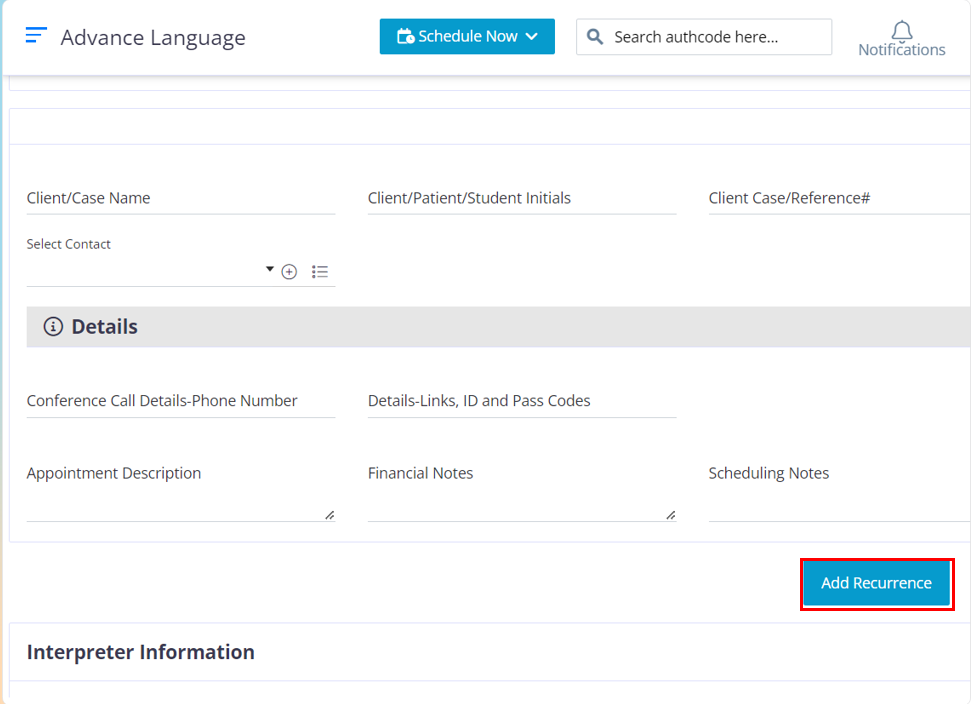
After you have completed filling up the required data for appointment 1, click on the “Add Recurrence” button
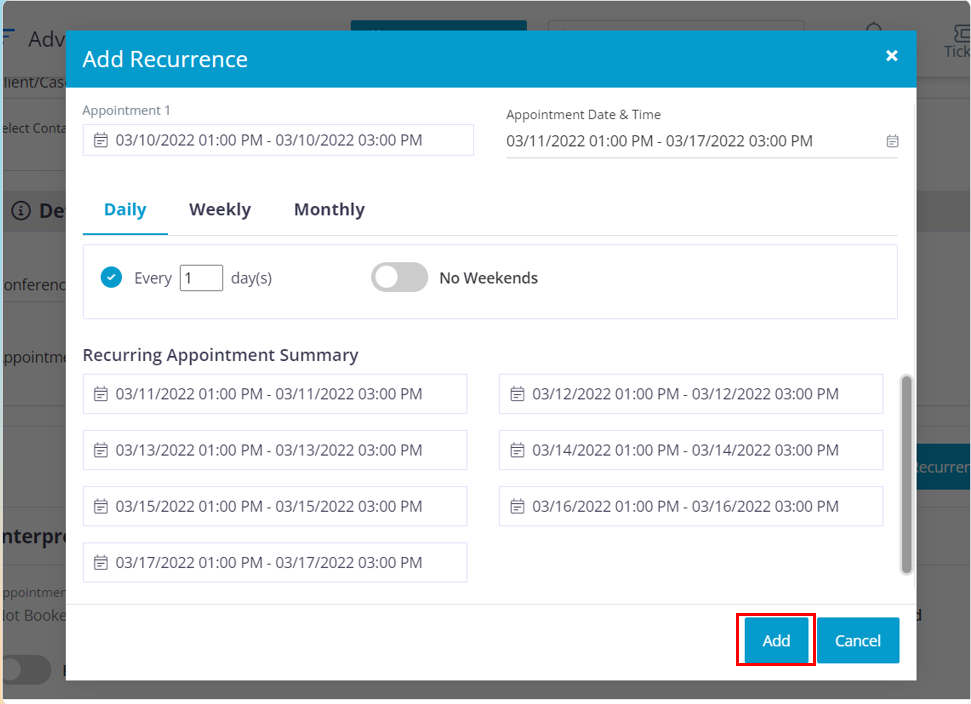
In this pop up, you need to choose the required date range, say from January to April, after you choose the required date range, there are 3 filter options that you can use to alter the recurring pattern for the appointments and those filters are Daily, Weekly, and Monthly.
Daily section, The Every Day(s) filter helps you to set a recurring pattern based on the number of days. For example: The chosen date range is from January 1st to April 25th. assume today is a Monday and you have entered 7 in the Every day(S) box. It will set the recurring pattern to choose the next available date after every 7 days, so all the Mondays within the selected date range will be chosen. You have an option to exclude the weekends too.
Weekly, This functionality helps you to choose selected days within a week. Example: you choose Jan 1st to 31st as the date range and now you choose the weekly option, you will find all the days in a week (Monday to Sunday). If you choose Monday and Tuesday from the days displayed in the option, the software will calculate the available Mondays and Tuesdays with in the selected date range and it will populate the appointments below.
Monthly, This helps you to set a monthly pattern for your recurring appointments. Once you have set the recurring pattern the available days will be chosen and you will find the required appointments below. Click on the “Add” button.
After you have set the required recurring pattern, choose the required vendors by clicking on their check box to send out the availability inquiry.
Available Interpreters: When you click on this options, the vendors that are not booked on any other appointment within the chosen time in this appointment will appear here.
All Interpreters: All the vendors will be shown regardless of their schedule. If you choose a vendor that is already booked within the selected date and time range then, you will get a pop up that intimates you that this vendor is already booked on another appointment and are you sure that you want to over-ride it and book this vendor, If yes, you will have to use your account password to validate your identity and book the vendor for this appointment too.
After you have chosen the required vendors to whom you want to sent the availability inquiry, click on the “Create Appointment” button.
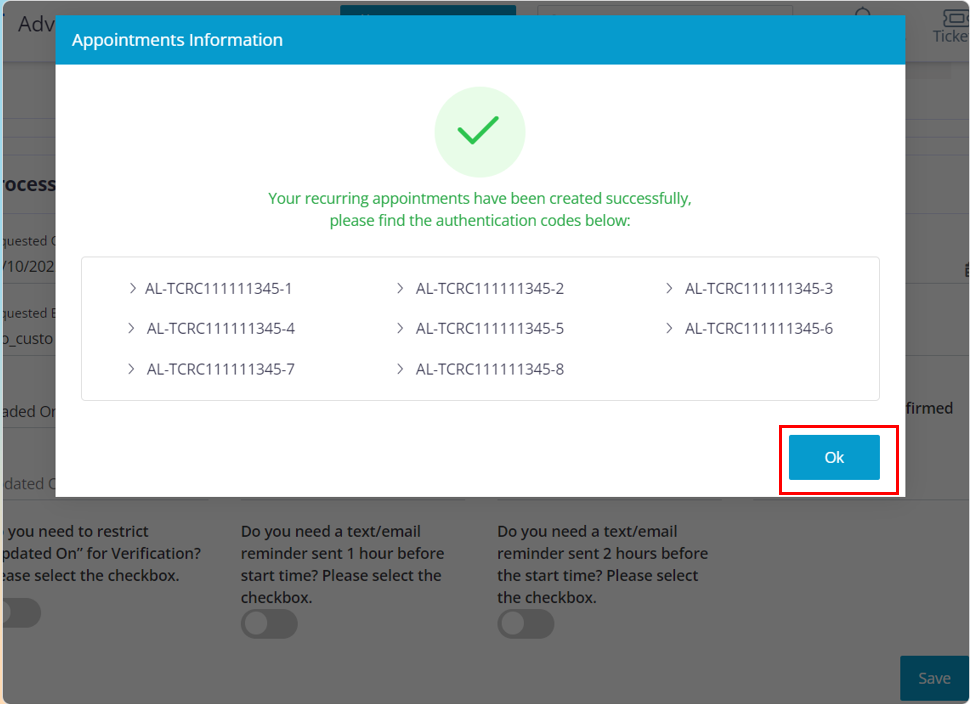
Click on the “OK” button, The pop up displays all the authentication code for the recurring appointments that you have created.
After you click on the “OK” button you will be re-directed to the dashboard where you can view the appointments.
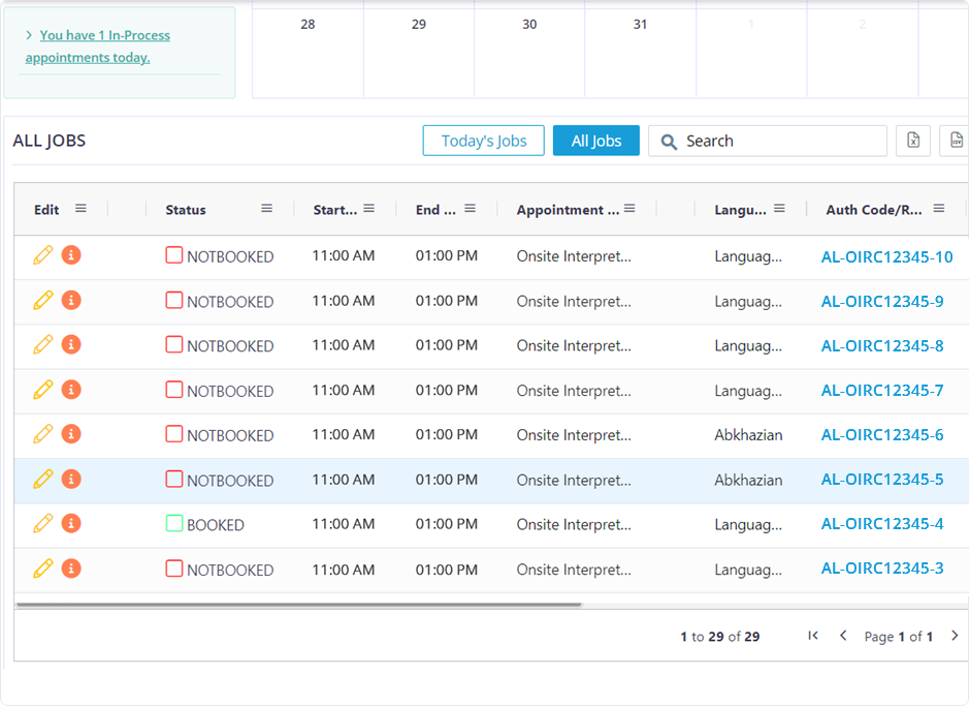
The vendors that accept the availability inquiry will populate in the green envelope. To assign the appointment to a particular vendor, click on the green envelope and click on the check box of the required vendor to whom you want to assign the appointment and click on the assign button, Now the vendor will receive the booked details and the status of the appointment will change to Booked.
The vendor who have declined the inquiry will populate in the red envelope.
When you click on the pencil icon the details page will open up where you can edit the details or the status of the appointment.
To create a regular Telephone Conference appointment by using the company staff’s credentials, please follow the below steps.

After you have entered the required appointment information, Use the “Available” filter or “All Interpreters” options to filter out and find the appropriate vendor.
Available Interpreters: When you click on this options, the vendors that are not booked on any other appointment within the chosen date & time in this appointment will appear here.
All Interpreters: All the vendors will be shown regardless of their schedule. If you choose a vendor that is already booked within the selected date and time range then, you will get a pop up that intimates you that this vendor is already booked on another appointment and it will ask you, if you are sure that you want to over-ride it and book this vendor, If yes, you will have to use your account password to validate your identity and book the vendor for this appointment too.

After you have entered the required details for the appointment and chosen the required vendor, then click on the “Create Appointment” button.
To create a Virtual Meeting blocked appointment, please follow the below steps.
Move your cursor to the “Schedule Now Button” and click on the Onsite Interpretation option.
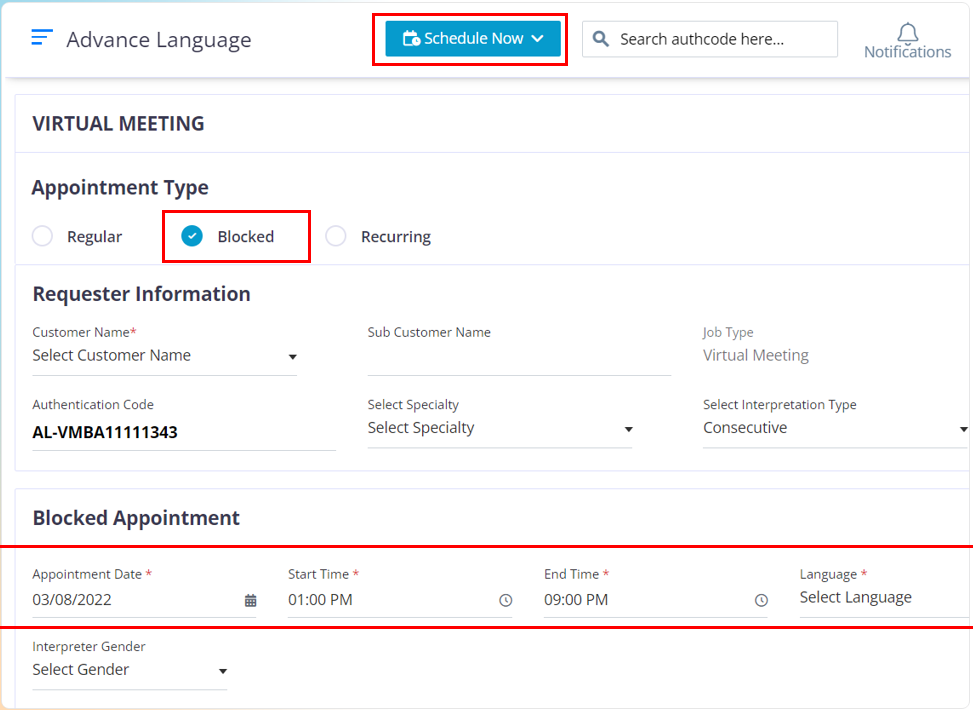
In the Appointment type section choose “Blocked”
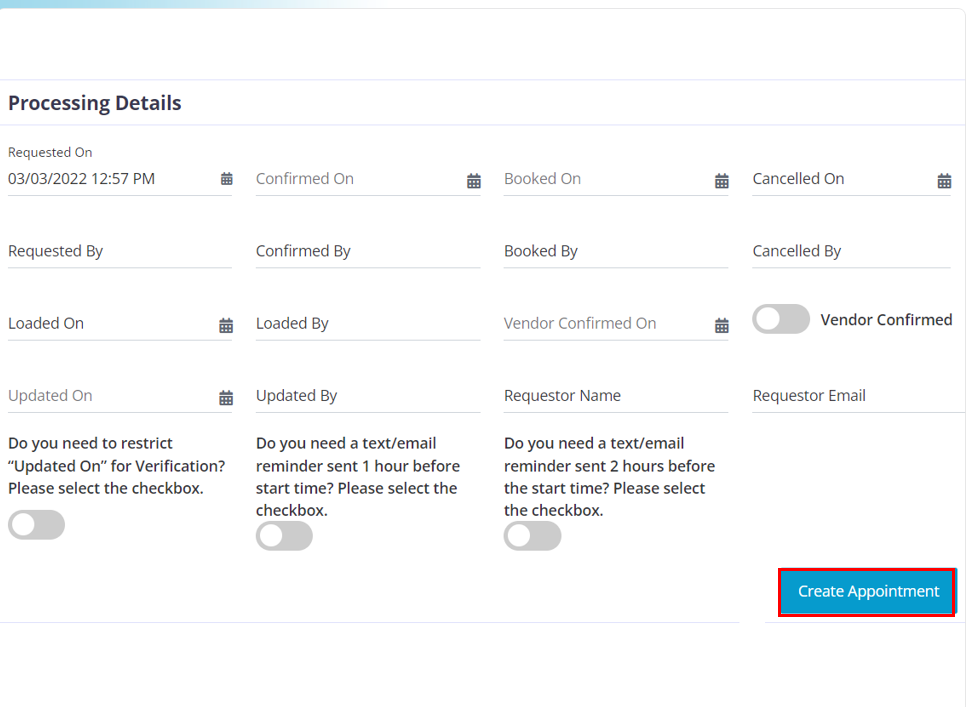
The fields that have a red star at the top of them are mandatory fields. The other fields are optional and can be filled based on your company requirements.
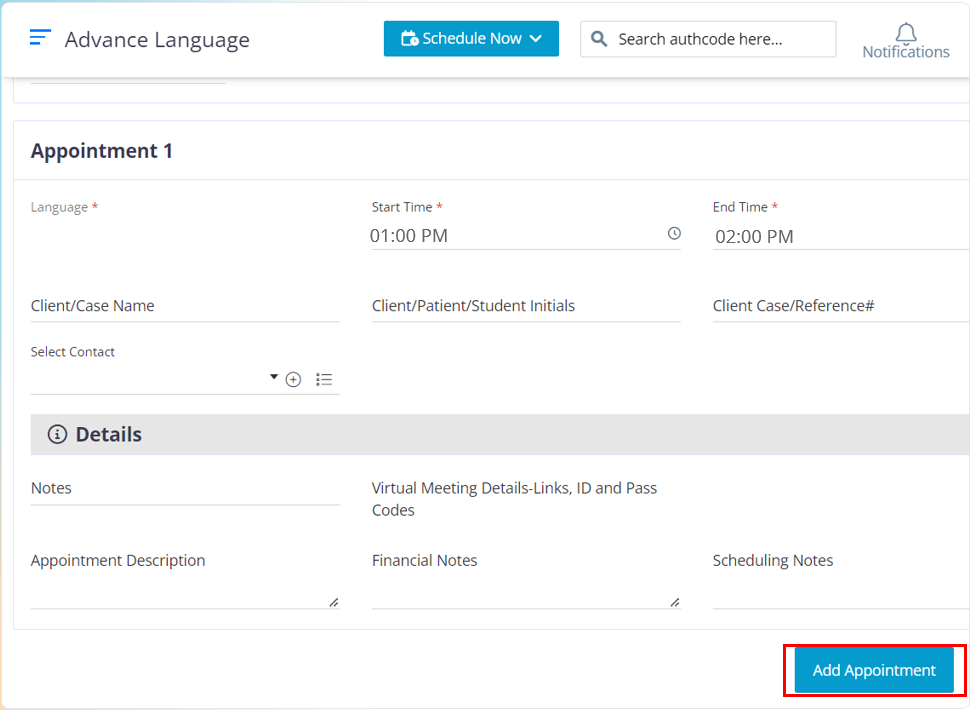
After you have completed entering the required appointment information, click on the “Add Appointment” button.
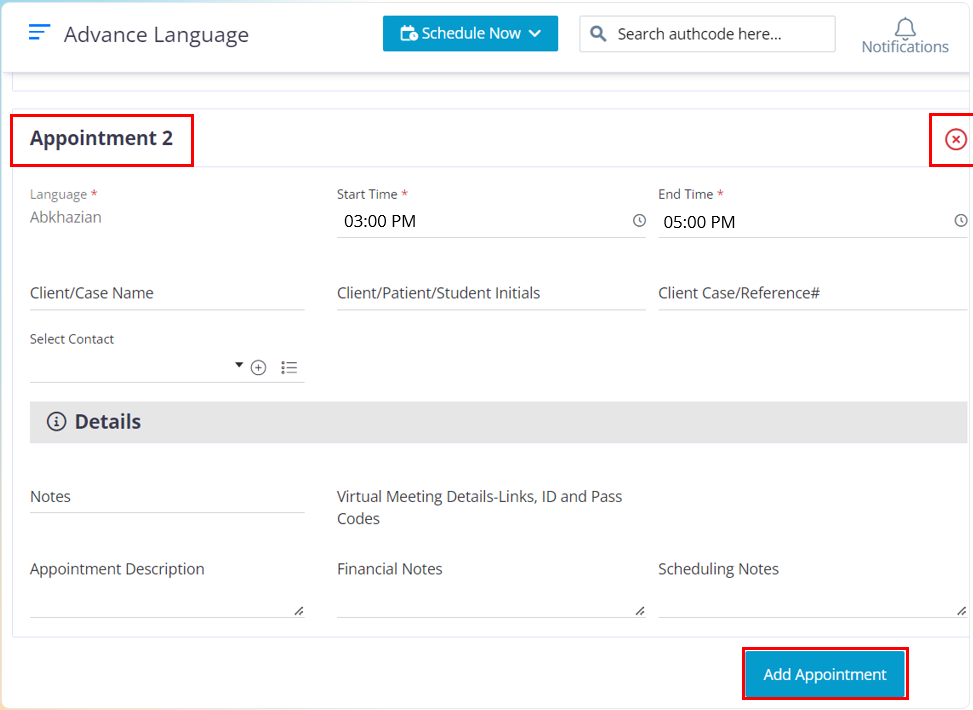
This is how a new block would look, the block will appear in the order of Appointment 2, Appointment 3, and Appointment 4. You can create a maximum of 4 blocks per authentication code. In case if you want to cancel a block click on the “x” icon.
After you have entered the required appointment information into the blocks, Uses the “Available filter or All Interpreters” options to filter out and find the appropriate vendor.
Available Interpreters: When you click on this options, the vendors that are not booked on any other appointment within the chosen time in this appointment will appear here.
All Interpreters: All the vendors will be shown regardless of their schedule. If you choose a vendor that is already booked within the selected date and time range then, you will get a pop up that intimates you that this vendor is already booked on another appointment and are you sure that you want to over-ride it and book this vendor, If yes, you will have to use your account password to validate your identity and book the vendor for this appointment too.

After you have chosen the required vendors to who you want to send out the availability Inquiry, click on the “Create Appointment” button.

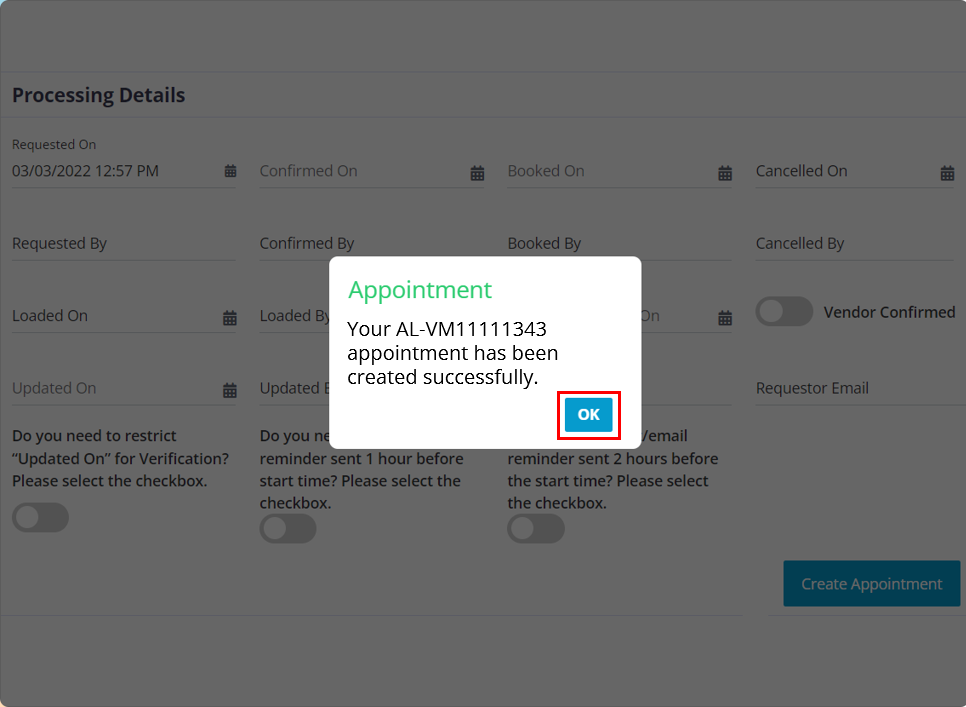
In the pop up you will find the authentication code for the appointment that you just created
Click on the “OK” button.
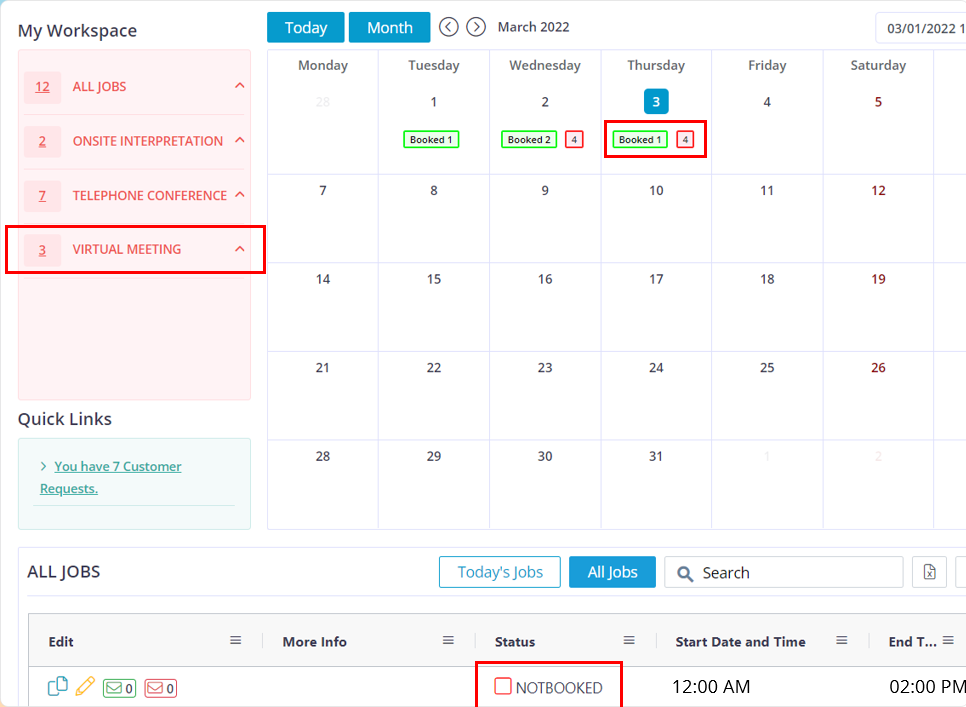
After you click on the “OK” button you will be re-directed to the dashboard where you can view the appointments.
The vendors that accept the availability inquiry will populate in the green envelope. To assign the appointment to a particular vendor, click on the green envelope and click on the check box of the required vendor to whom you want to assign the appointment and click on the assign button, Now the vendor will receive the booked details and the status of the appointment will change to Booked.
The vendor who have declined the inquiry will populate in the red envelope.
When you click on the pencil icon the details page will open up where you can edit the details or the status of the appointment.
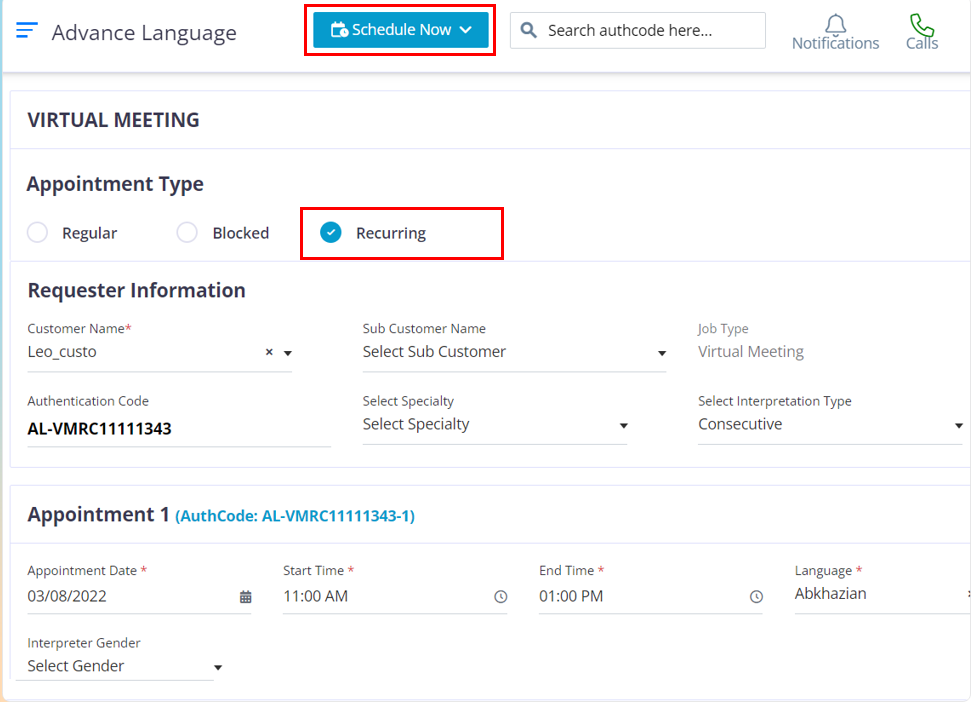
To create a Virtual Meeting recurring appointment buy using the company staff’s credentials, please follow the below steps.
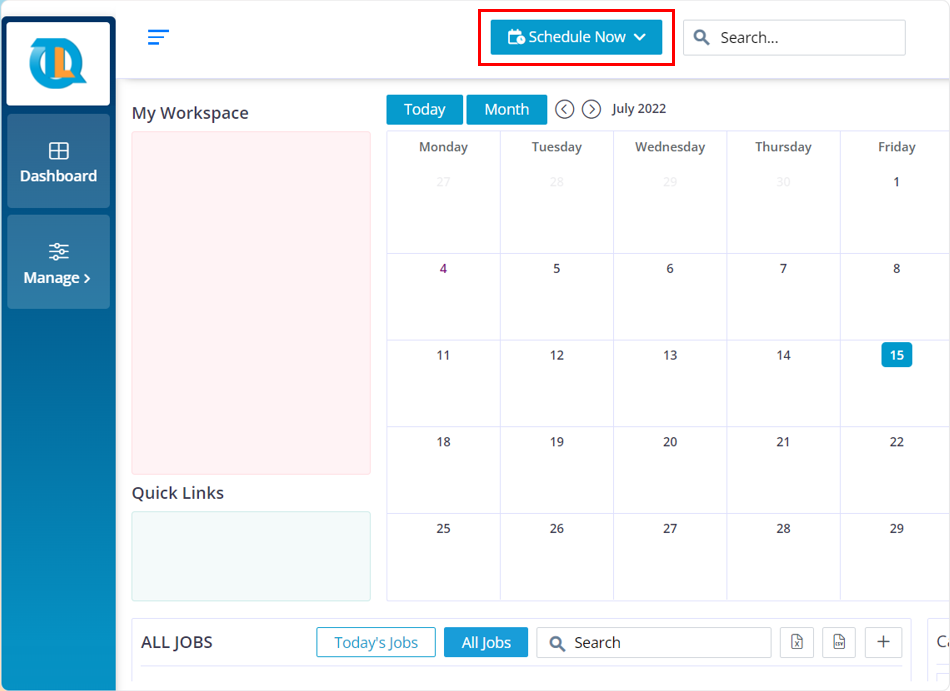
Move your cursor to the “Schedule Now Button” and click on the Virtual meeting option.
In the Appointment type section choose “Recurring”
The fields that have a red star at the top of them are mandatory fields. The other fields are optional and can be filled based on your company requirements.
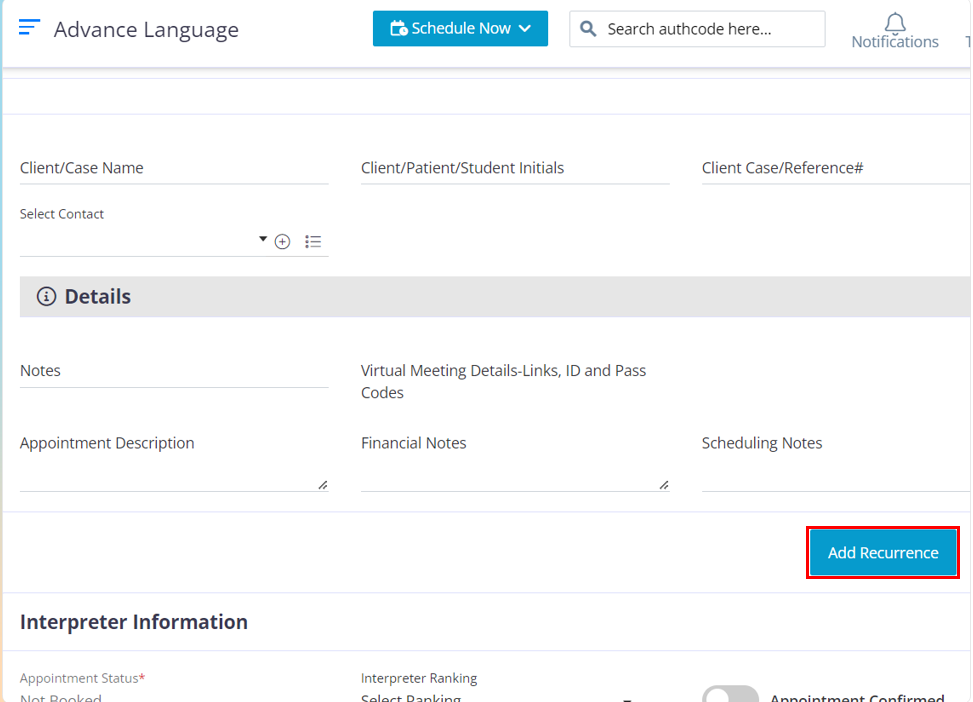
After you have completed filling up the required data for appointment 1, click on the “Add Recurrence” button
In this pop up, you need to choose the required date range, say from January to April, after you choose the required date range, there are 3 filter options that you can use to alter the recurring pattern for the appointments and those filters are Daily, Weekly, and Monthly.
Daily section, The Every Day(s) filter helps you to set a recurring pattern based on the number of days. For example: The chosen date range is from January 1st to April 25th. assume today is a Monday and you have entered 7 in the Every day(S) box. It will set the recurring pattern to choose the next available date after every 7 days, so all the Mondays within the selected date range will be chosen. You have an option to exclude the weekends too.
Weekly, This functionality helps you to choose selected days within a week. Example: you choose Jan 1st to 31st as the date range and now you choose the weekly option, you will find all the days in a week (Monday to Sunday). If you choose Monday and Tuesday from the days displayed in the option, the software will calculate the available Mondays and Tuesdays with in the selected date range and it will populate the appointments below.
Monthly This helps you to set a monthly pattern for your recurring appointments.Once you have set the recurring pattern the available days will be chosen and you will find the required appointments below. Click on the “Add” button.
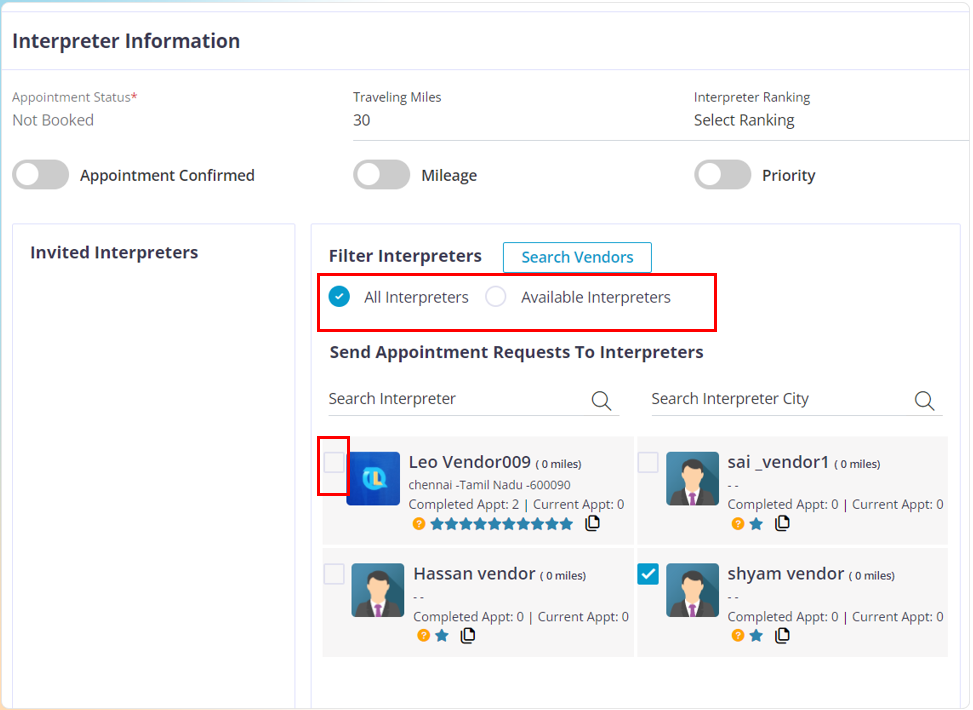
After you have set the required recurring pattern, choose the required vendors by clicking on their check box to send out the availability inquiry.
Available Interpreters: When you click on this options, the vendors that are not booked on any other appointment within the chosen time in this appointment will appear here.
All Interpreters: All the vendors will be shown regardless of their schedule. If you choose a vendor that is already booked within the selected date and time range then, you will get a pop up that intimates you that this vendor is already booked on another appointment and are you sure that you want to over-ride it and book this vendor, If yes, you will have to use your account password to validate your identity and book the vendor for this appointment too.

After you have chosen the required vendors to whom you want to sent the availability inquiry, click on the “Create Appointment” button.
Click on the “OK” button, The pop up displays all the authentication code for the recurring appointments that you have created.
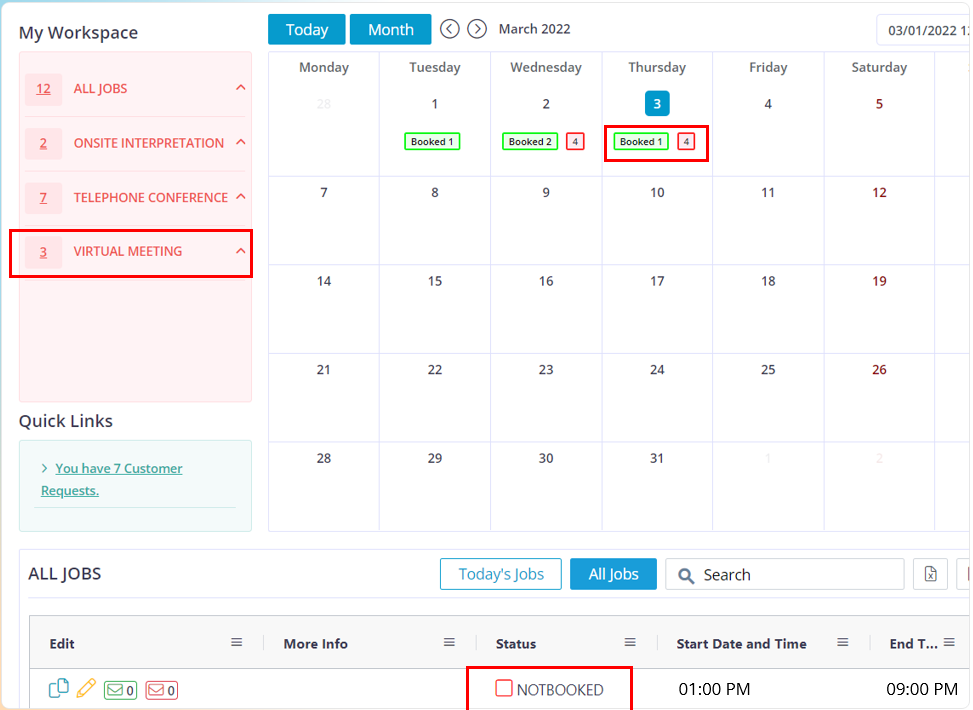
After you click on the “OK” button you will be re-directed to the dashboard where you can view the appointments.
The vendors that accept the appointment will appear in the green envelope and the ones that decline the appointment will be found in the red envelope.
To assign the appointment, click on the green envelope. Now choose the required vendor and click on the “Assign button. After the page loads the appointment status will be changed to booked and the vendor will receive the booked details of the appointment.
To create a regular Onsite Interpretation appointment by using the company staff’s credentials, please follow the below steps.
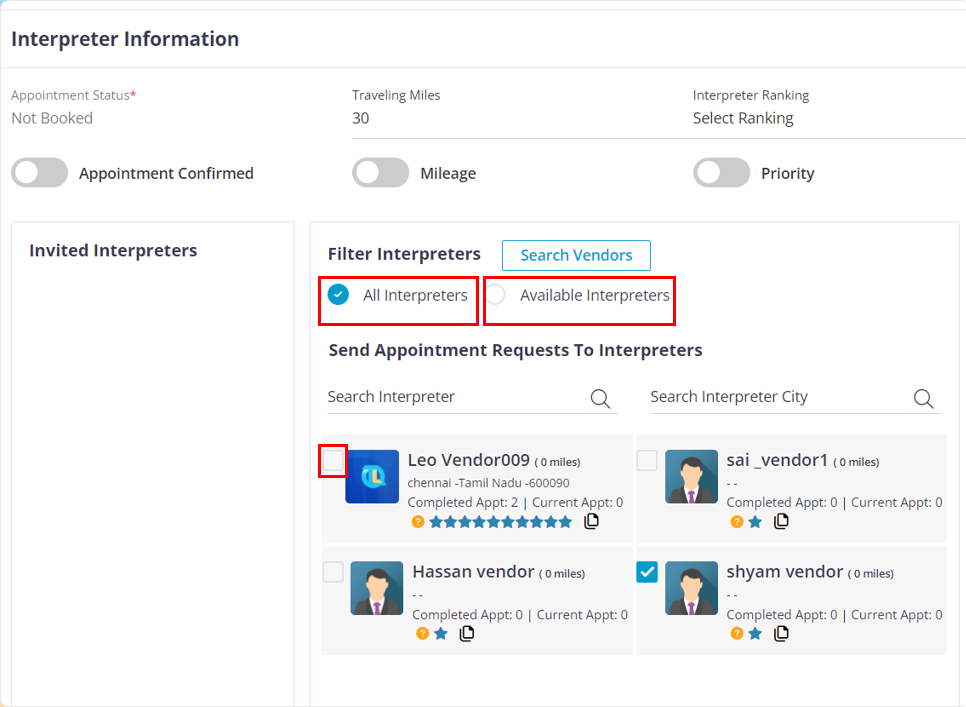
After you have entered the required appointment information, Uses the “Available” filter or “All Interpreters” options to filter out and find the appropriate vendor.
Available Interpreters: When you click on this options, the vendors that are not booked on any other appointment within the chosen time in this appointment will appear here.
All Interpreters: All the vendors will be shown regardless of their schedule. If you choose a vendor that is already booked within the selected date and time range then, you will get a pop up that intimates you that this vendor is already booked on another appointment and it will ask you, if you are sure that you want to over-ride it and book this vendor, If yes, you will have to use your account password to validate your identity and book the vendor for this appointment too.
After you have entered the required details for the appointment and chosen the required vendor, then click on the “Create Appointment” button.
In the pop up you will find the authentication code, that you can use to pull up the appointment for future purposes.
Click on the “OK” button and it will redirect you to the dashboard.
After you click on the “OK” button, you will be re-directed to the dashboard where you can view the appointment and it’s status.
Move your cursor to the “Schedule Now” button.
Click on the “Document Translation” option.
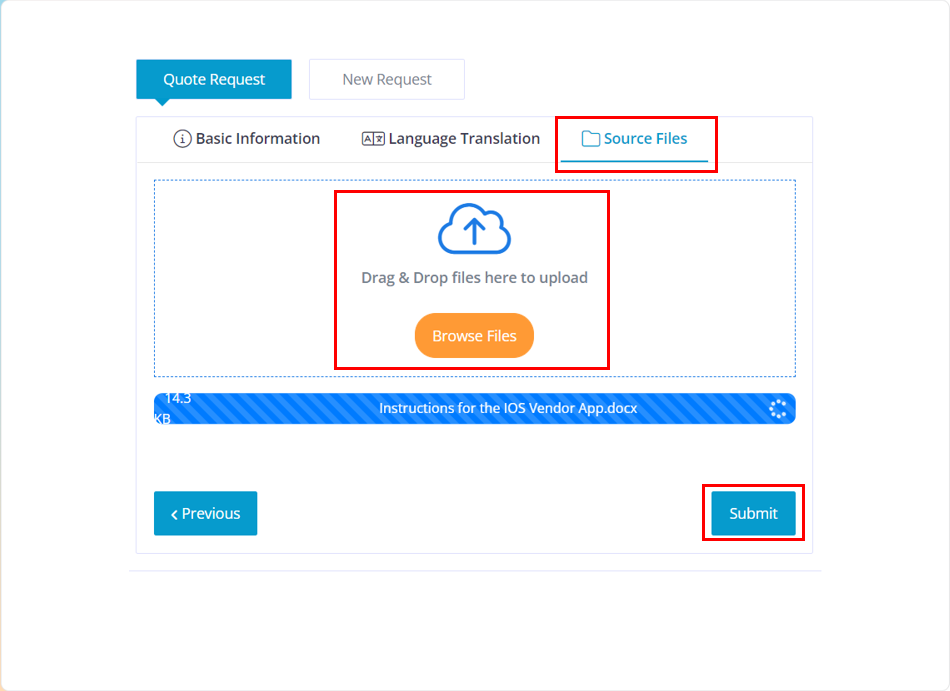
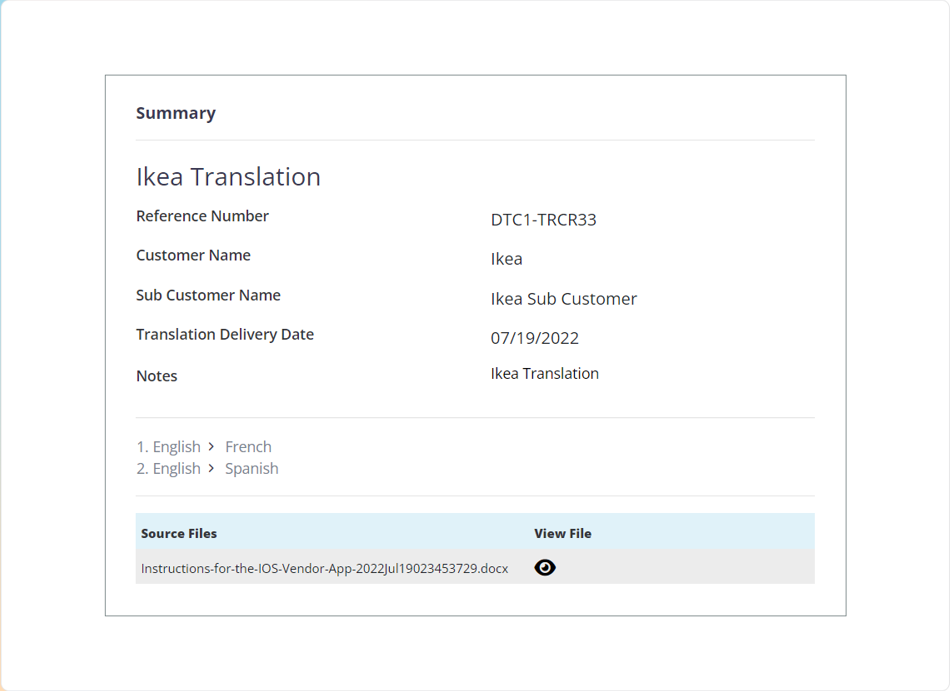
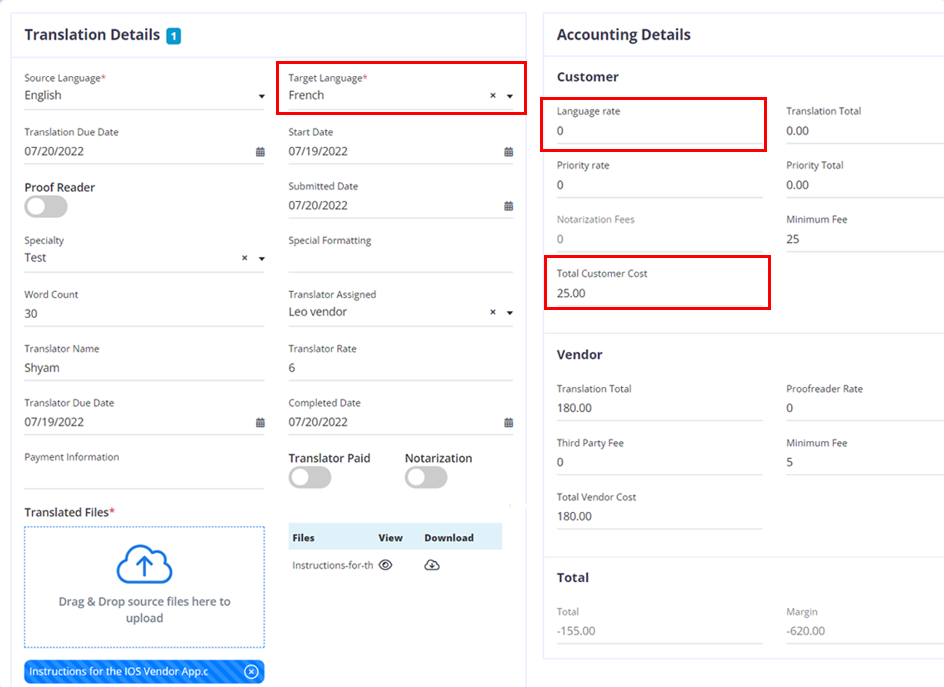
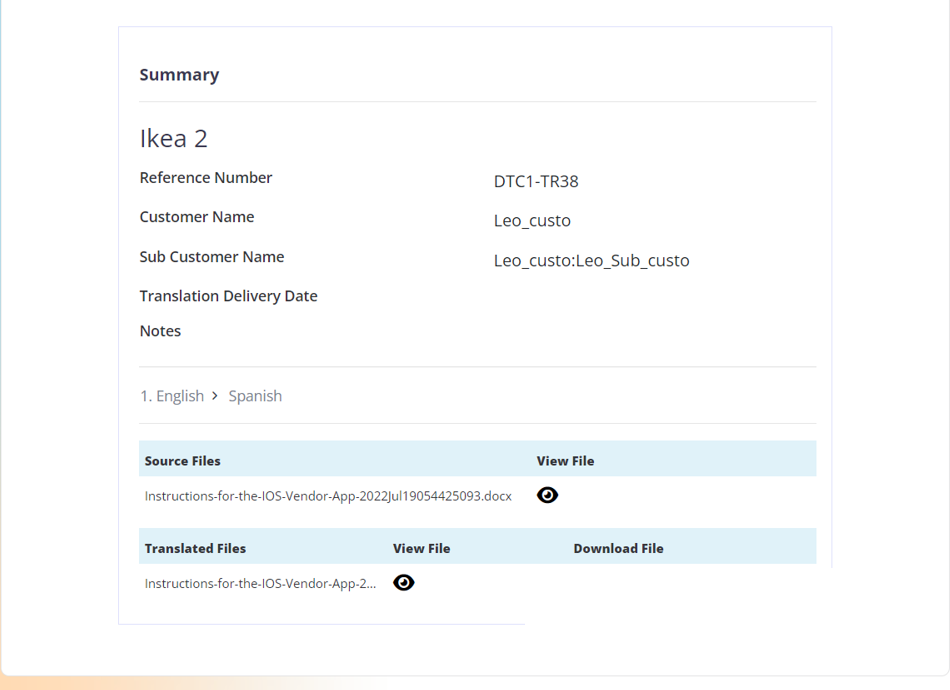
The summary section helps you to keep track of the details that you have entered and the files that you have uploaded while creating the quote request.
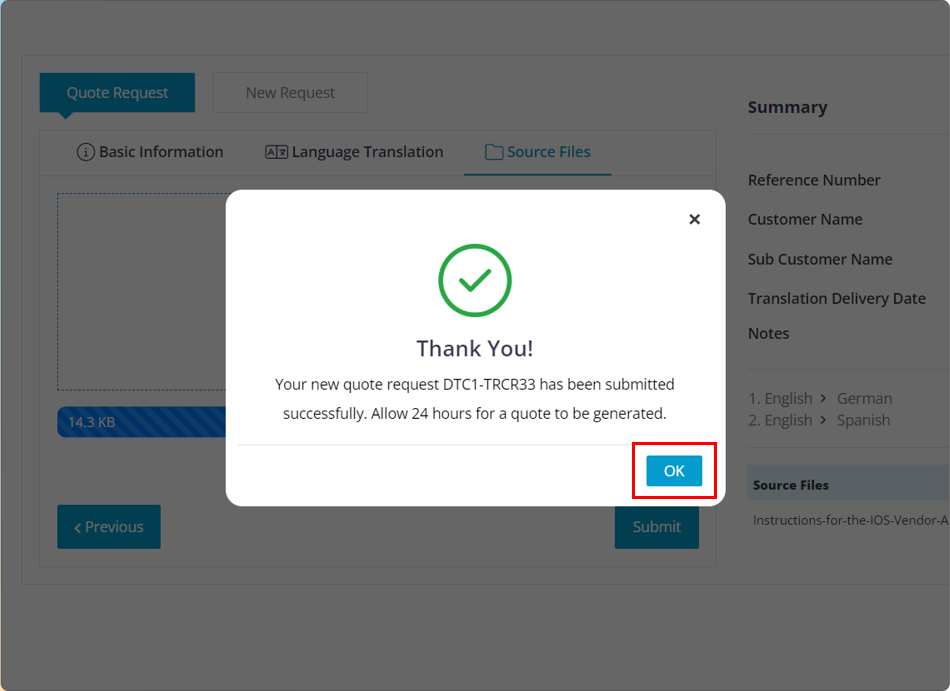
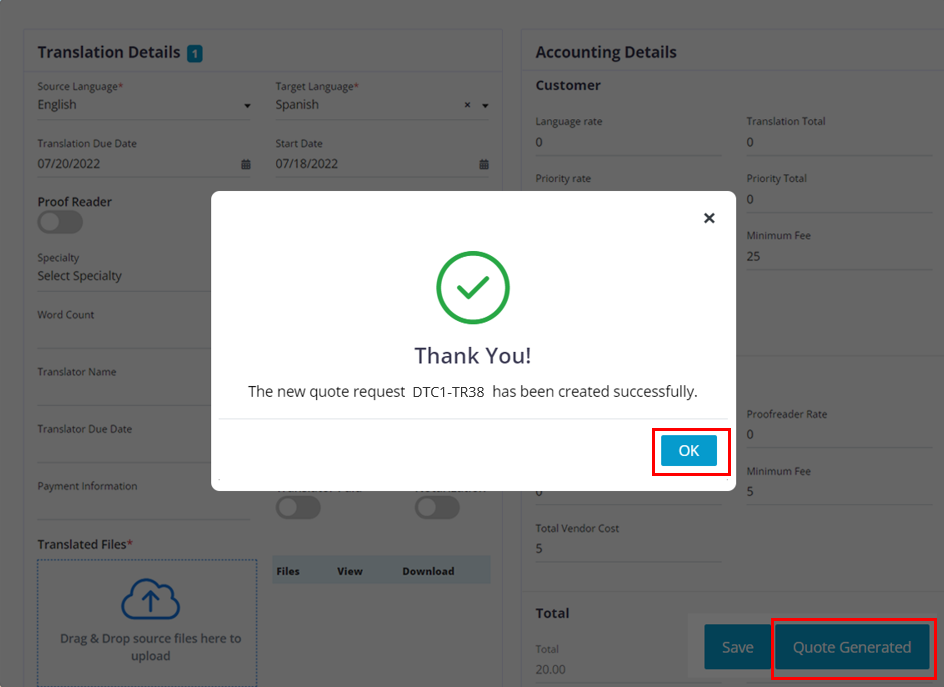
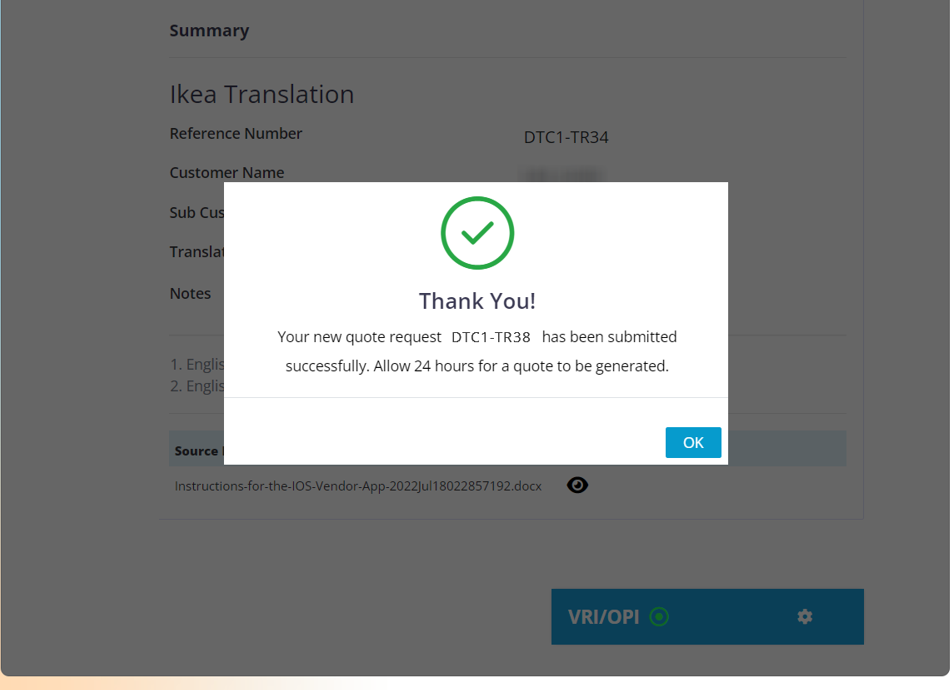
Once you click the “Submit” button you will get this pop up, click on the “OK” button and the quote request will be sent to the Translation team.
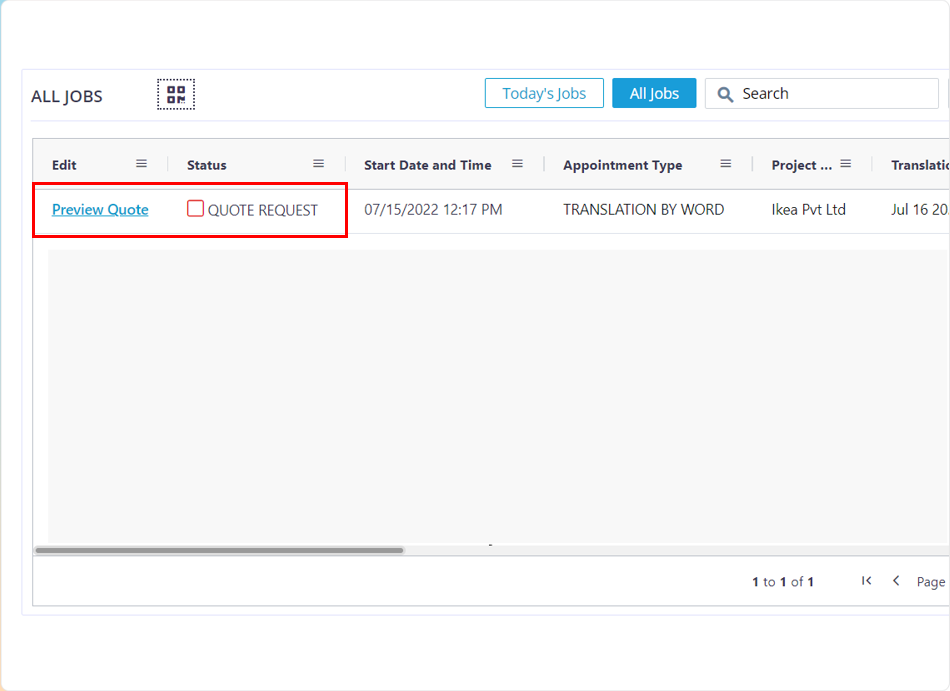
Customer side:
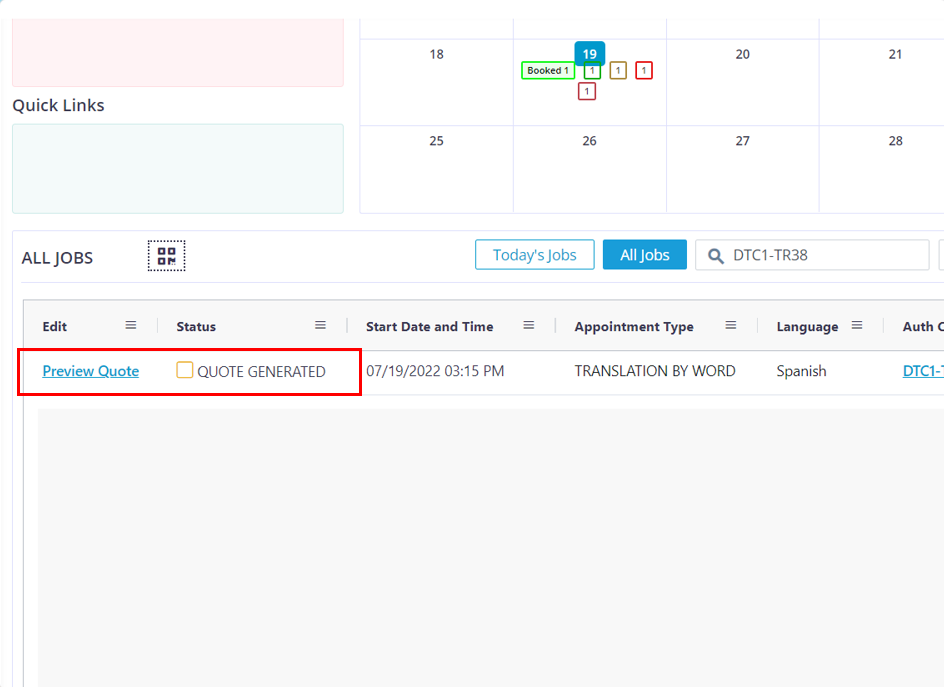
Click on the preview Quote button to view the generated quote.
You will receive an email stating that the quote has been generated and to login to view/ approve the quote
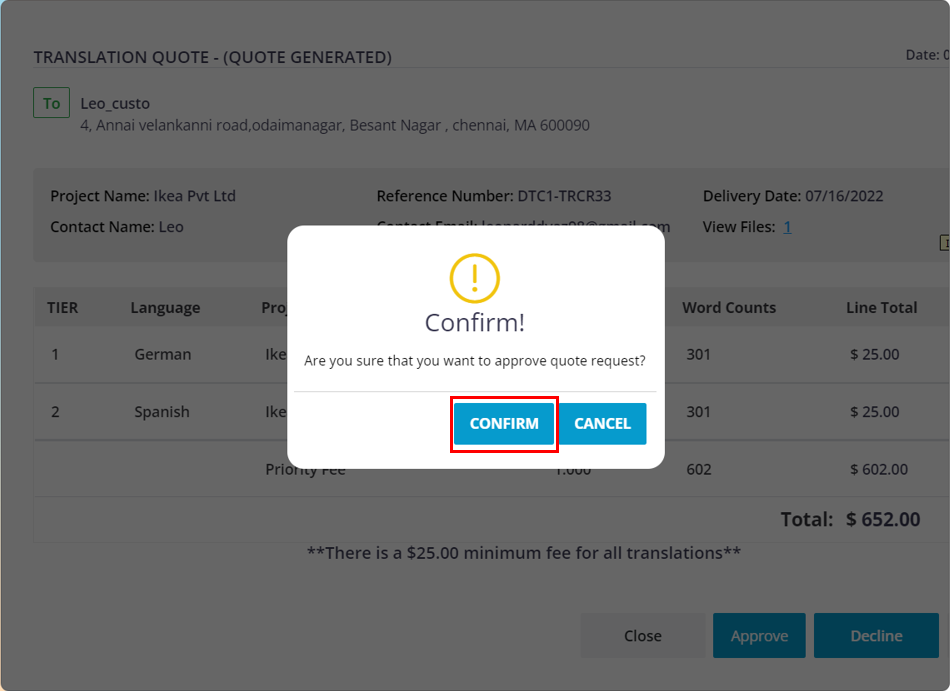
Click on the “Confirm” button.
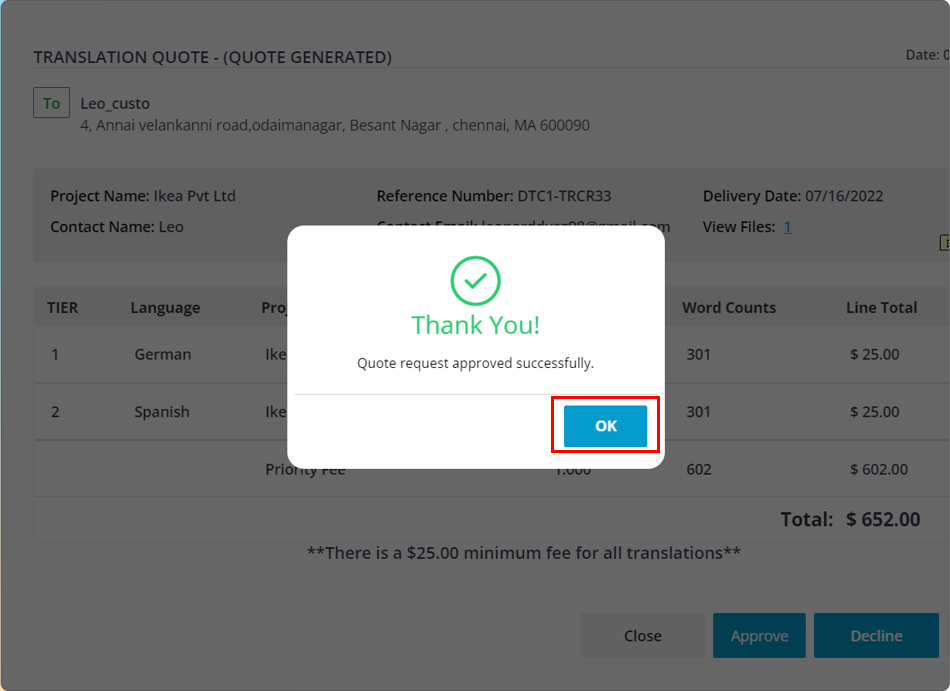
Click on the “OK” button.
Customer side:
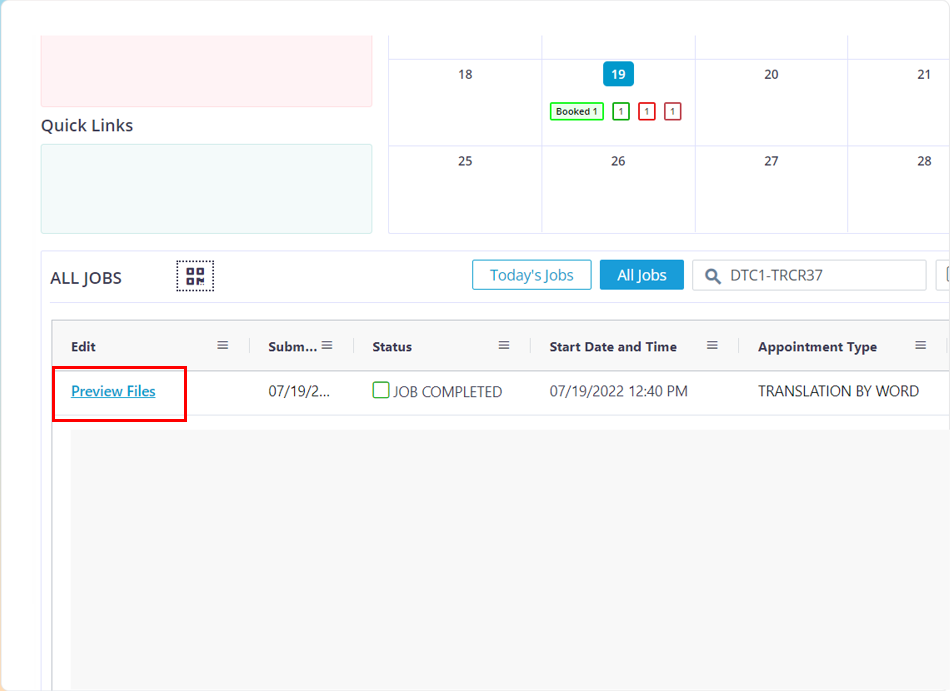
Once the Job has been completed then the user can login and click on the “Preview Files” button.
You will receive an email stating that the job was completed and you have to login to view/ download their translated document.
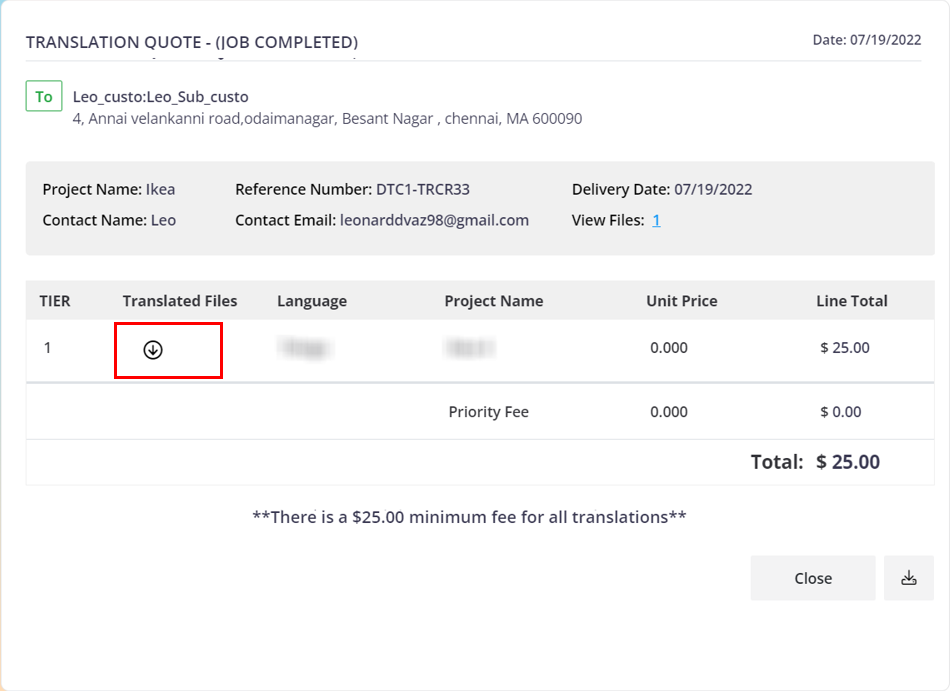
Click on the download button to download the Translated Files.
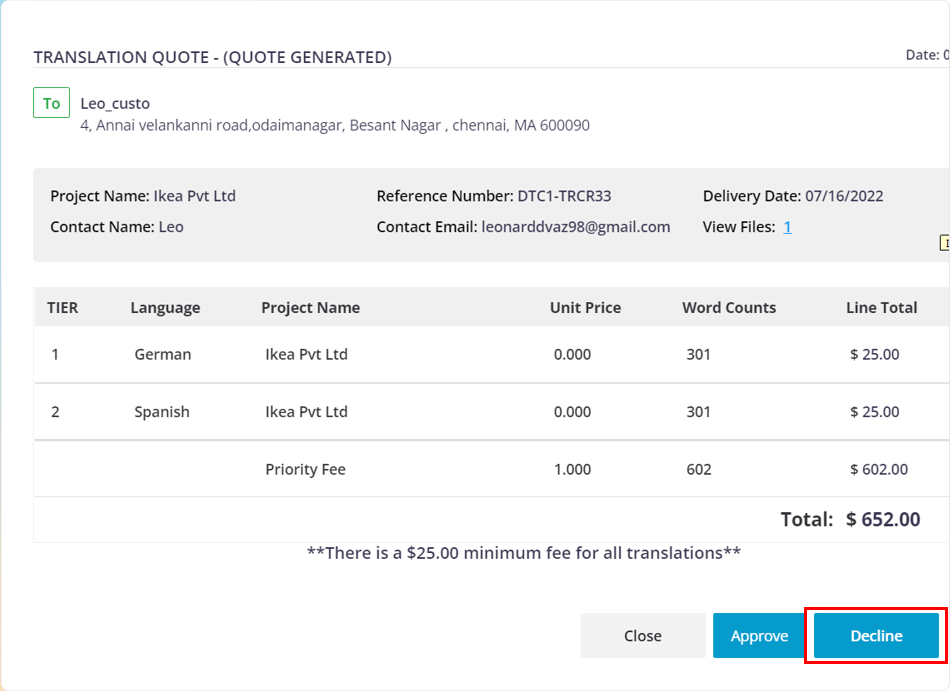
For reasons applied, if you want to decline the quote request, then click on the Decline button.
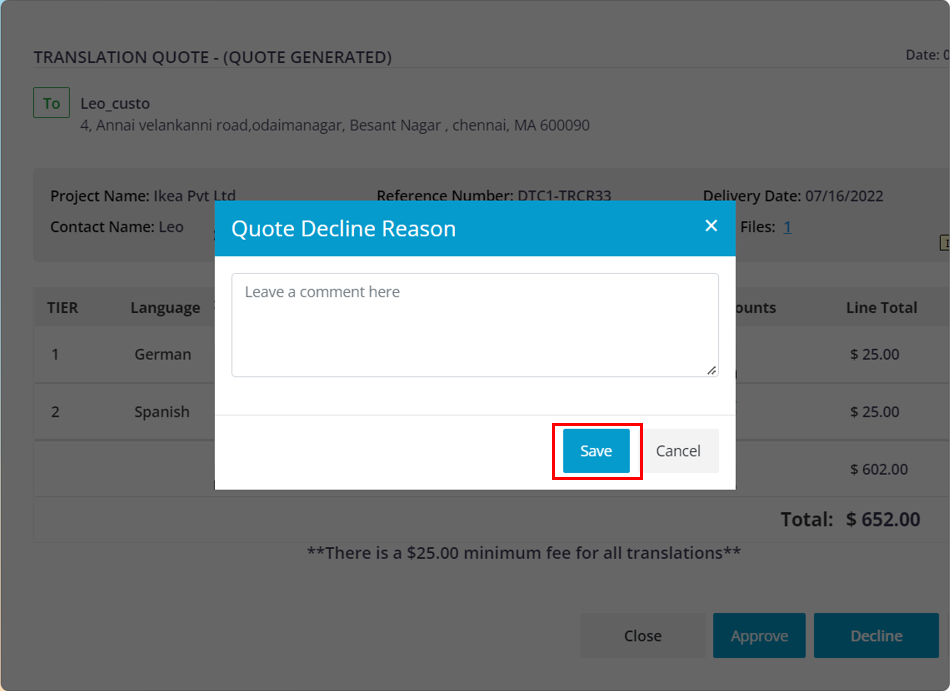
Enter the decline reason and click on the Save button.
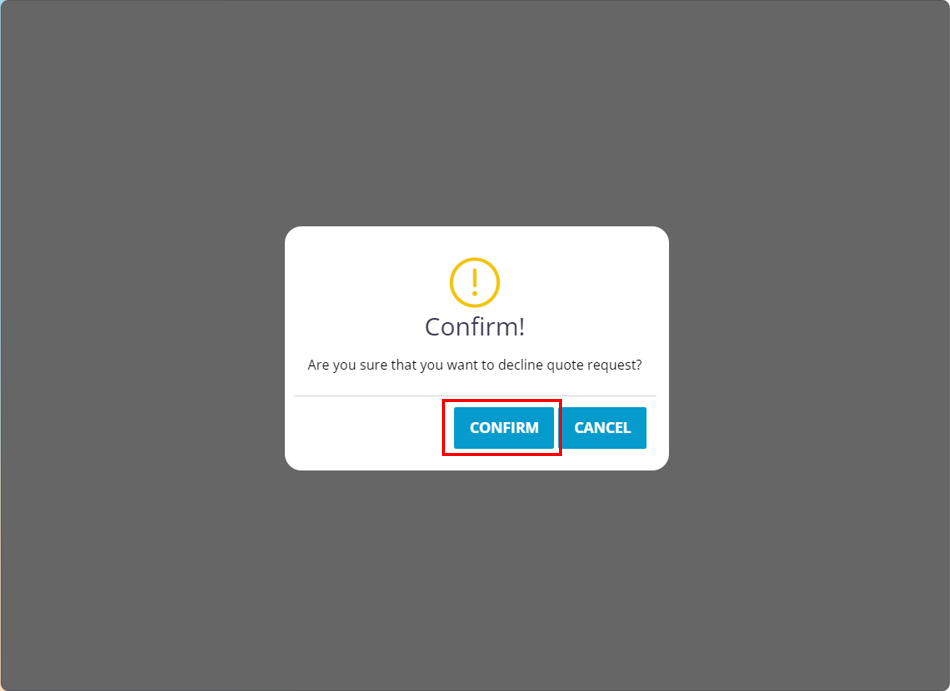
Click on the “Confirm” button
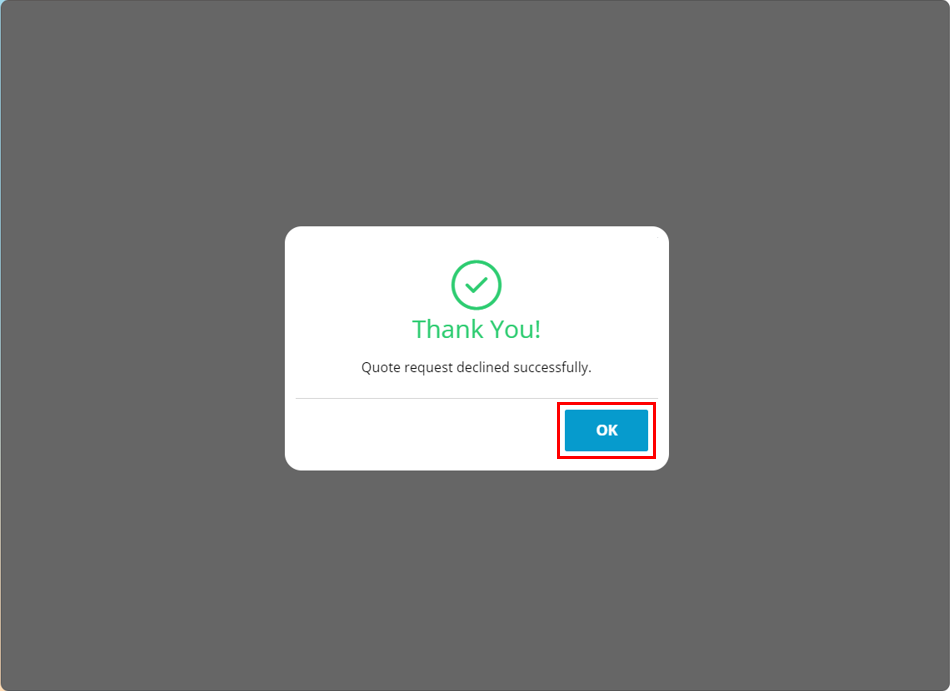
Click on the “OK” button.
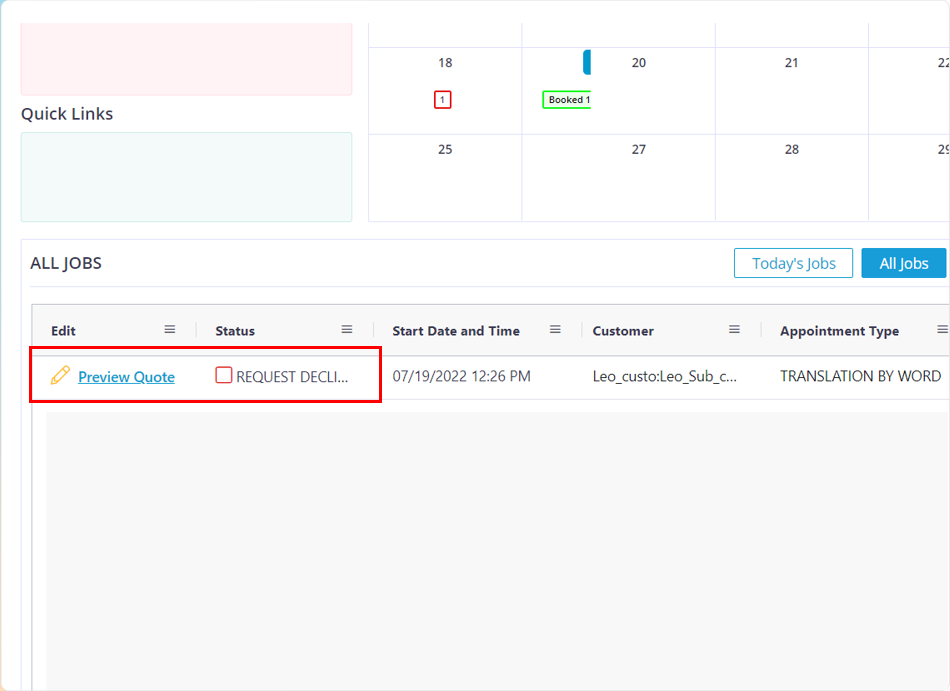
The job in the customer’s grid will be marked as Request Declined.
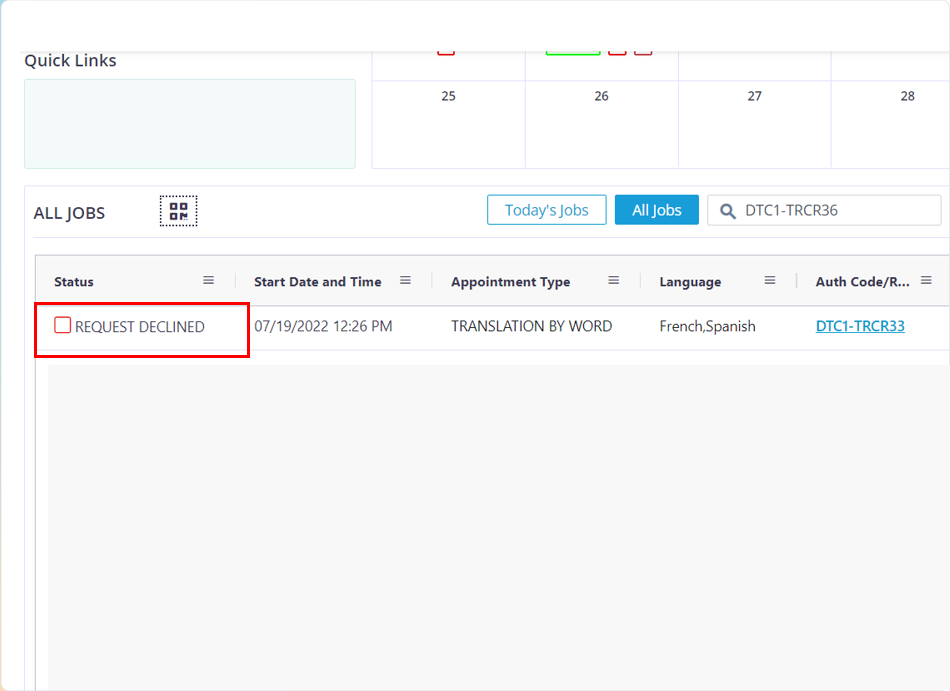
The status of the job will be marked as Request Declined.
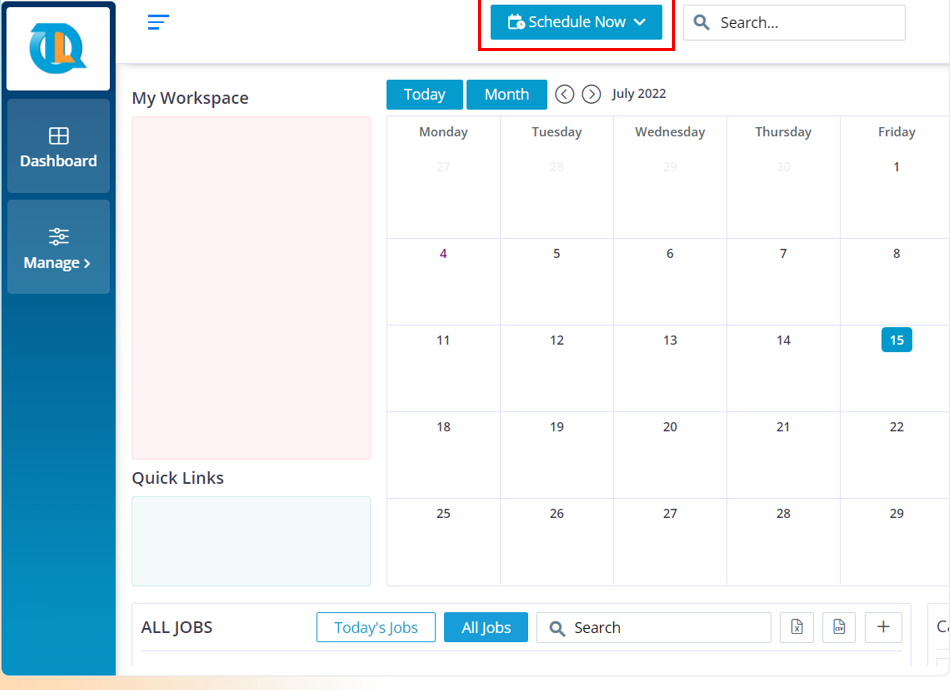
Move your cursor to the Schedule Now button.
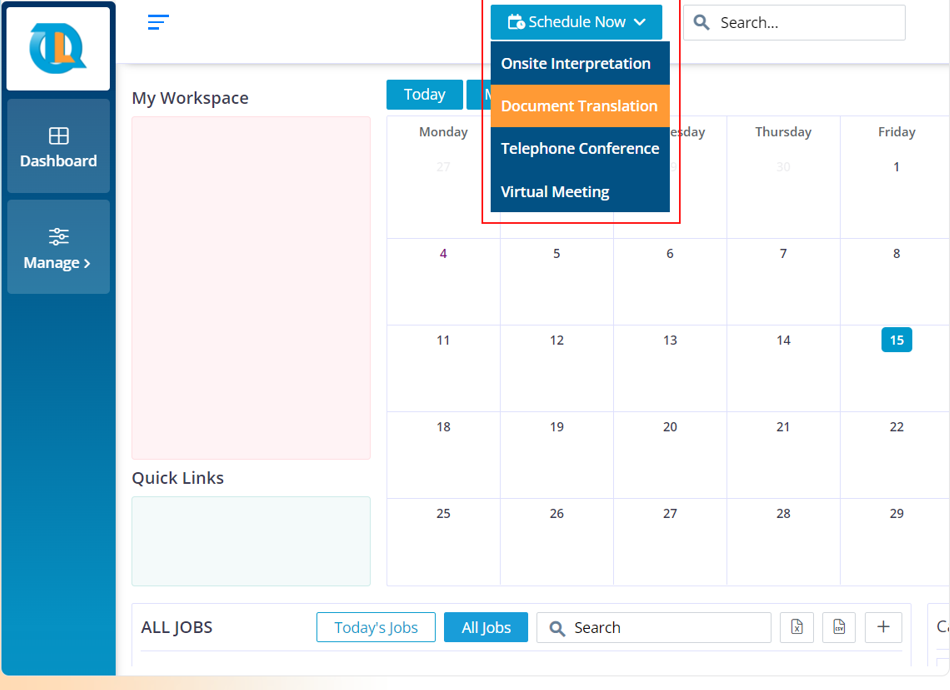
Click on the Document Translation option.
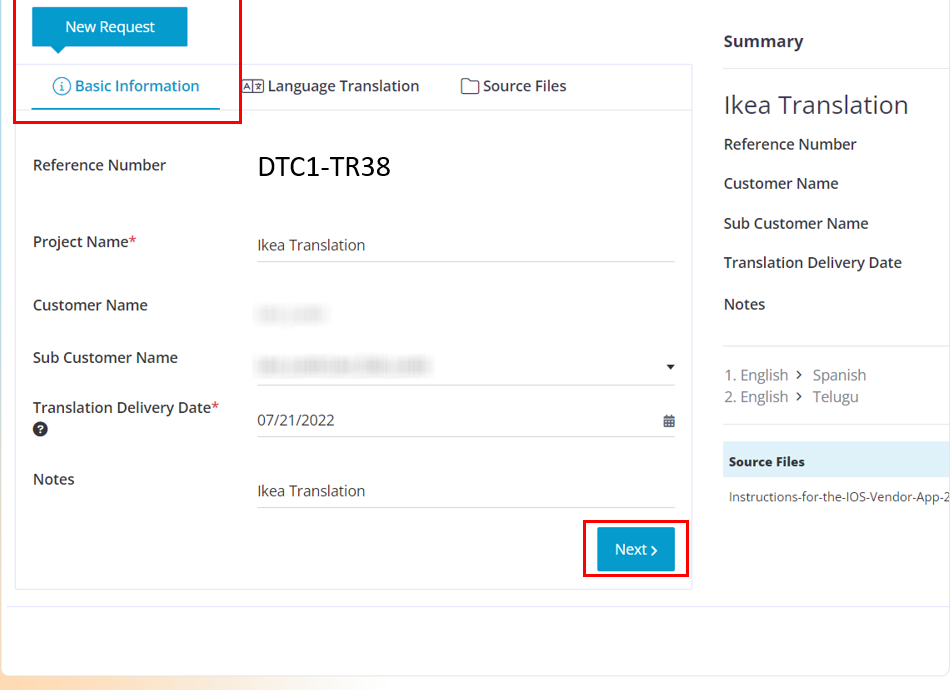
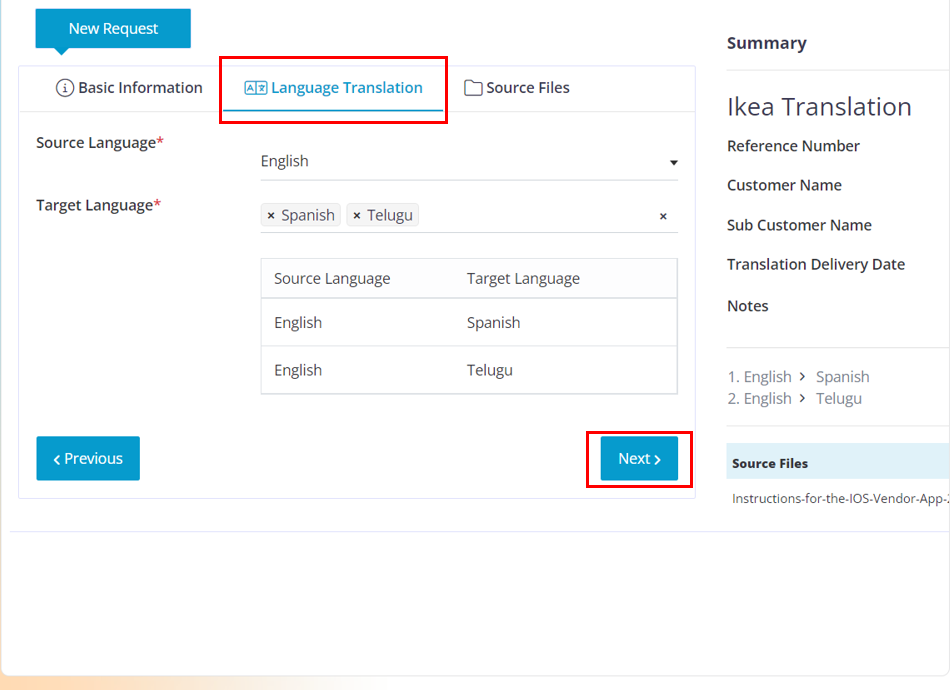

The summary section helps you to keep track of the details that you have entered and the files that you have uploaded while creating the New request.
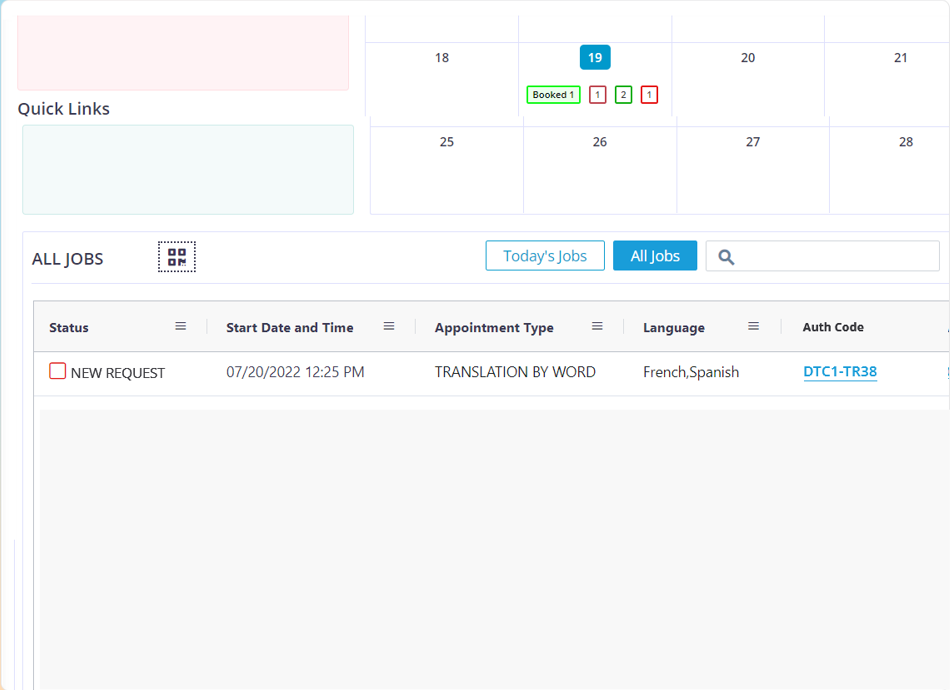
Now you can view the Created job marked as a New Request in the status column.
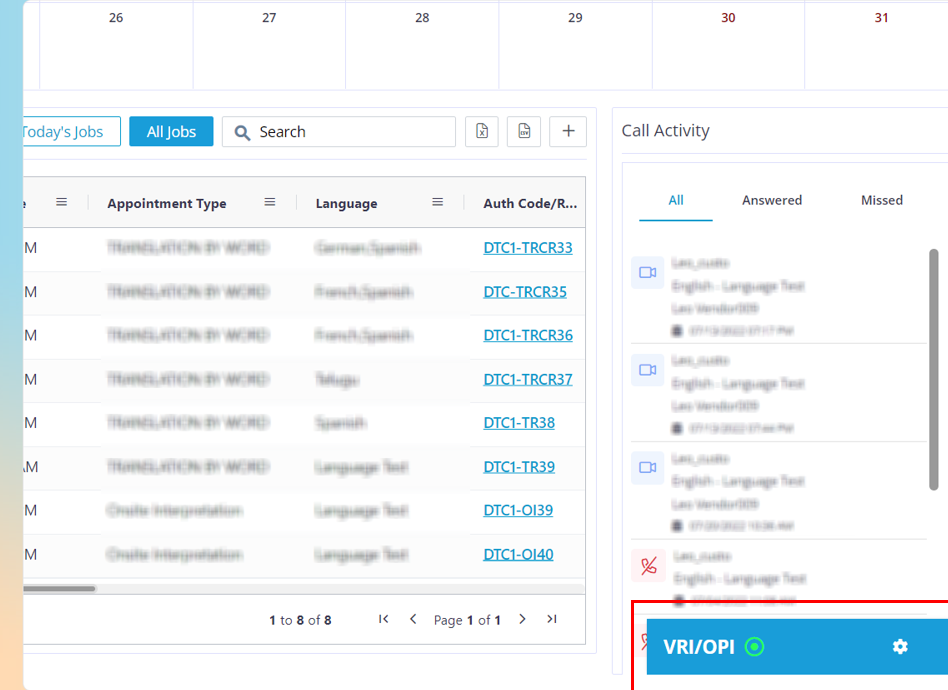
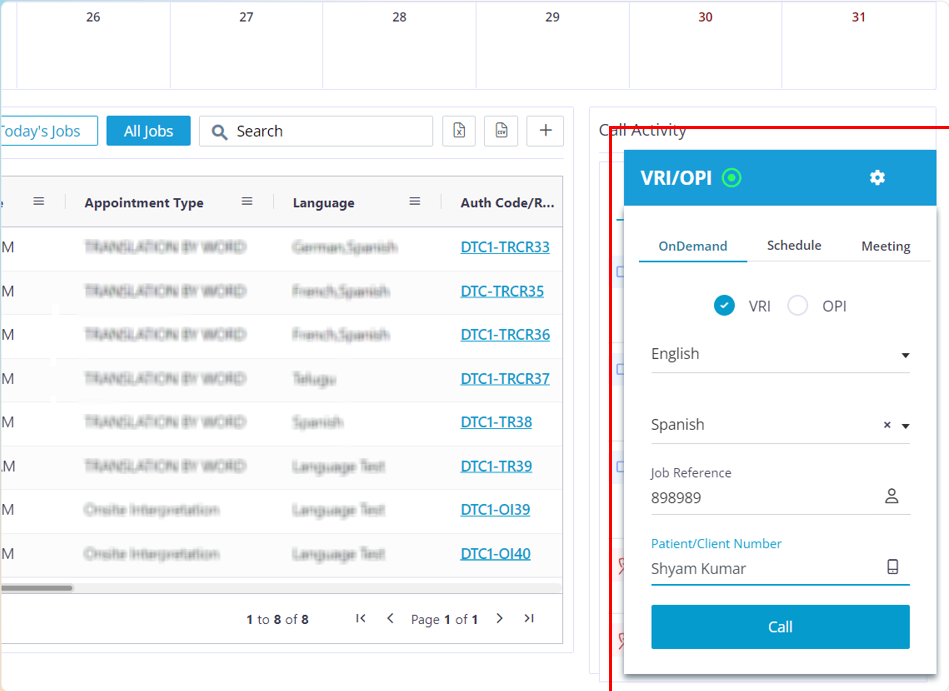
Click on the VRI/OPI tab.
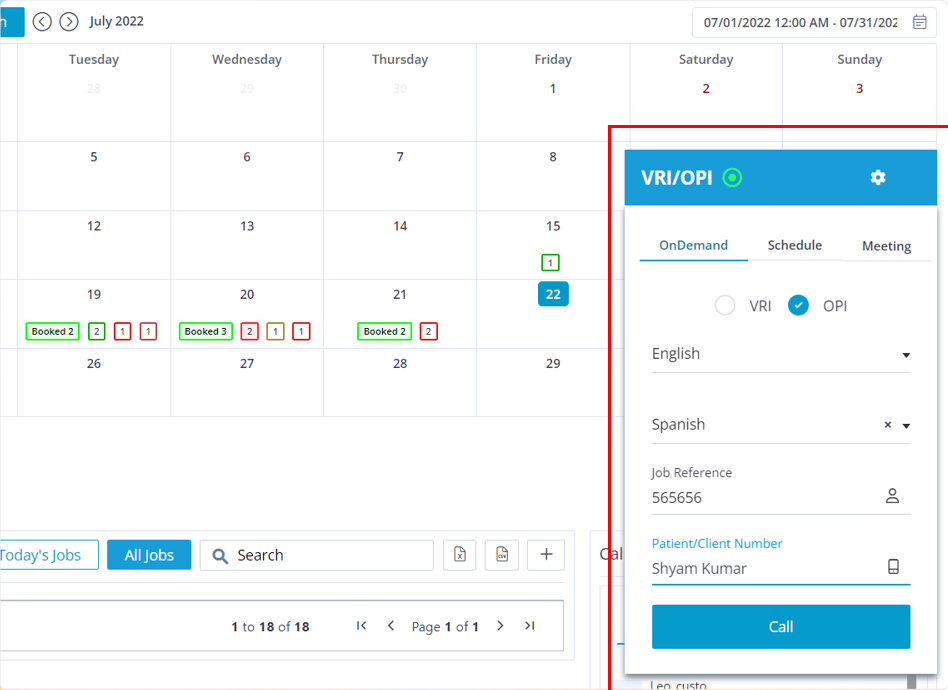
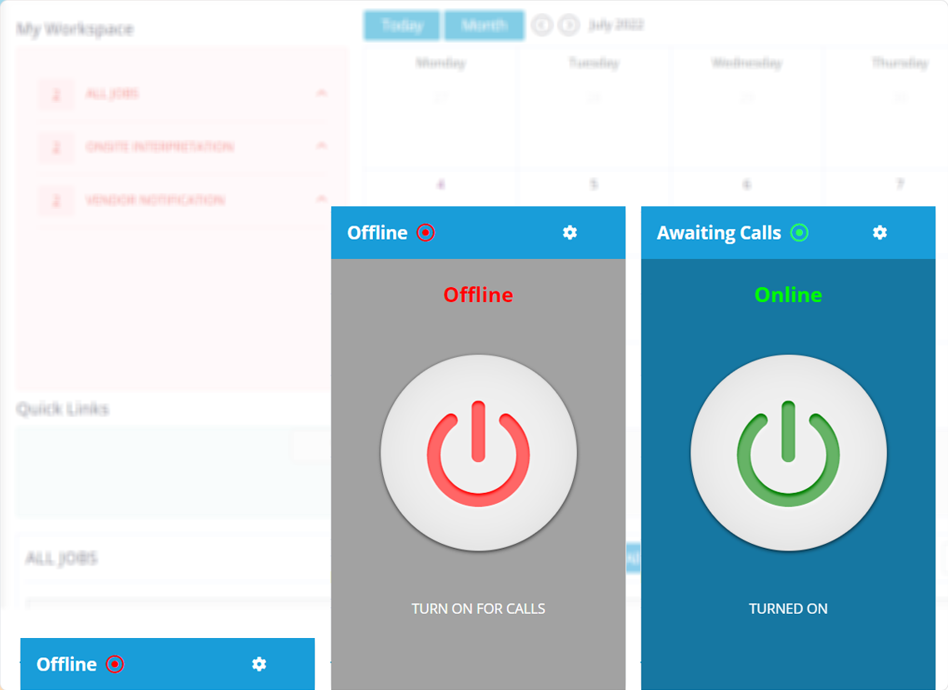
When the vendor logs in they will find a blue tab at the bottom that says Offline they need to click on it, a pop up will appear. Once they click on the red button it will turn green and the title will change to Awaiting Calls. Only now the vendor will receive VRI/OPI calls. If the button is turned off they will not receive any calls.
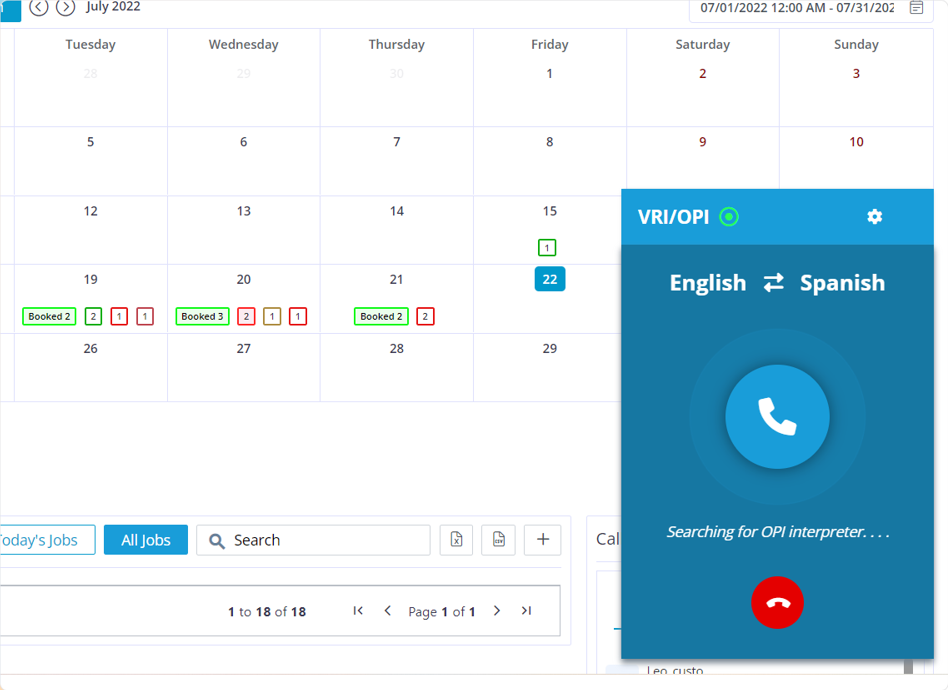
This screens appears after the customer clicks on the call button.
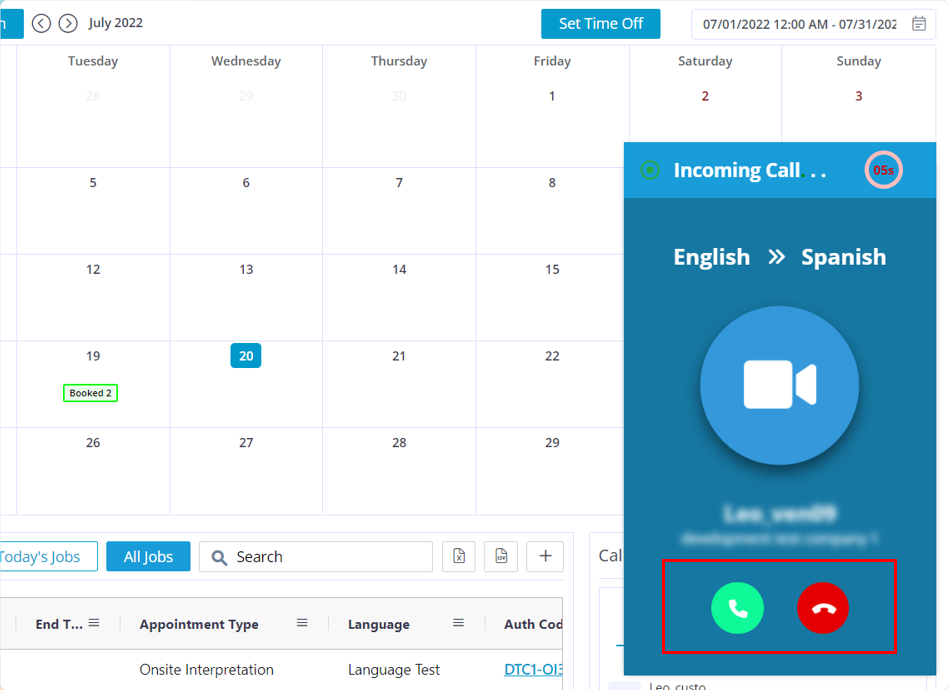
This is the screen that the vendor will see when they are receiving the call. They can choose to accept or decline it.
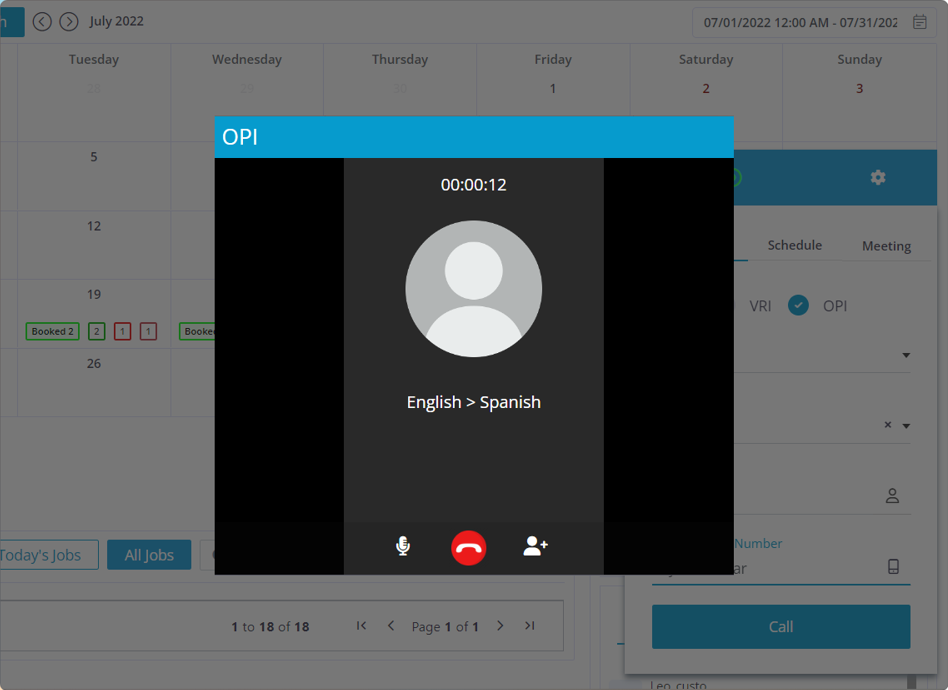
Once the call gets connected this is how it would look.
By clicking on the mic icon you can mute yourself and by clicking on it again you can unmute yourself.
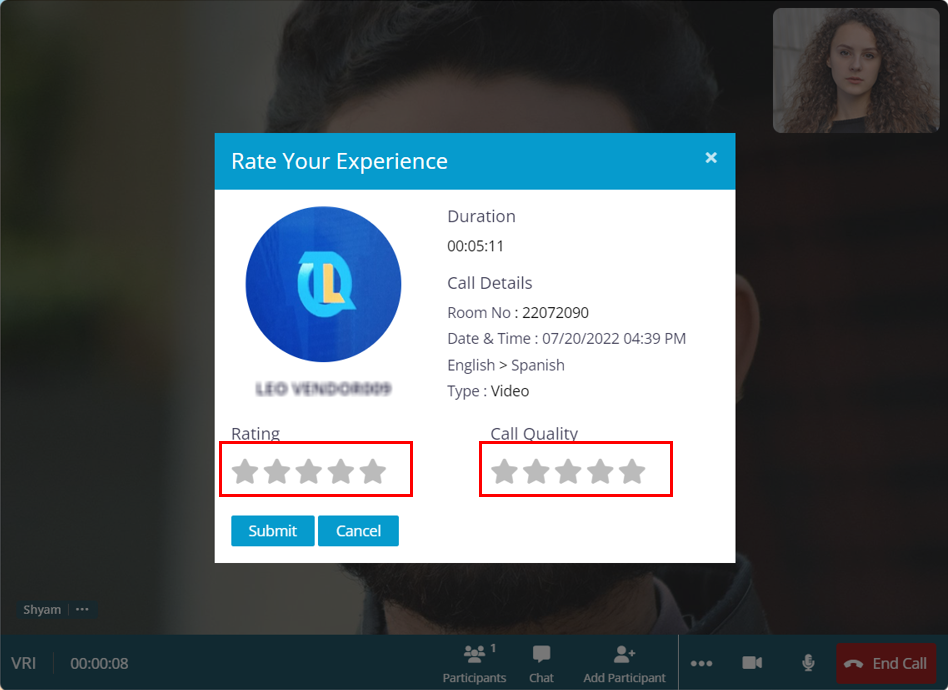
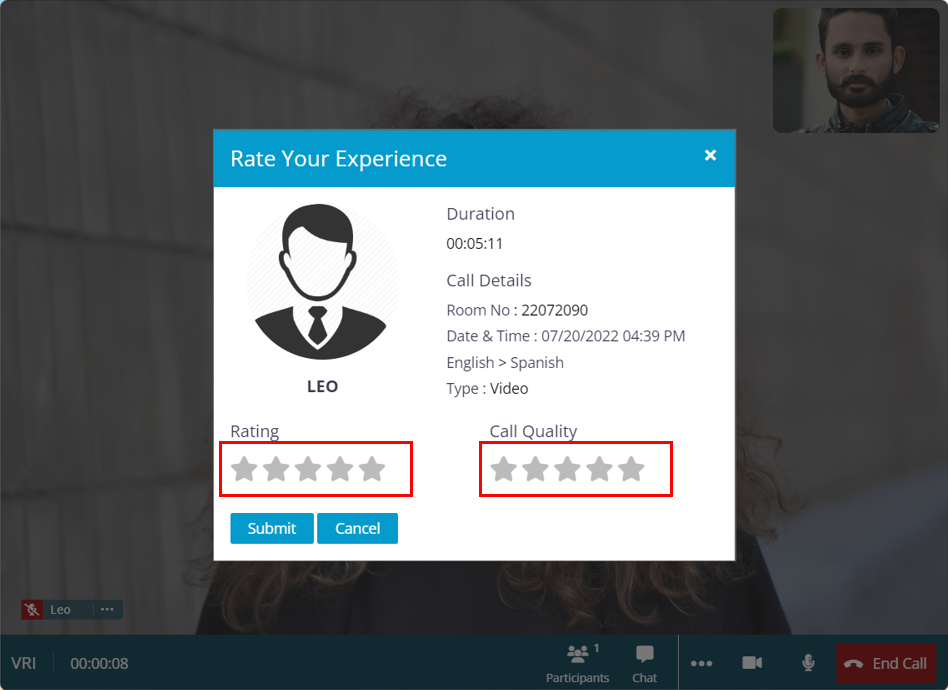
When the call ends the vendor will also receive the feedback form where they can view the summary of the call and rate the customer too.
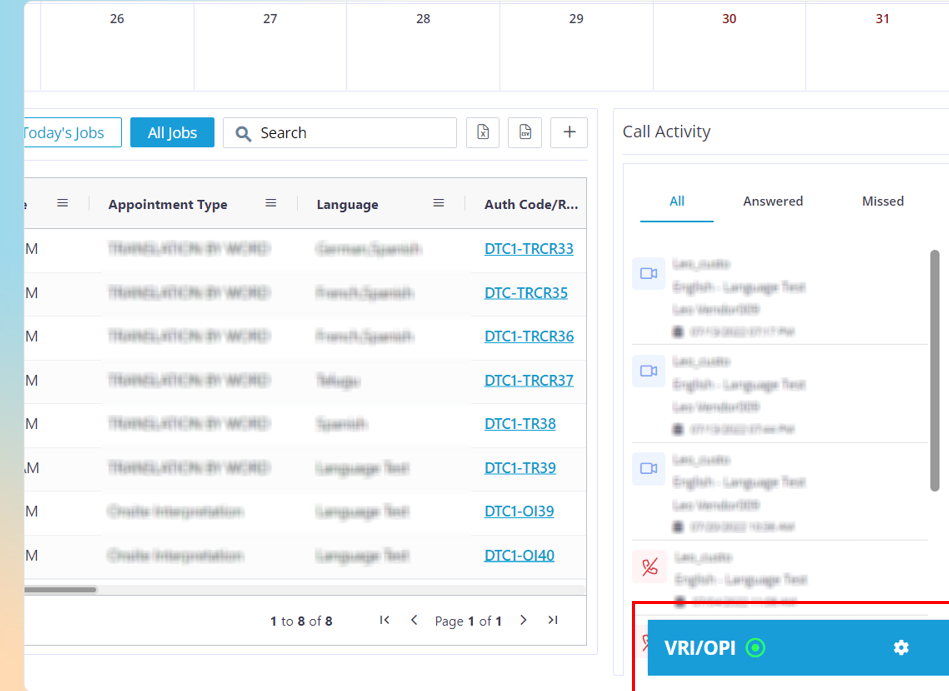
Click on the VRI/OPI tab.

When the vendor logs in they will find a blue tab at the bottom that says Offline they need to click on it, a pop up will appear. Once they click on the red button it will turn green and the title will change to Awaiting Calls. Only now the vendor will receive VRI/OPI calls. If the button is turned off they will not receive any calls.
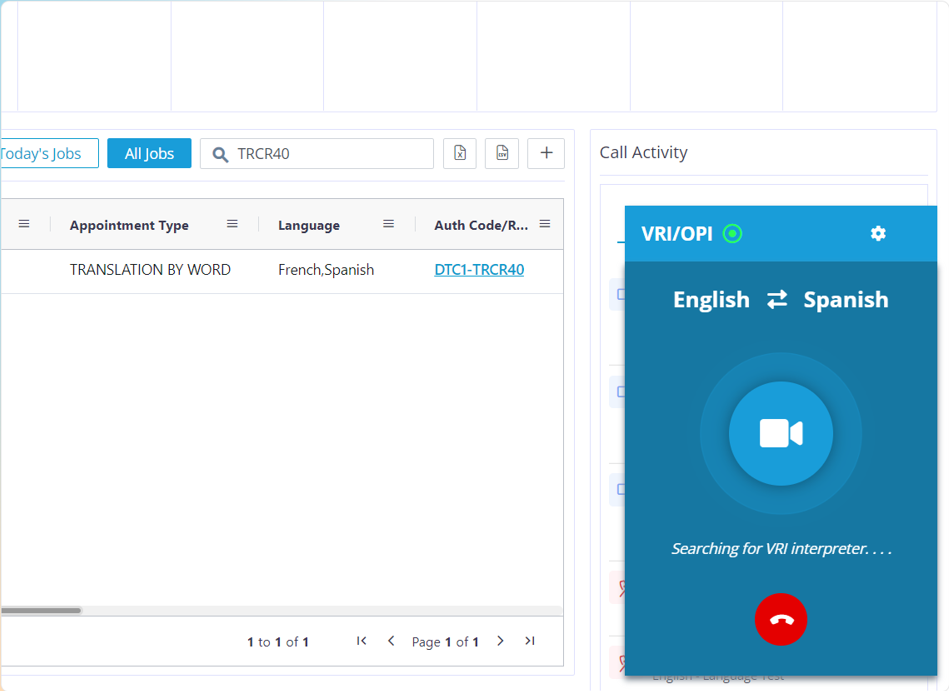
This screens appears after the customer clicks on the call button.

This is the screen that the vendor will see when they are receiving the call. They can choose to accept or decline it.

Once the call gets connected this is how it would look.

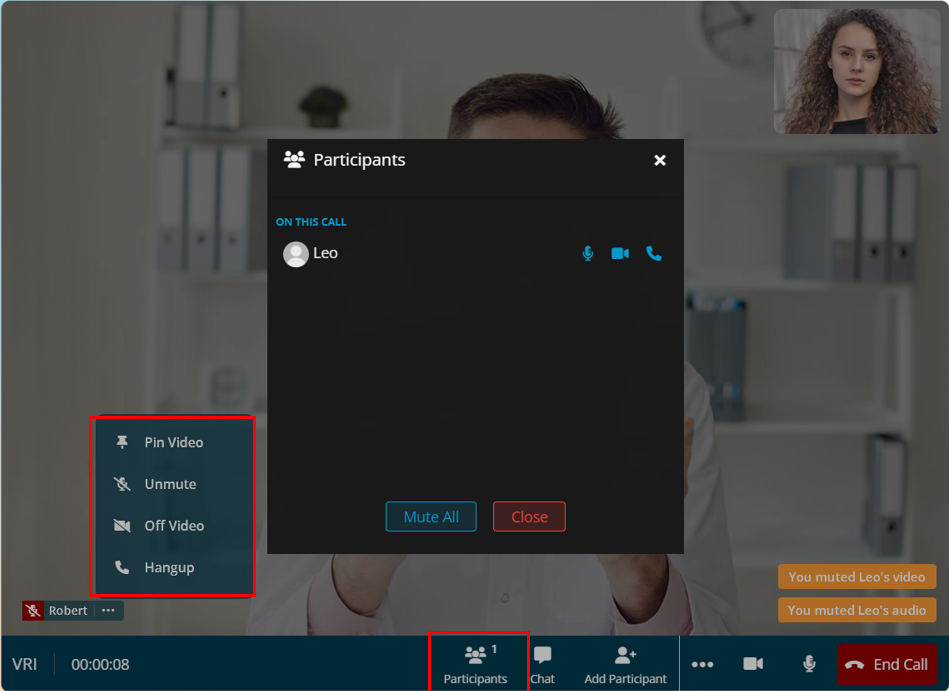
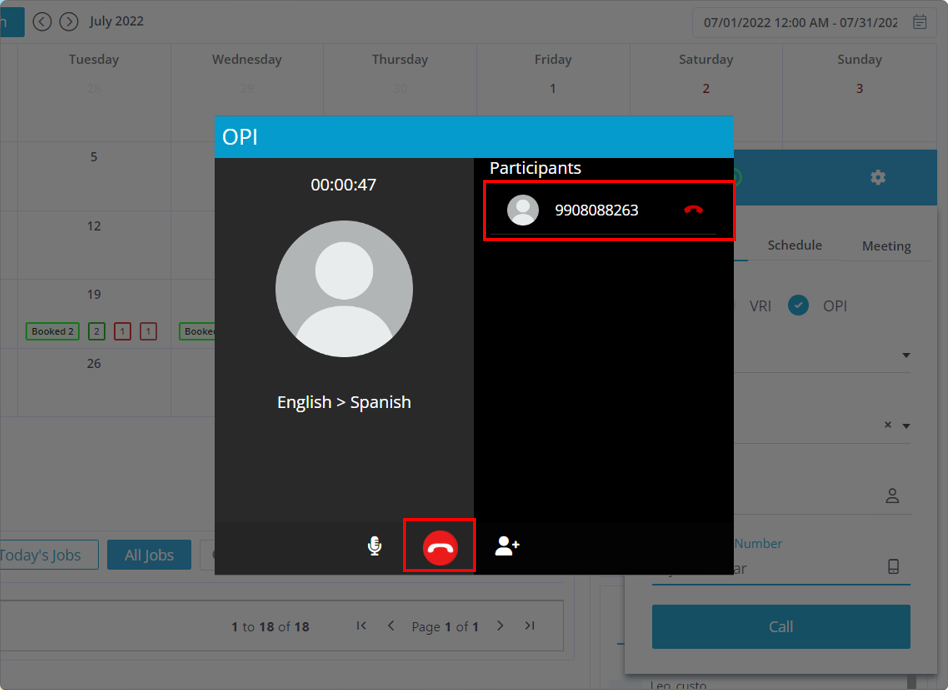
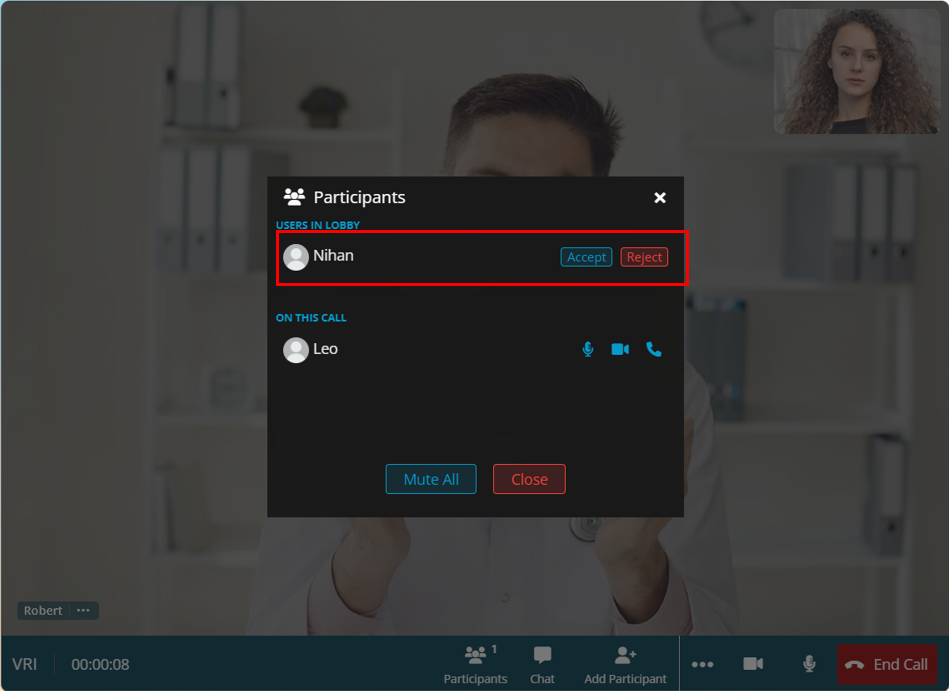
By clicking on the Participants button, the customer can use same functionality to Mute, pause and end the call for the participants by clicking on the required icons. This feature is called as the Host controls, because the other participants cannot mute or pause the video of other participants. They can only do it for themselves.

When you click on these 3 dots you can access the Mini player option that minimizes the video call for multi tasking purposes. You can change the view from Grid View to Speaker view by clicking on the Speaker view option (Note: you can only access the speaker view when you are in a group call. You cannot do it on a one on one call). You can use the Full Screen option to make the call to fit the entire screen.

This is how it would look when you click on the Mini Player option.

When the users pauses their own video no one can see their video. Only if the customer pauses a participant’s video, then the other participants can still see the video of the participant who was paused by the client.
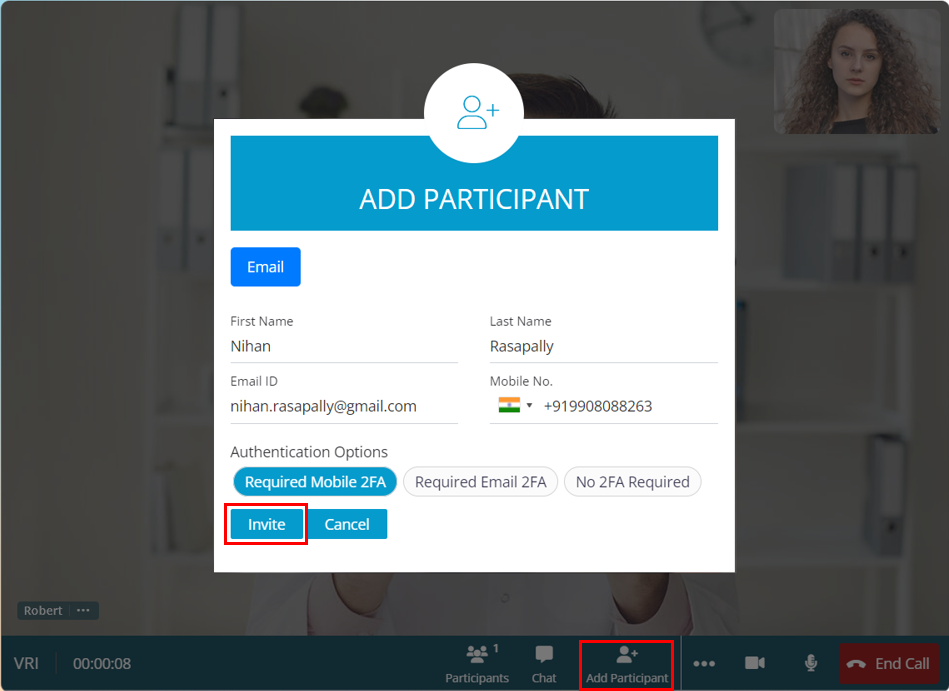
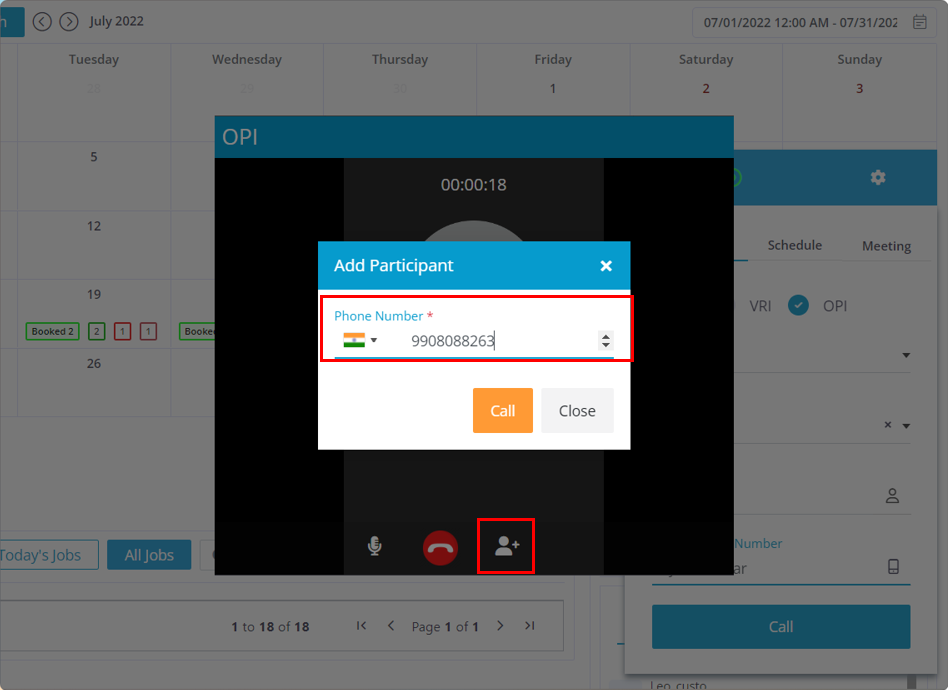
Once you click on the invite button, you will get this pop up.
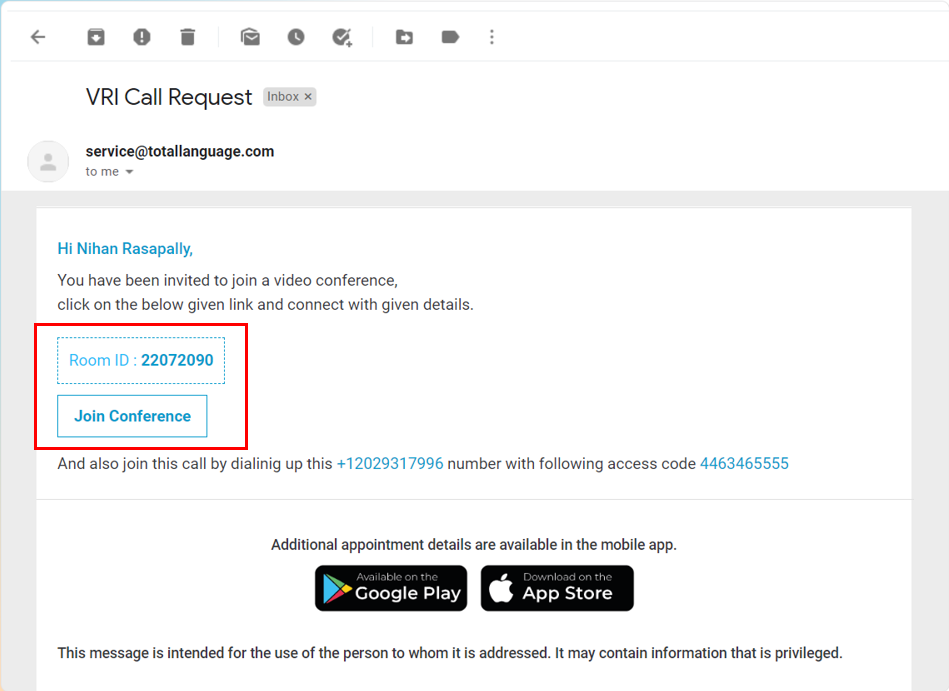
This is the email that will be sent to the invited participant. They can join the meeting by clicking on the Join Conference button
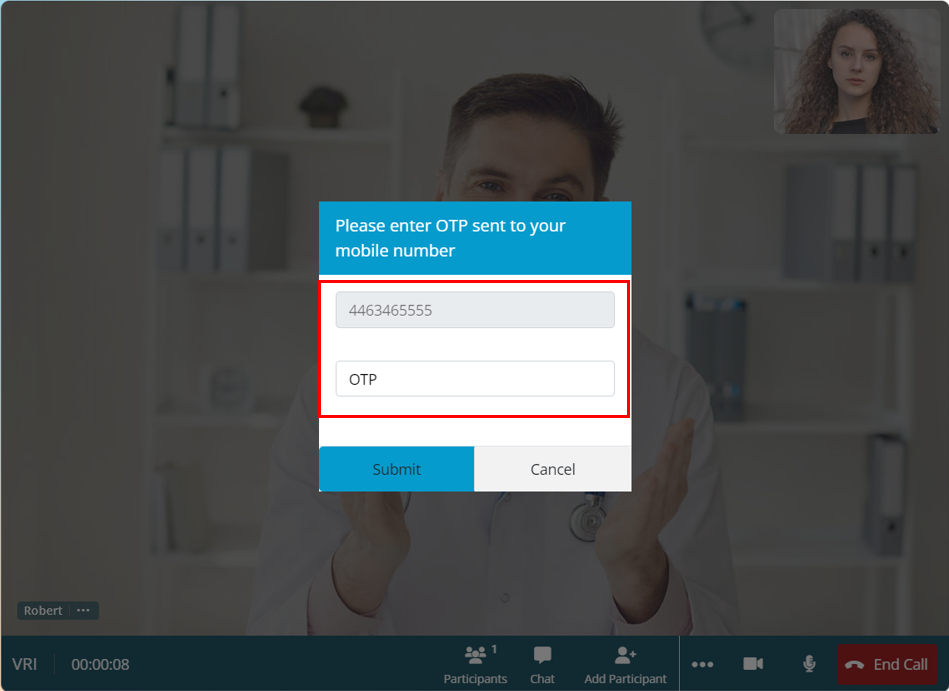
When the user reaches this point, they will receive an otp via email or mobile based on the chosen 2FA. Once you receive the otp, enter it and click on the Submit button.
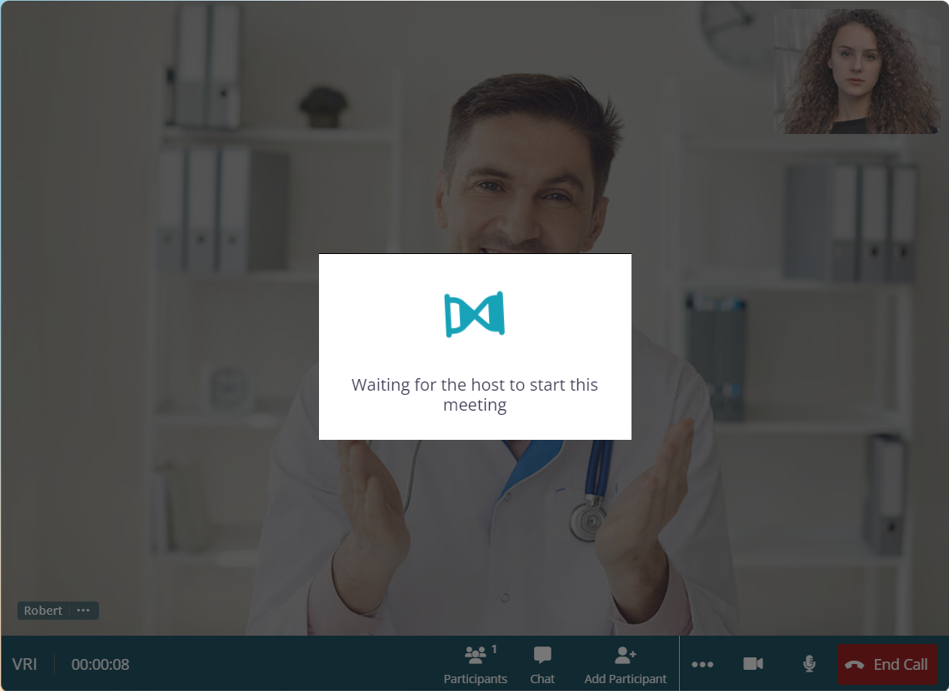
Now the participant needs to wait for the customer to let them into the meeting.
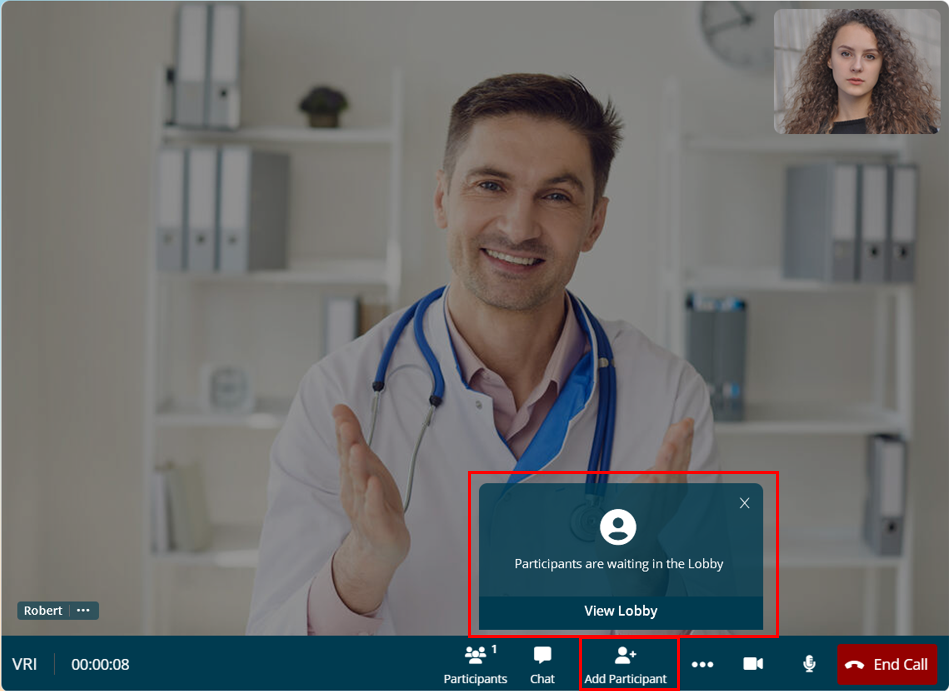

Once the participant has been accepted he will join the call and the orientation will be adjusted automatically.
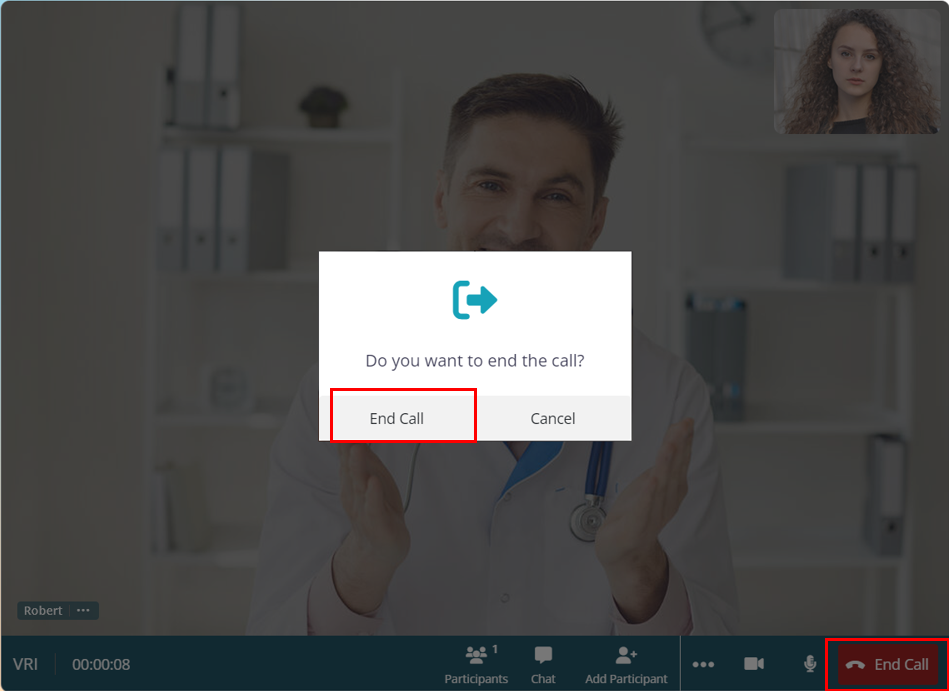
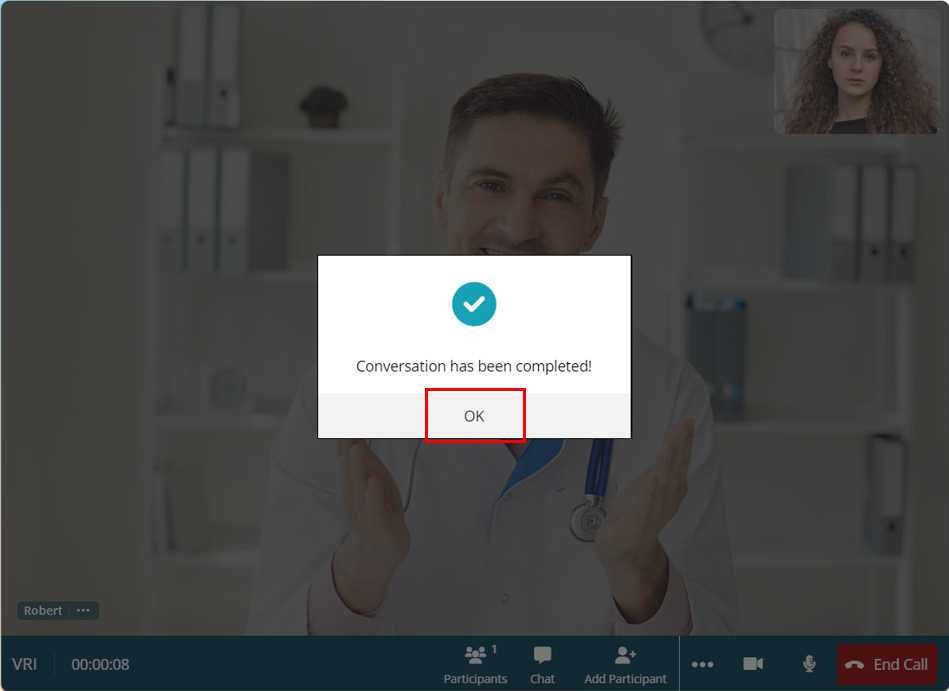
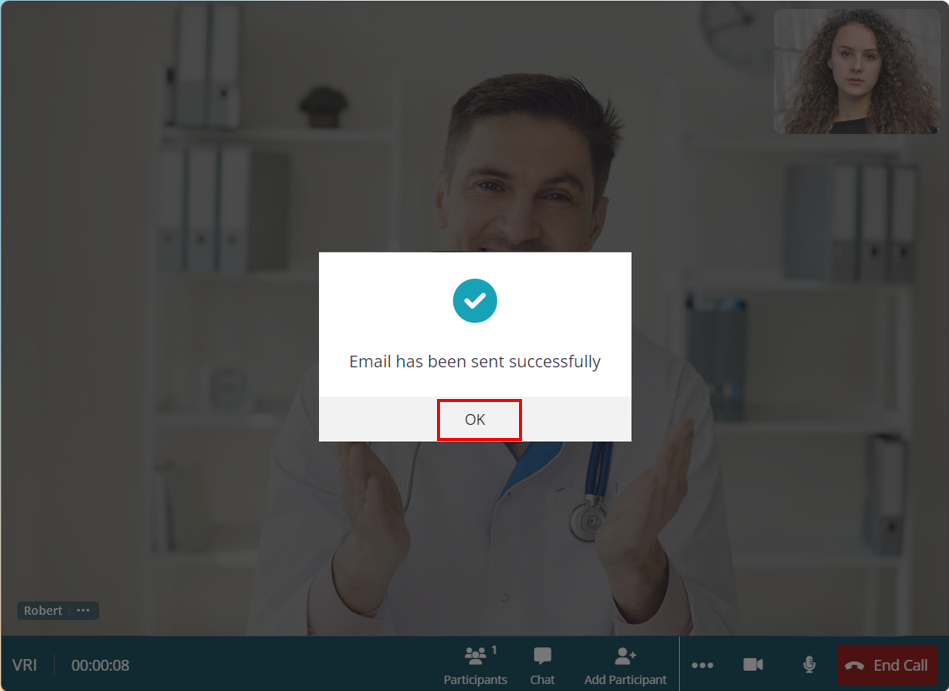
Click on the Ok button.
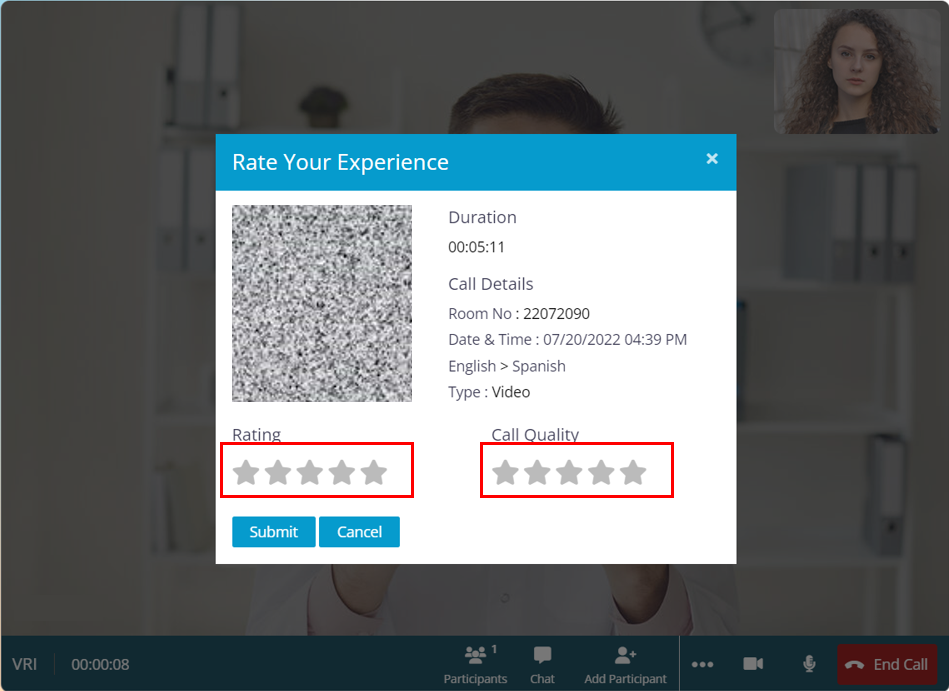
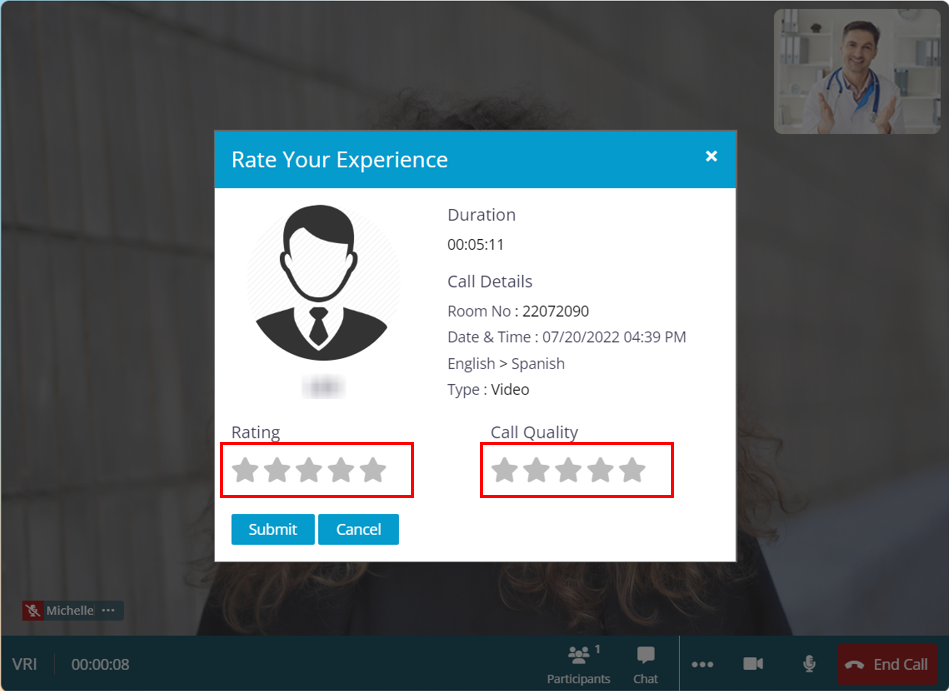
When the call ends the vendor will also receive the feedback form where they can view the summary of the call and rate the customer too.
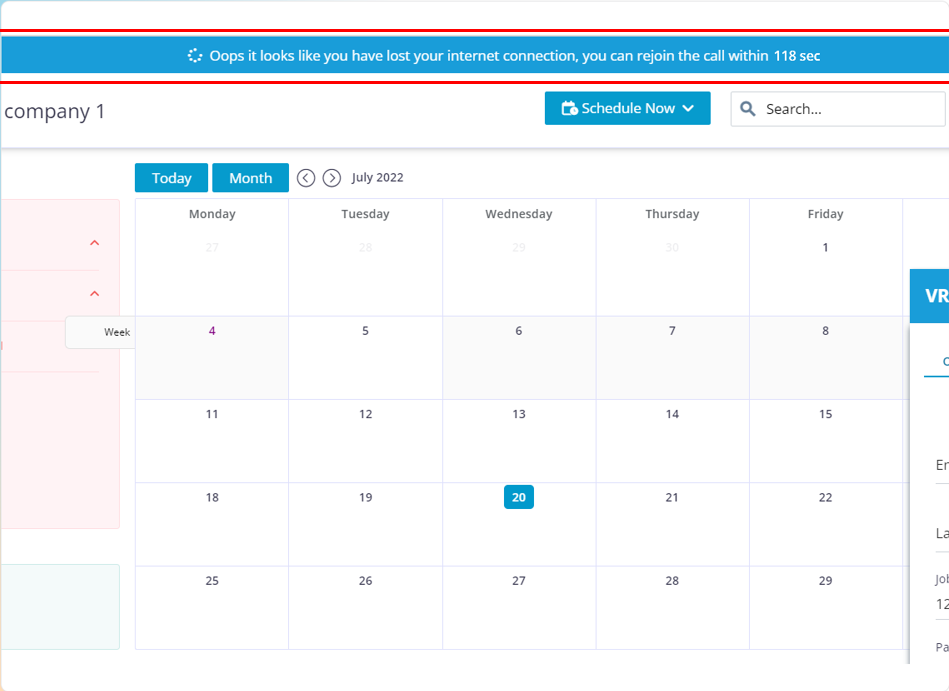
Re-join Functionality: Incase if you lose your internet connection when you are on a call, then you will be redirected to the dashboard that shows you the time that is left for you to re-join the call. (Note: you have 120 seconds to re-join the call)
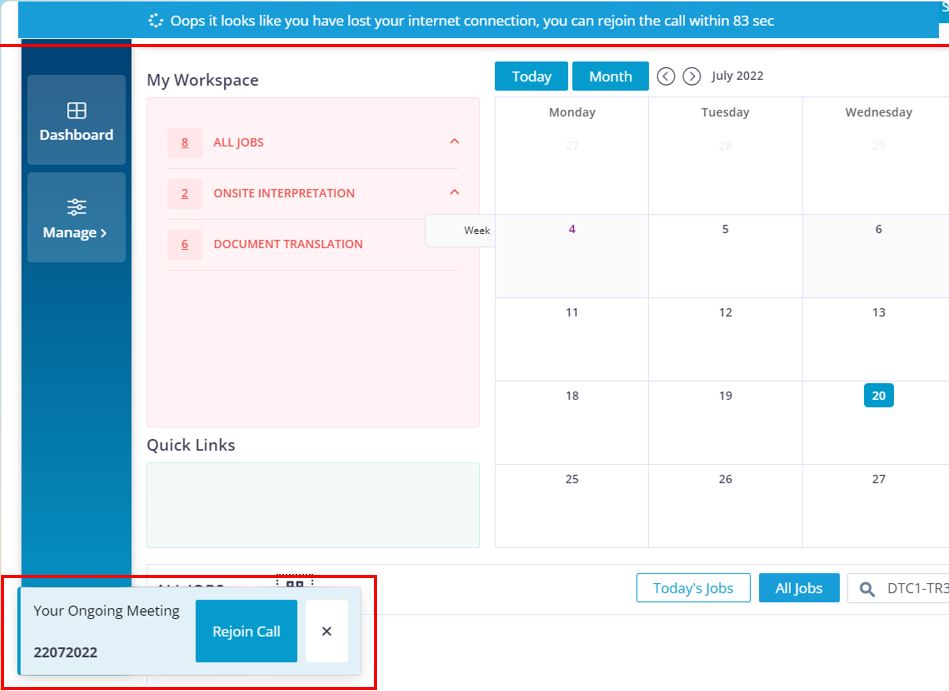

Now you would have successfully re-joined the call.
Follow the below steps to create a blocked appointment
Move you cursor to the “Schedule Now” button and click on Onsite interpretation
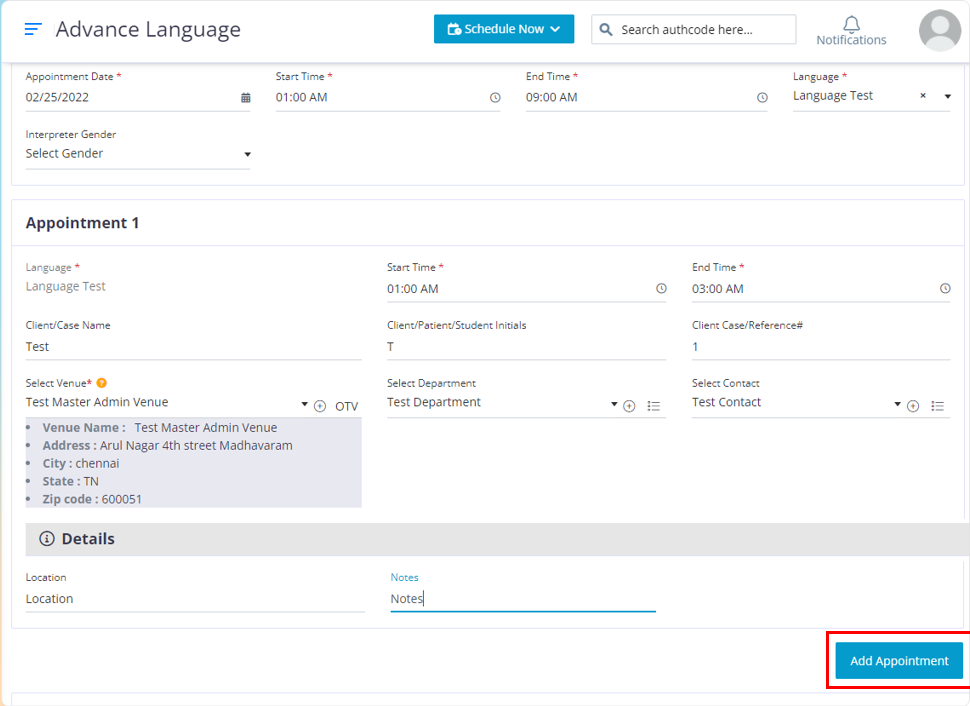
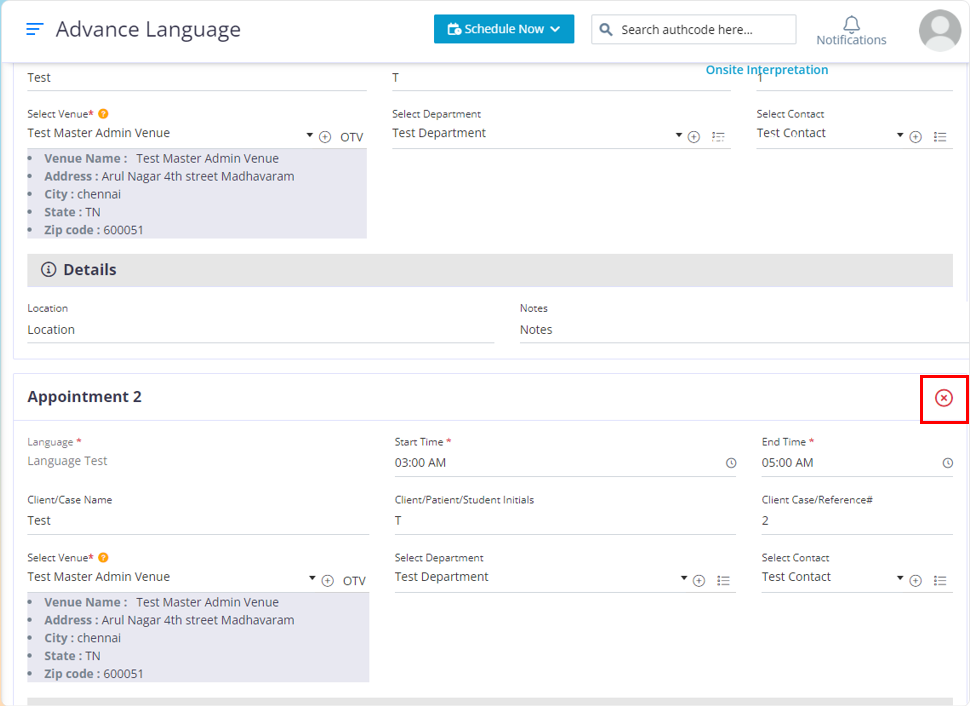
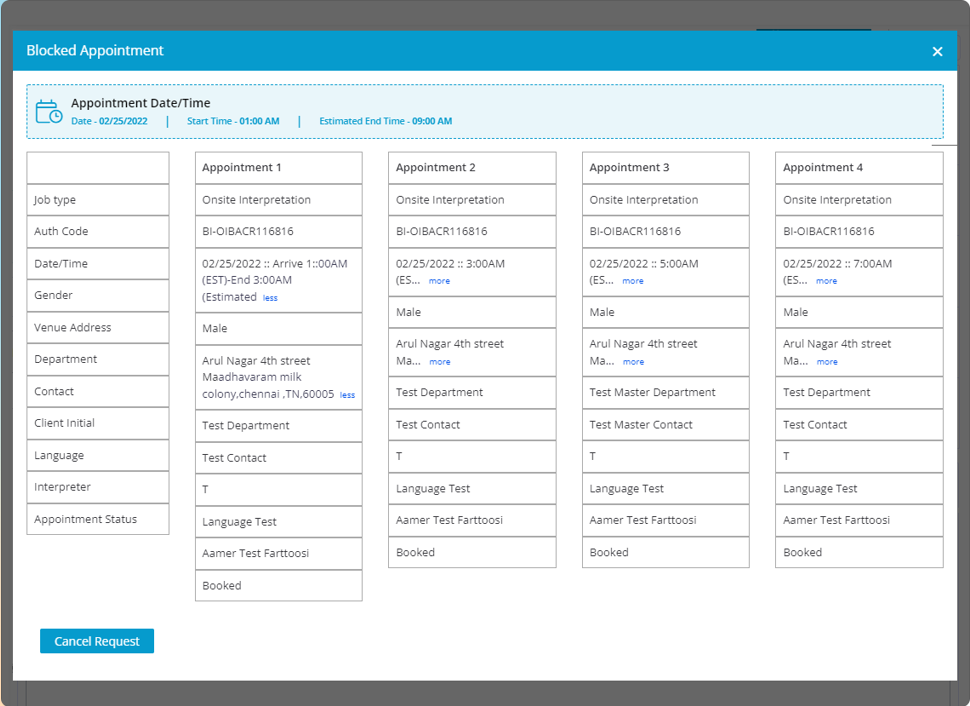
After you click on the “Add Appointment” button it will open up another block for you to use. If you want to close the block click on the “x” icon.
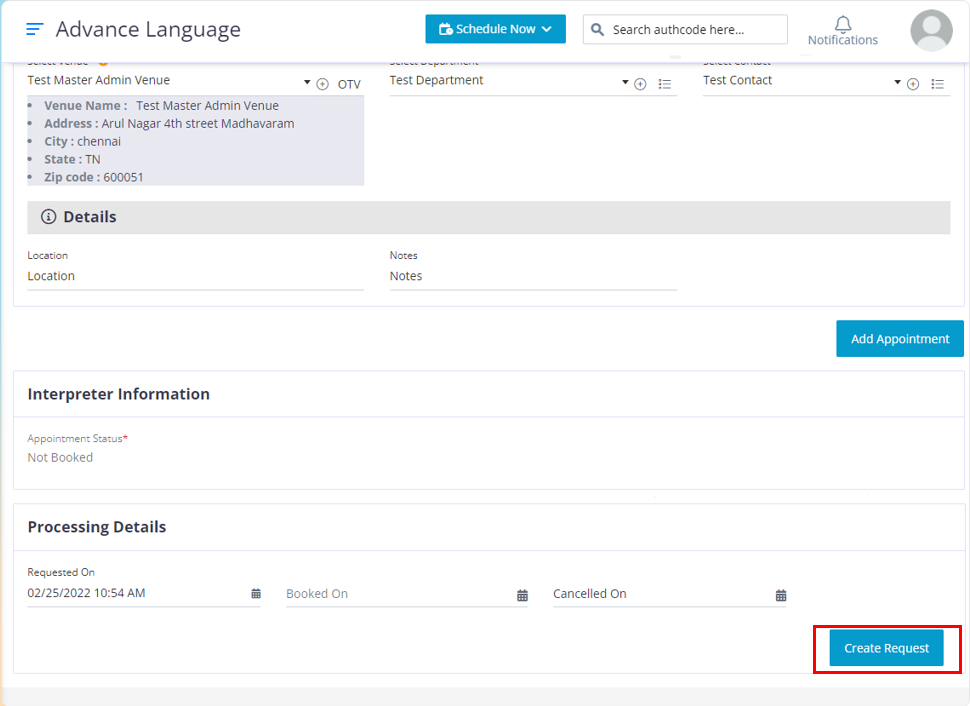
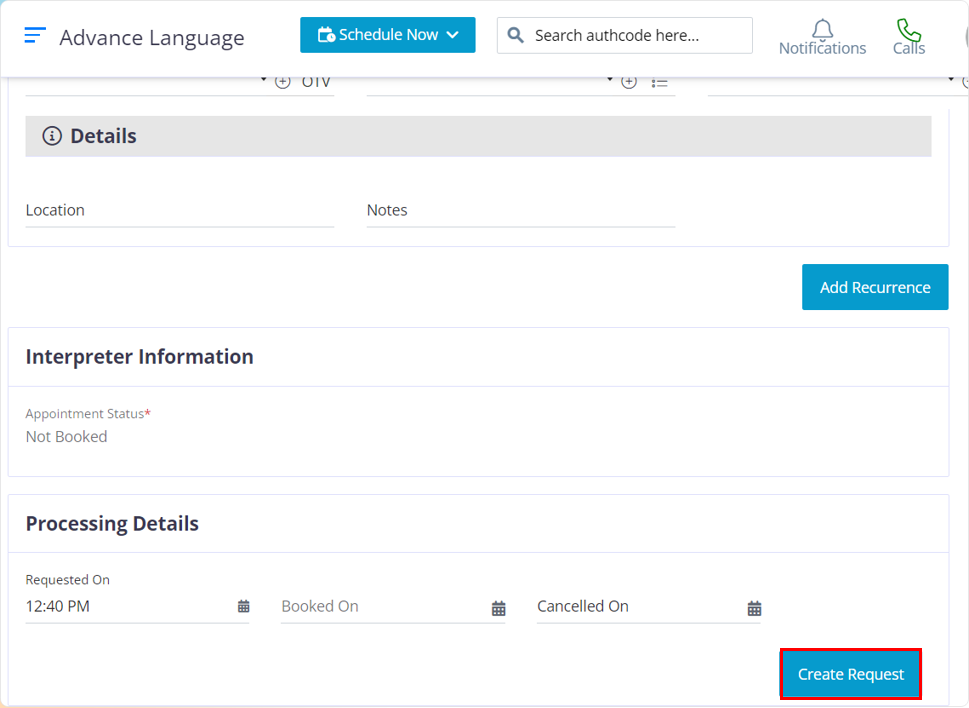
Once you have completed entering the required information into the blocks click on the “Create Request” button.
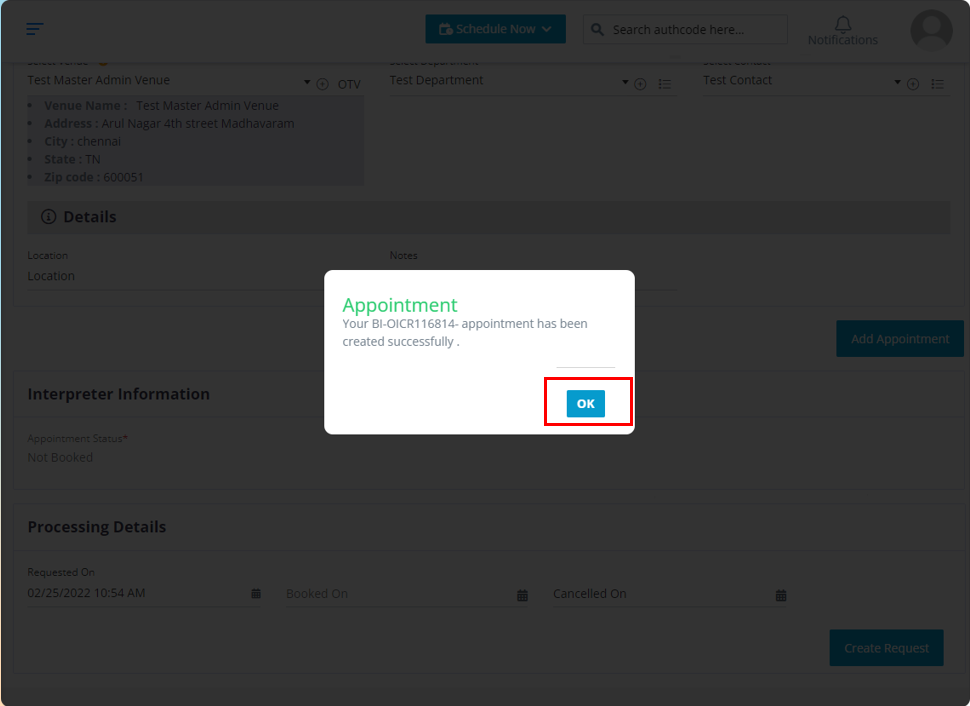
Click on the “OK” button.

After you click on the “ok” button it will redirect you to the dashboard, where you can view the appointment.
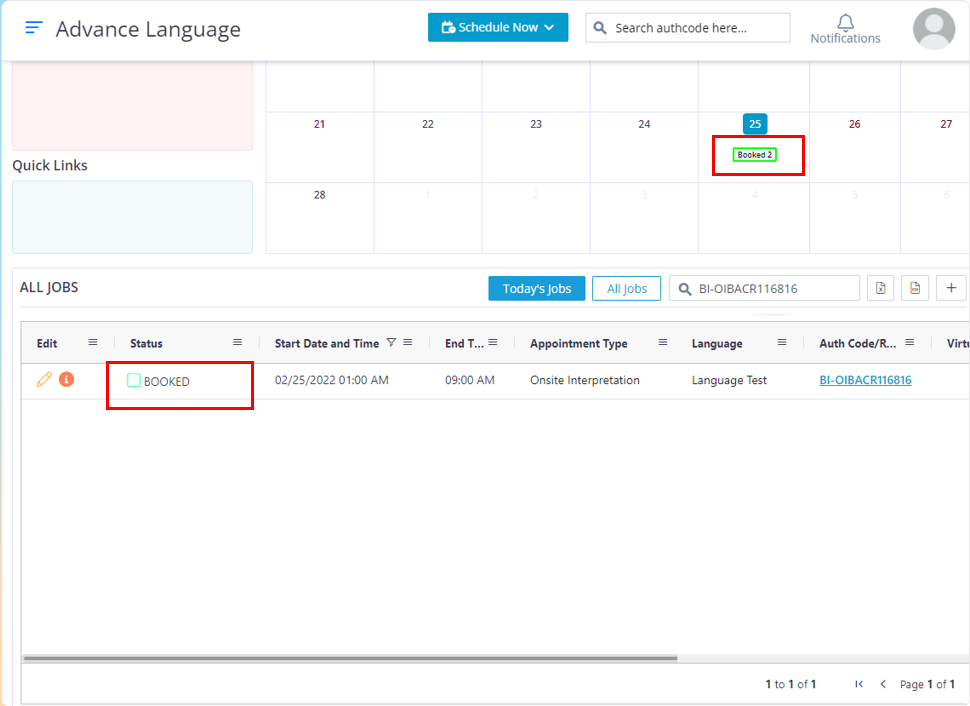
After the appointment is booked, the status of the appointment in the grid will change from Not-Booked to Booked.
Click on the “i” icon to view the vendor’s name along with the appointment details.
Follow the below steps to Learn
How to create an Onsite Recurring appointment by using the Customer’s side credentials & How the company staff can edit the recurring appointment
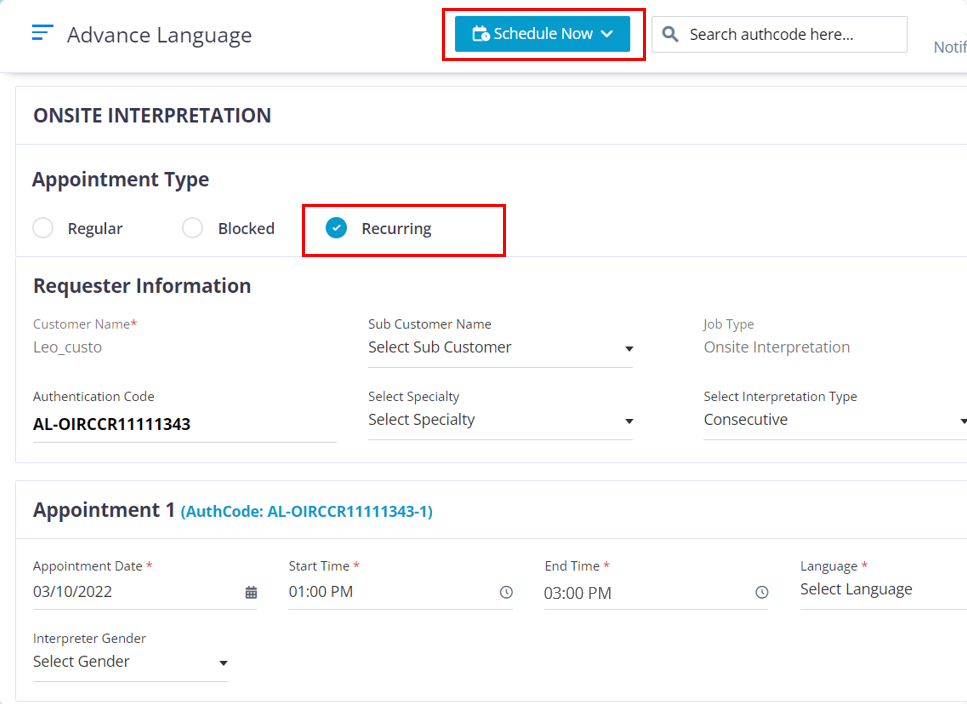
Move your cursor to the “Schedule Now Button” and click on the Onsite Interpretation option.
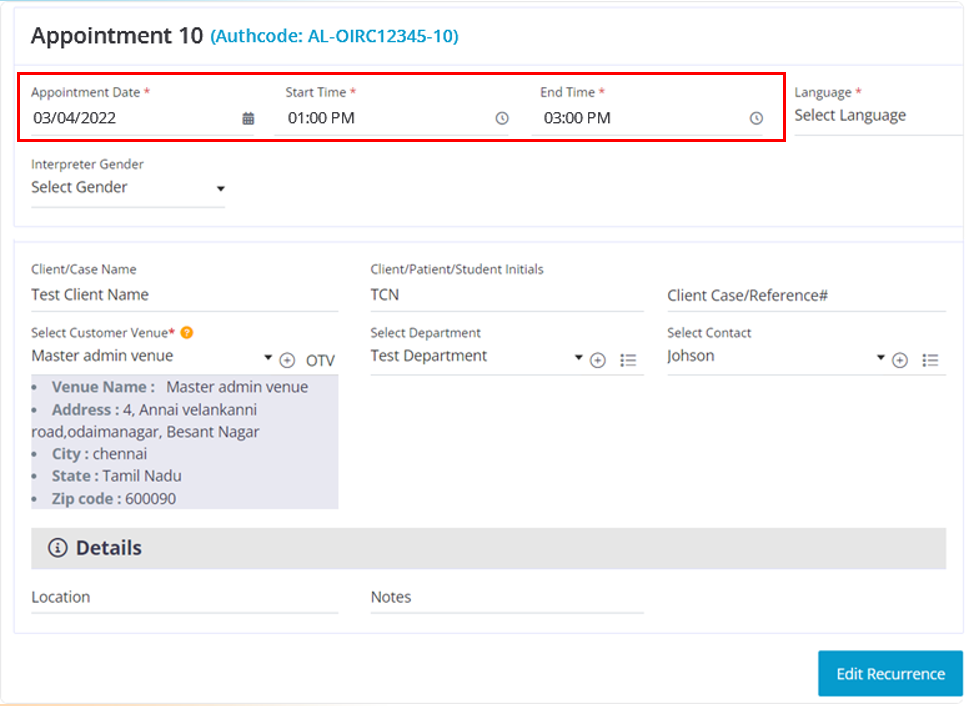
In the Appointment type section choose “Recurring”
The fields that have a red star at the top of them are mandatory fields. The other fields are optional and can be filled based on your company requirements.

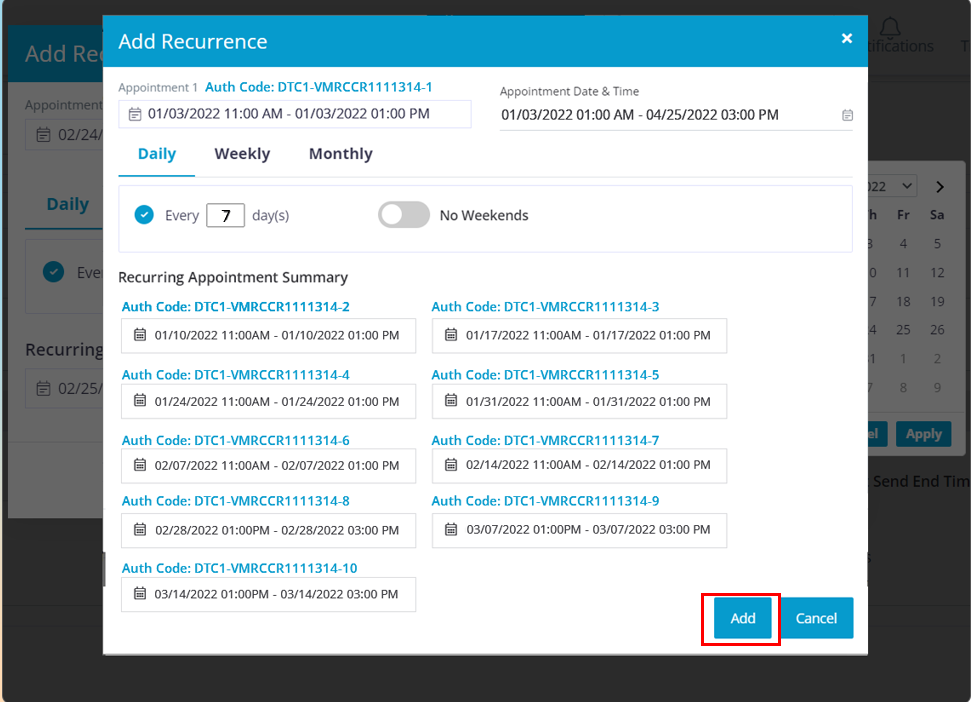
After you complete filling up the required data for appointment 1, click on the “Add Recurrence” button
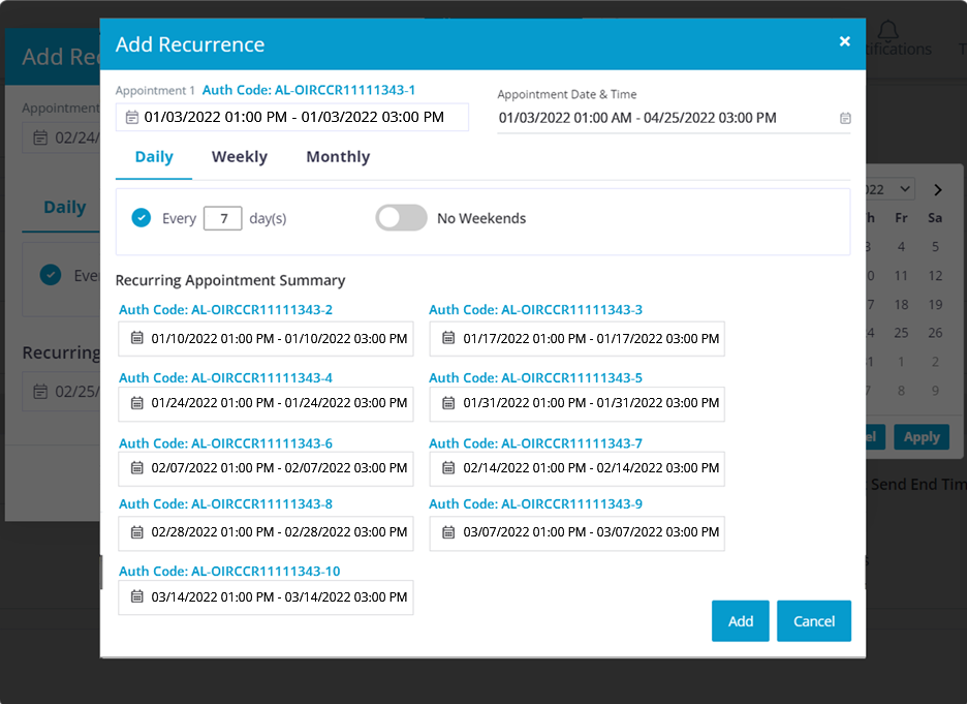
In this pop up, you need to choose the required date range, say from January to April, after you choose the required date range, there are 3 filter options that you can use to alter the recurring pattern for the appointments and those filters are Daily, Weekly, and Monthly.
Daily section, The Every Day(s) filter helps you to set a recurring pattern based on the number of days. For example: The chosen date range is from January 1st to April 25th. assume today is a Monday and you have entered 7 in the Every day(S) box. It will set the recurring pattern to choose the next available date after every 7 days, so all the Mondays within the selected date range will be chosen. You have an option to exclude the weekends too.
Weekly, This functionality helps you to choose selected days in a week. Example: you choose Jan 1st to 31st as the date range and now you choose the weekly option, you will find all the days in a week (Monday to Sunday). If you choose Monday and Tuesday from the days displayed in the option, the software will calculate the available Mondays and Tuesdays with in the selected date range and it will populate the appointment below.
Monthly This helps you to set a monthly pattern for your recurring appointment. Once you have set the recurring pattern the available days will be chosen and you will find the required appointments below. Click on the “Add” button
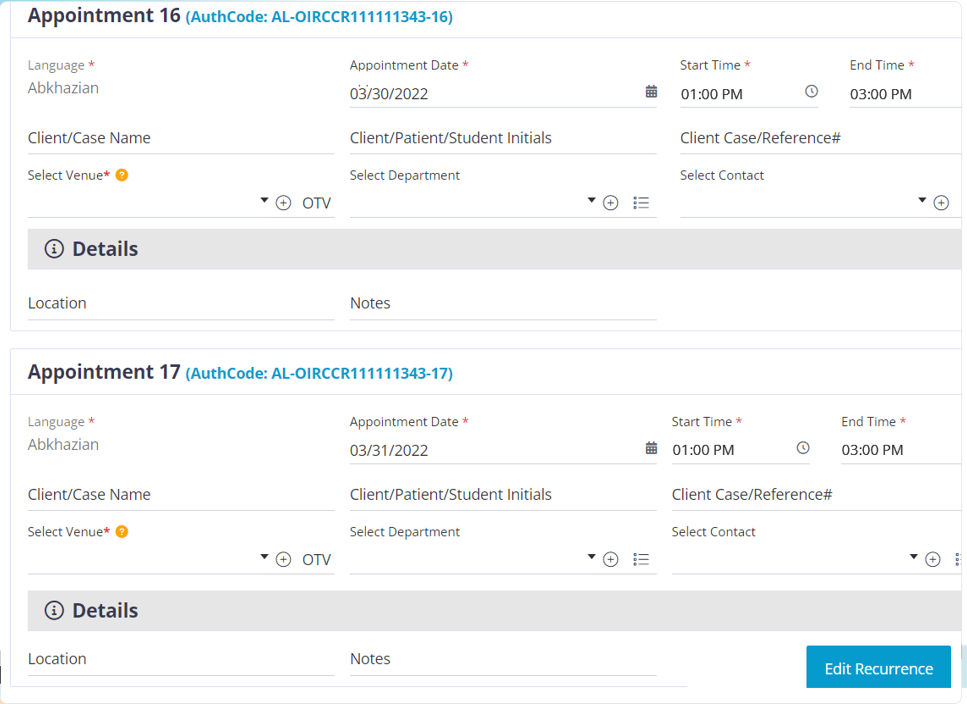
Now in your appointment page you will find all the appointments with their chosen dates and their unique authentication number listed in order.
Click on the “Create Appointment” button to create the appointment.
Now in your appointment page you will find all the appointments with their chosen dates and their unique authentication number listed in order.
Click on the “Create Appointment” button to create the appointment.

Now in your appointment page you will find all the appointments with their chosen dates and their unique authentication number listed in order.
Click on the “Create Appointment” button to create the appointment.
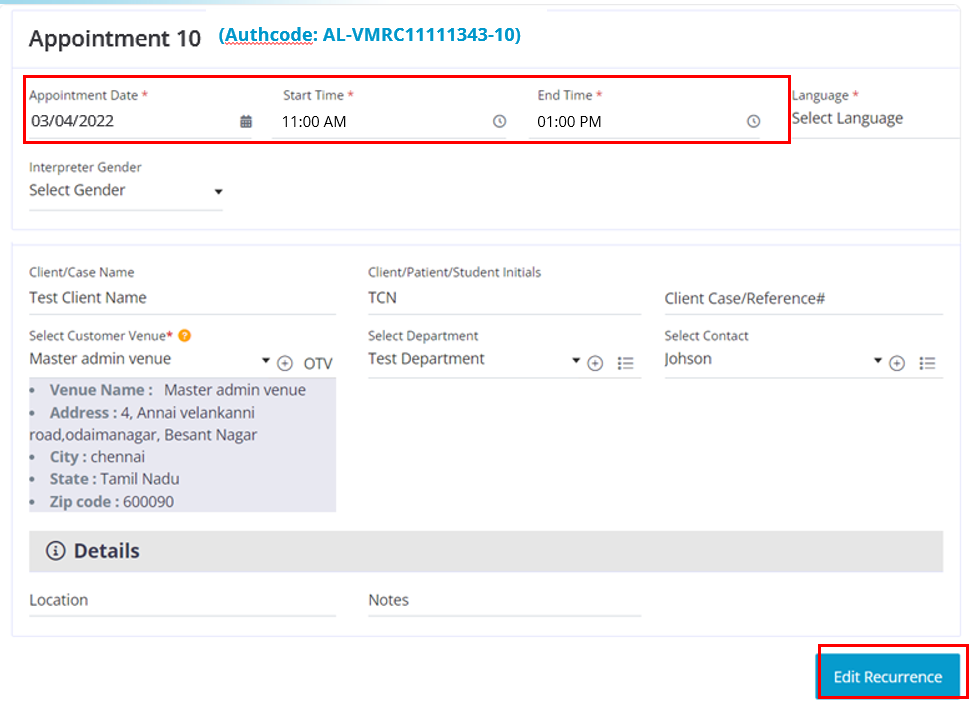
Open the required app and make the required changes to the appointment and click on the “Update Appointment” button. Now only this particular appointment will be updated with the entered information
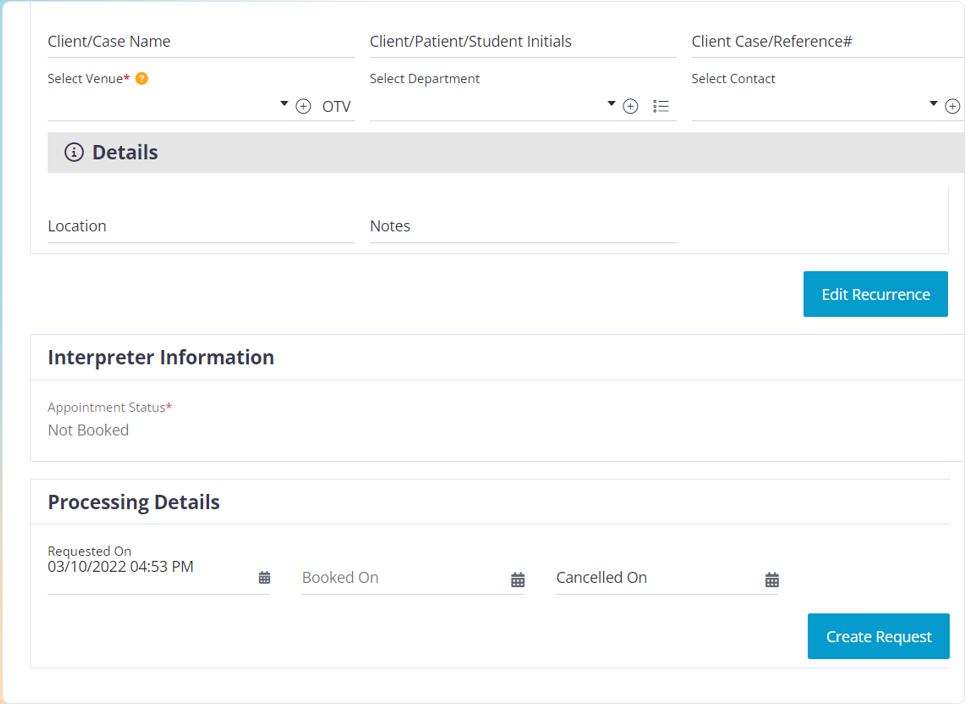
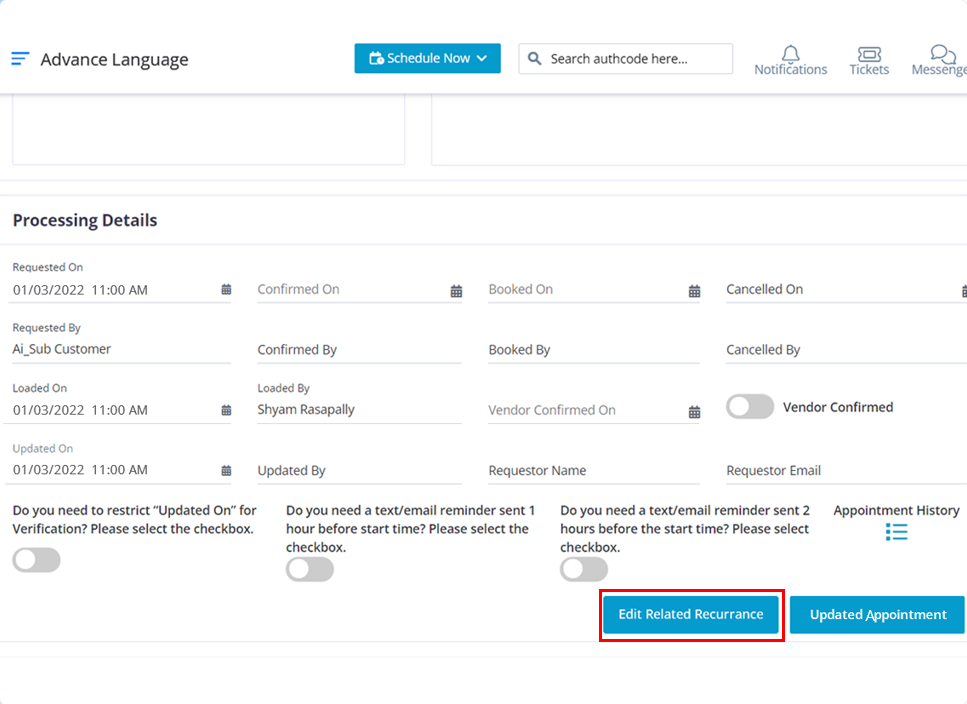
Open the chosen recurring appointment. Scroll down and click on the “Edit Related Recurrence” button
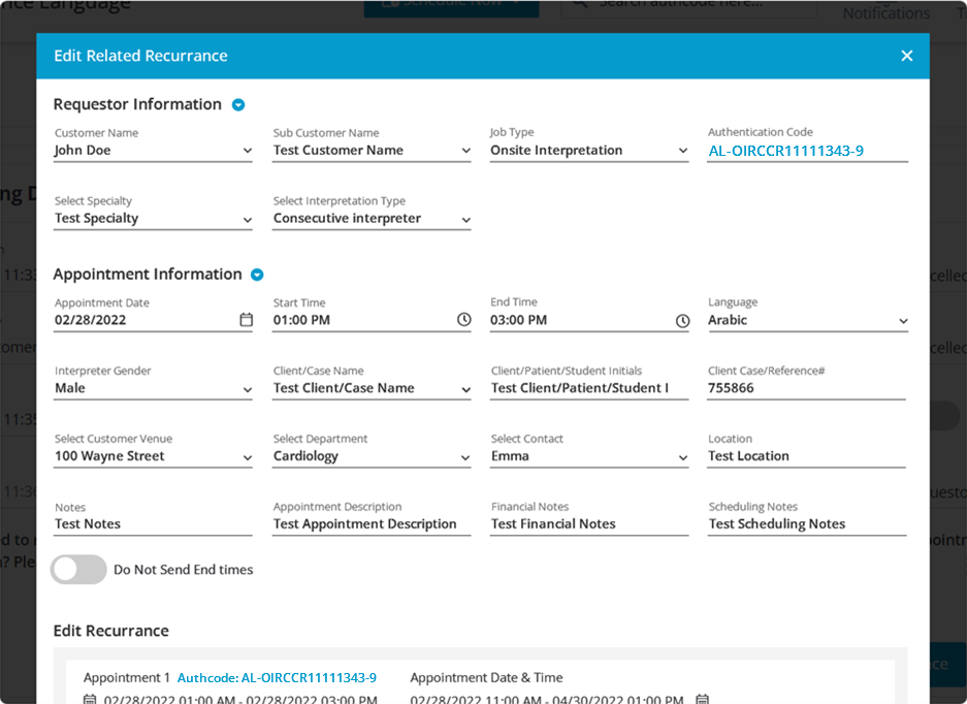
Make the required changes based on your requirements in this page.
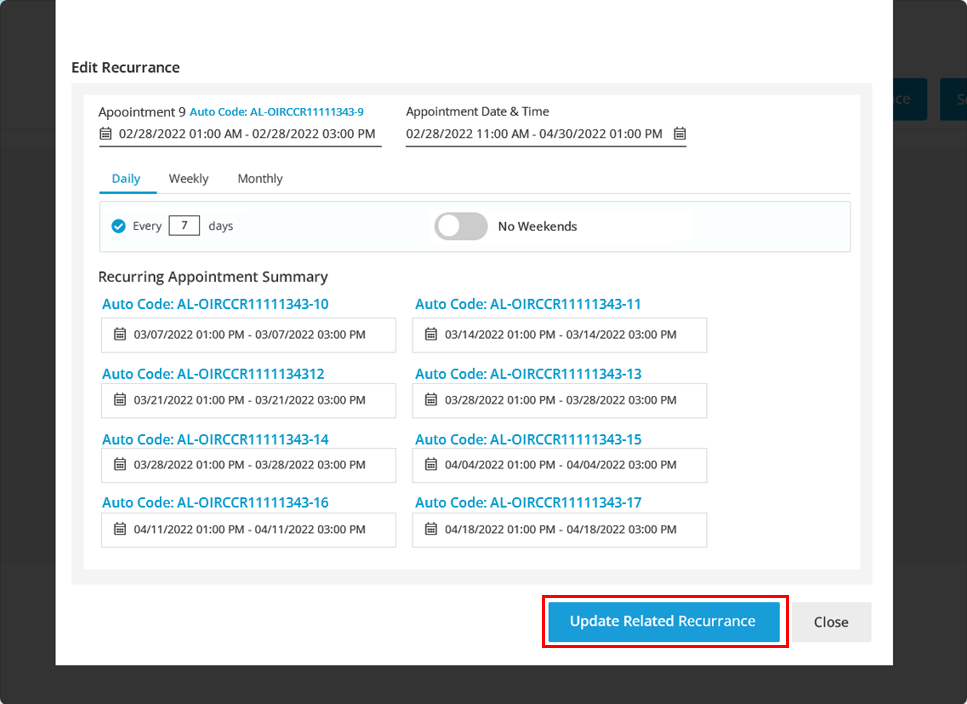
Use the date filter to choose the appointments to which you want to apply these changes.
Once done, click on the “Update Related Recurrence” button. The chosen appointments will be updated with the entered data.

To create a onsite regular appointment using the customer’s credential, please follow the below steps.
Move you cursor to the “Schedule Now” button and click on Onsite interpretation.

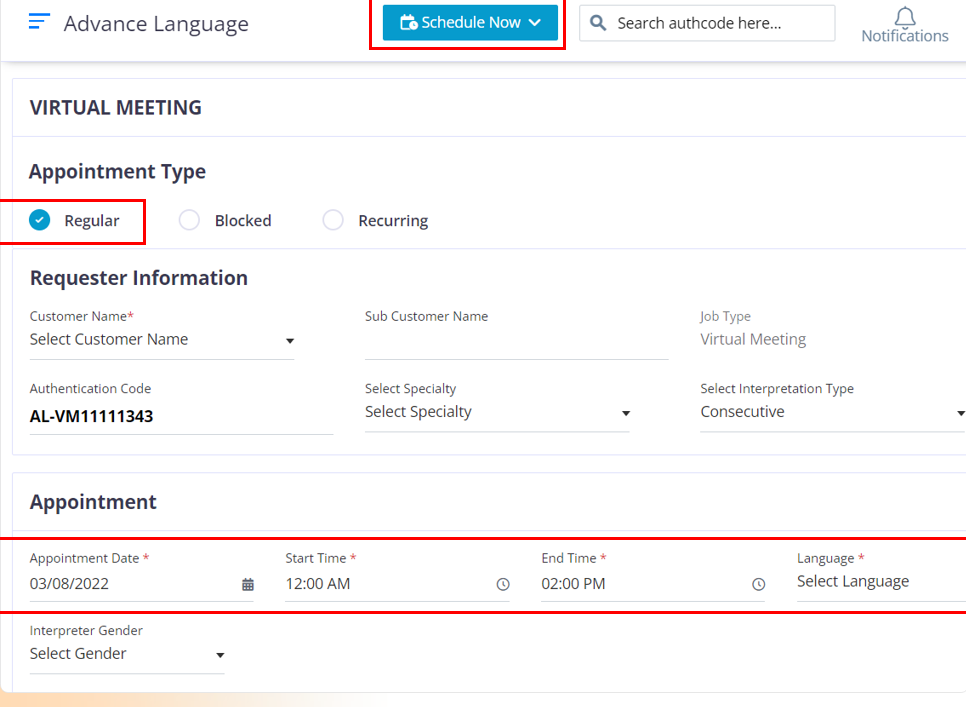
All required fields are marked with a red asterisk (*)
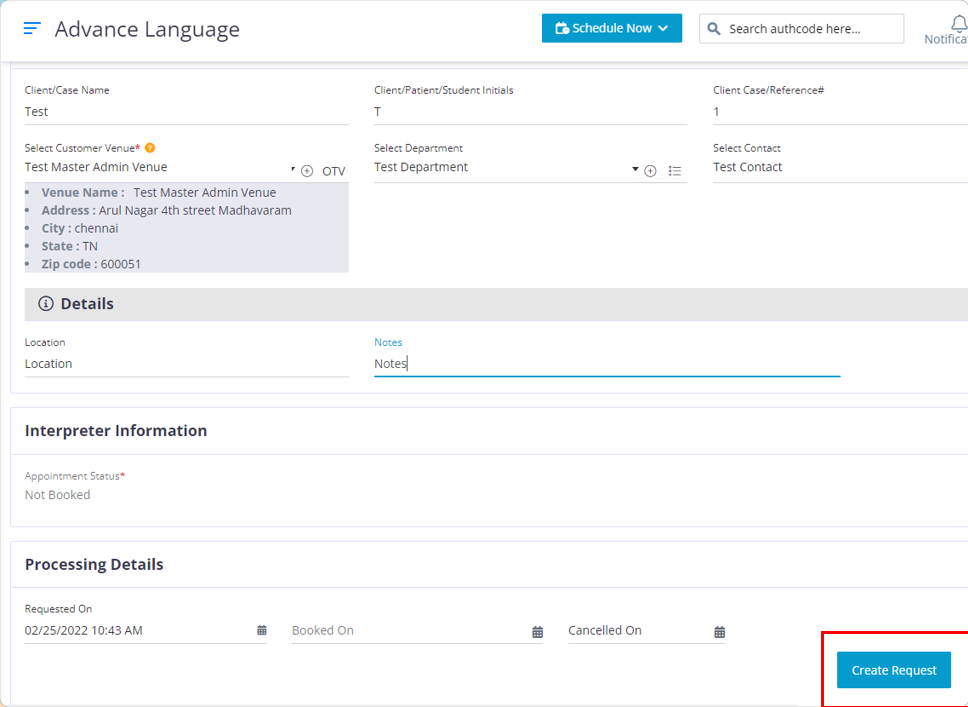
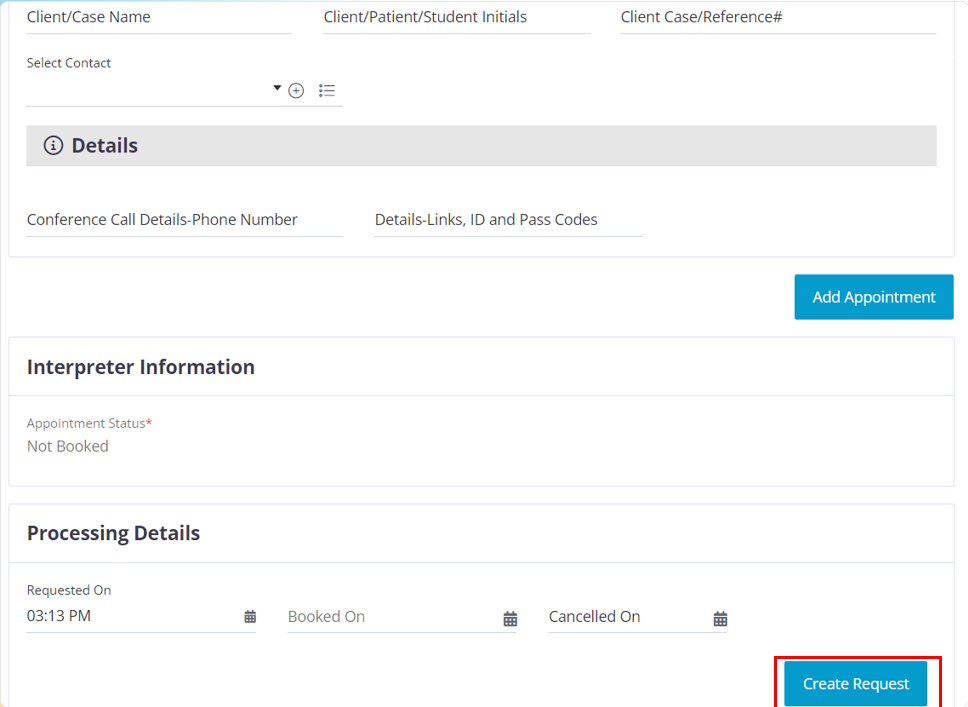
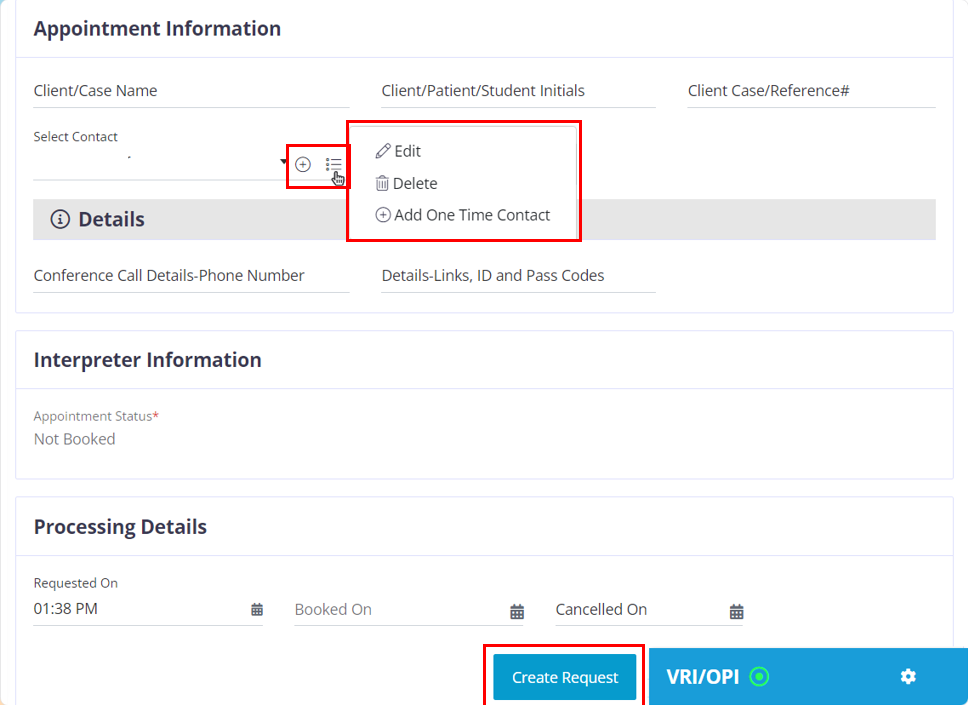
After entering the required information into the appointment, click on the “Create Request” button.
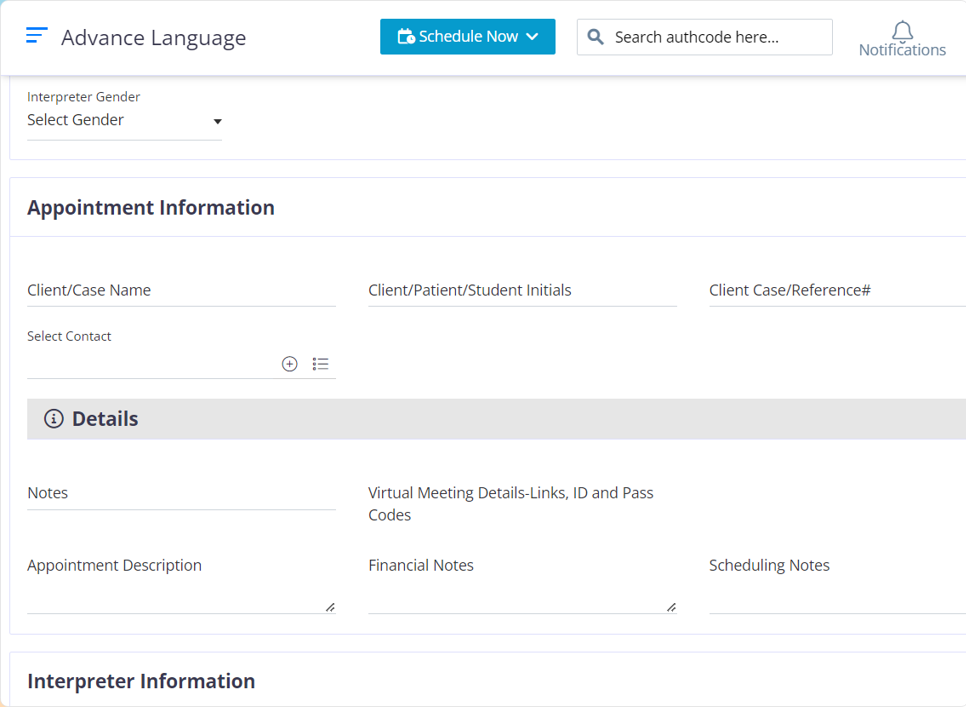
Please provide any additional appointment information in the notes field.
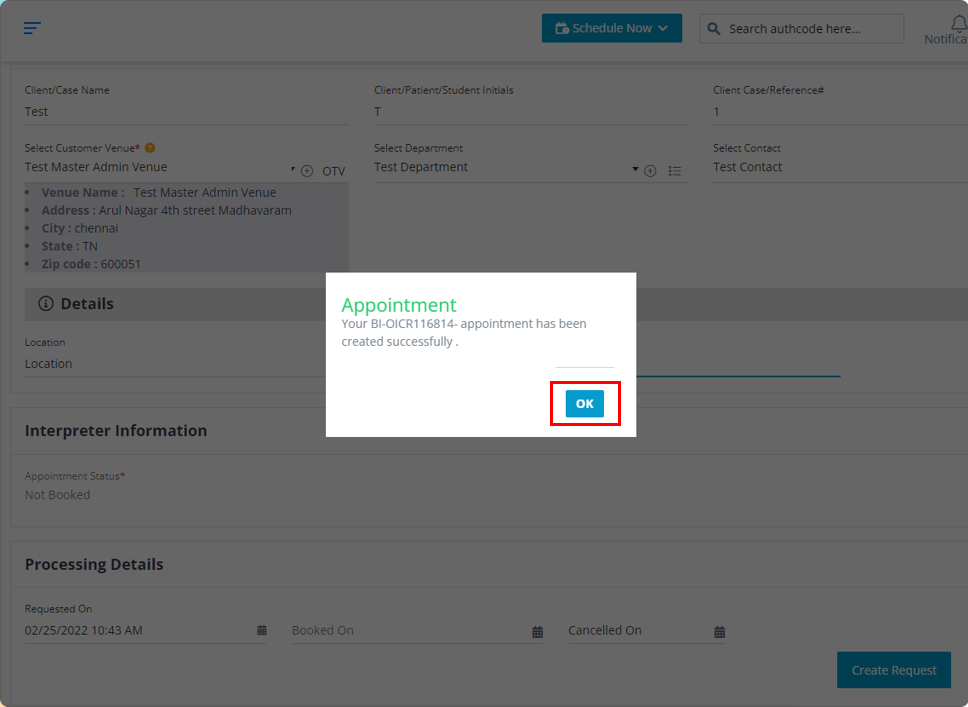
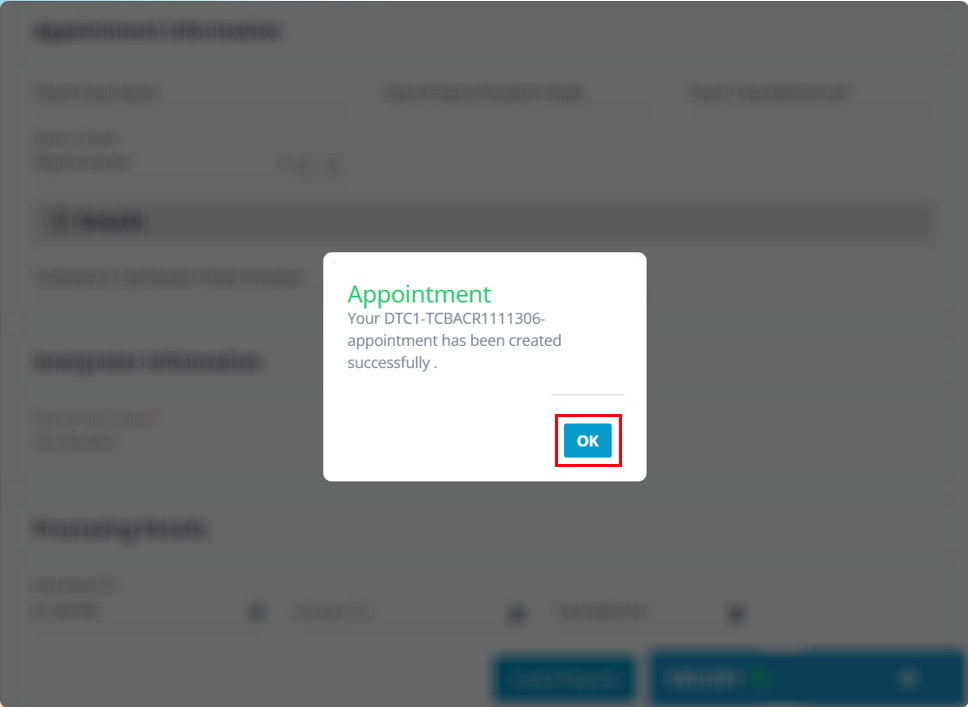
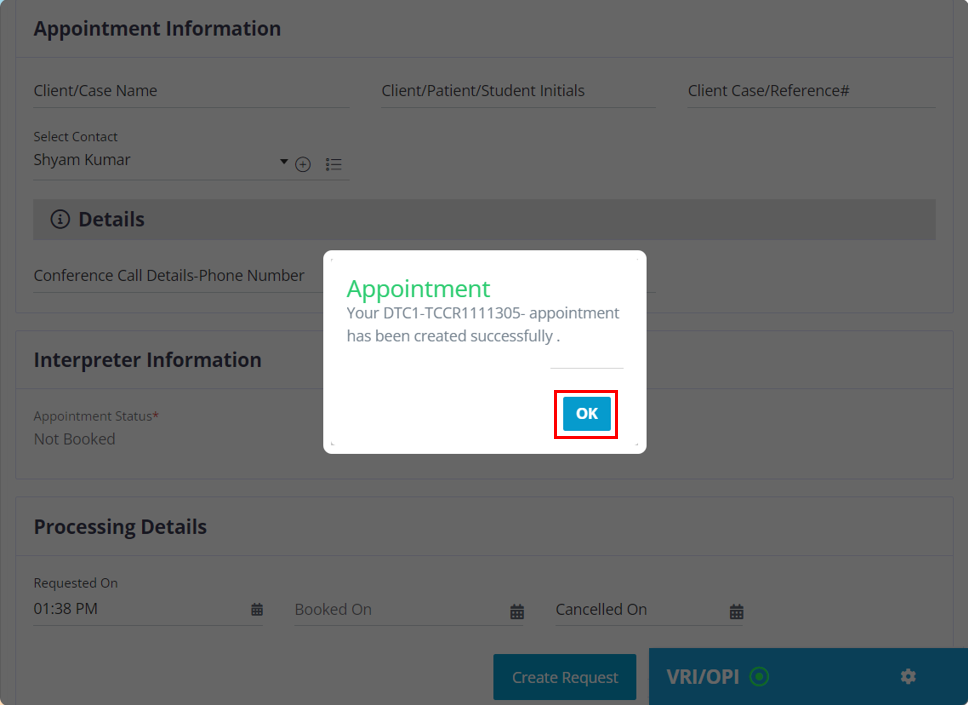
Click on the “OK” button.
Once appointment is successfully created you will receive an email stating we have received your request.
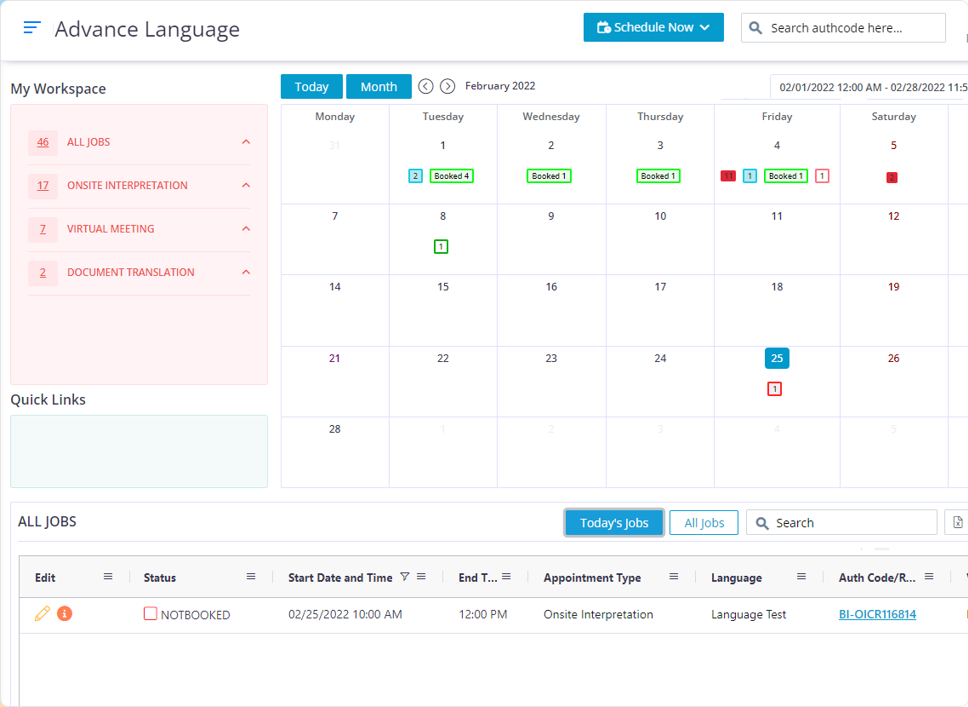
After you click on the “OK” button, you will be redirected to the dashboard where you can find the appointment.
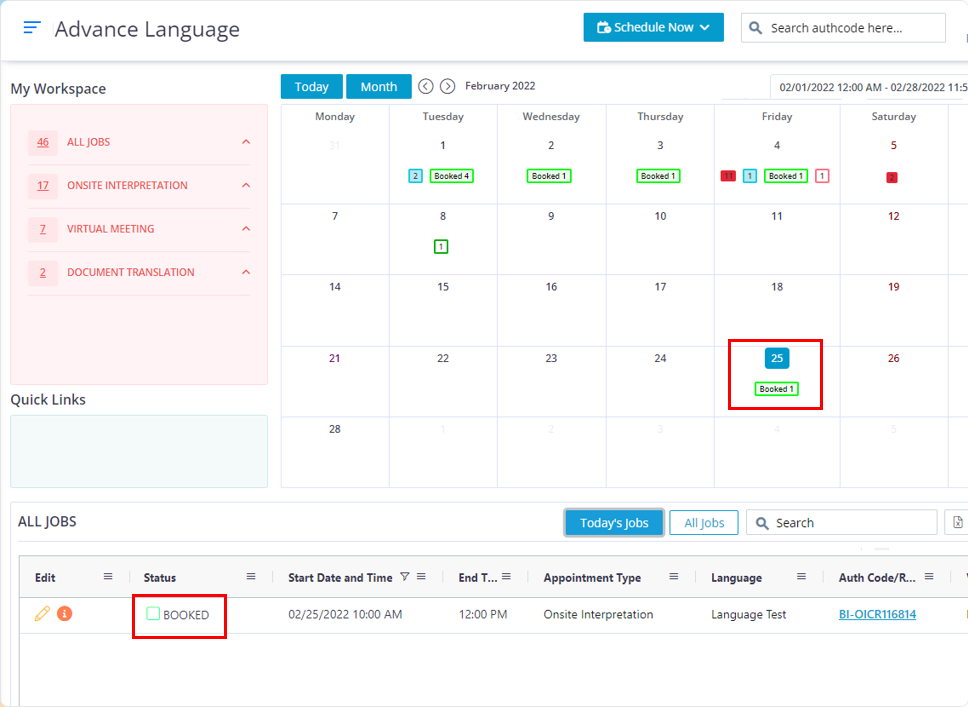
After the appointment has been booked, the appointment’s status in the grid will automatically change from Not-Booked to Booked.
Once Baystate books your appointment you will receive an email confirmation
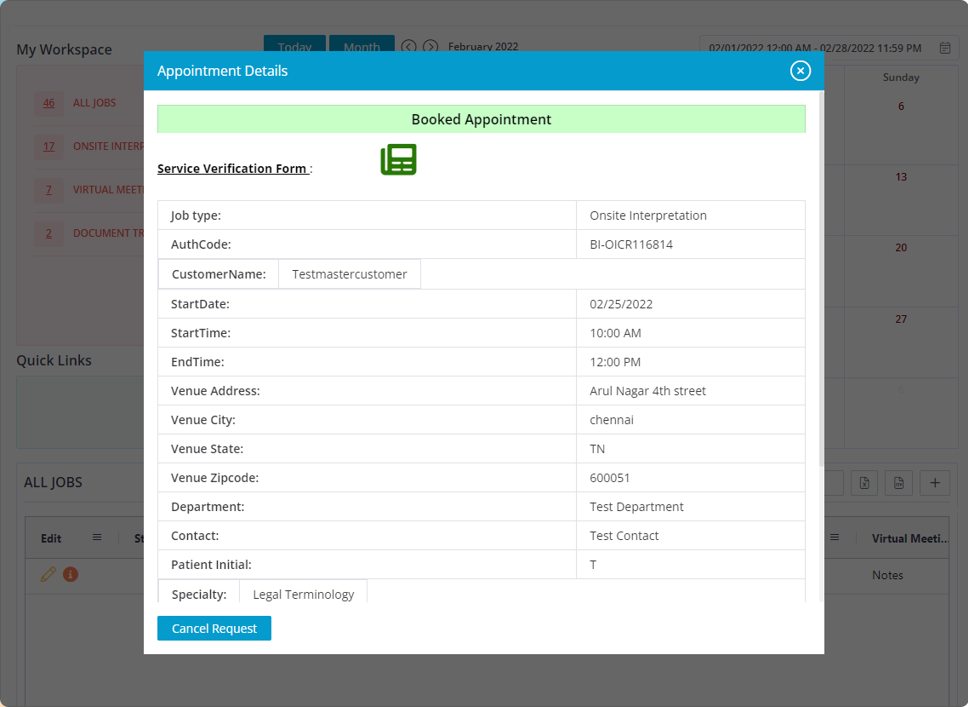
Click on the “i” Symbol to view the booked interpreter’s name and the appointment details.
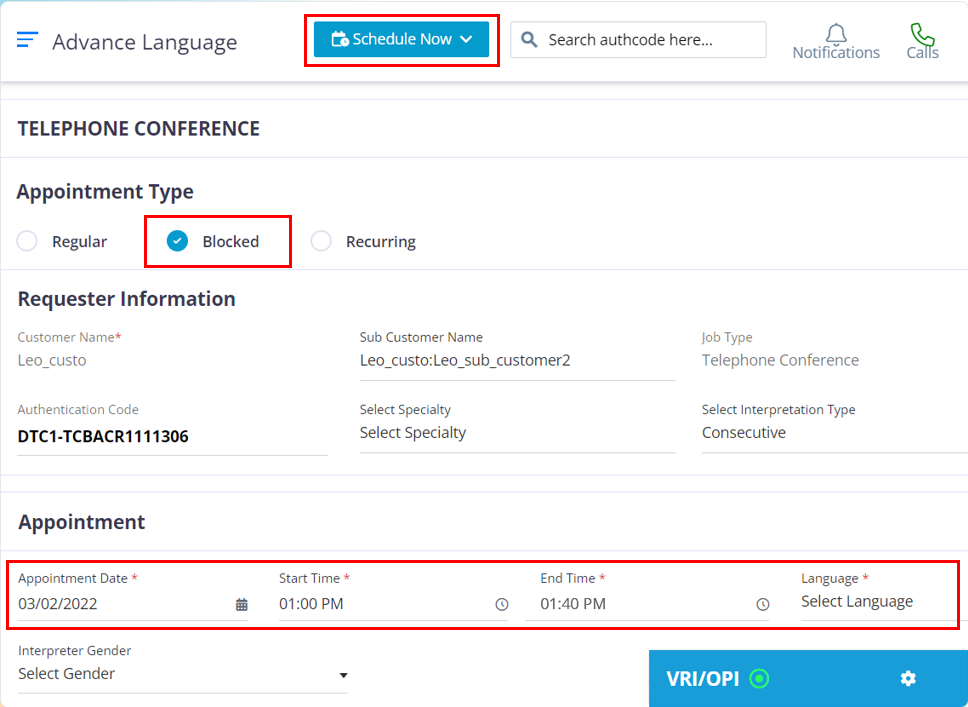
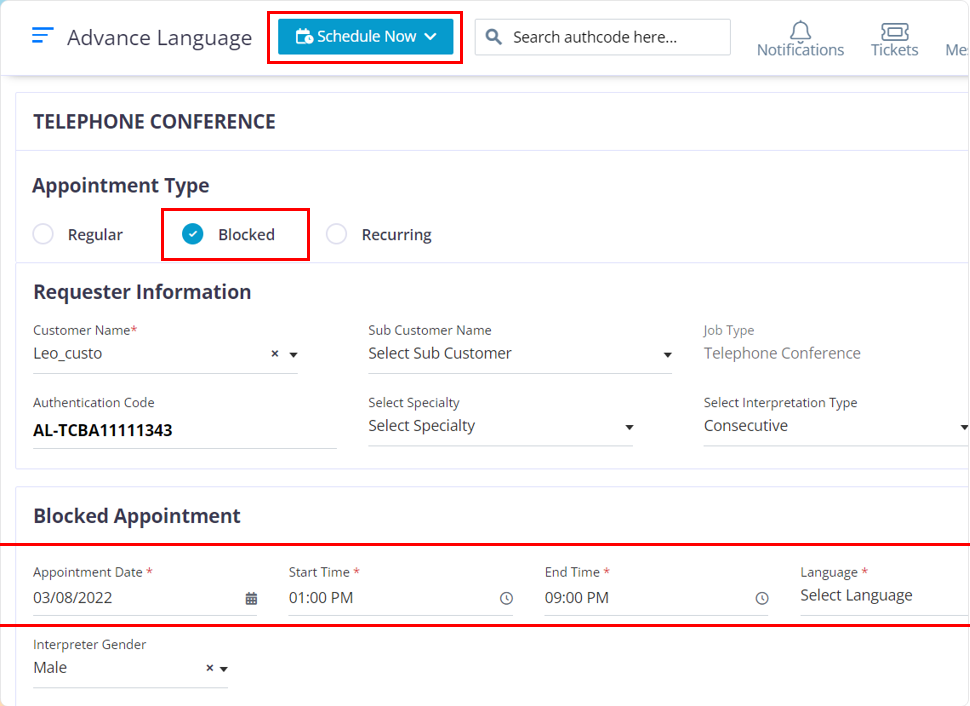
To Create a Telephone Conference blocked appointment by using the customer’s credentials, please follow the below steps
After you are done entering appointment information, Click on the “Add Appointment” button to open up a new block to enter the required appointment details.
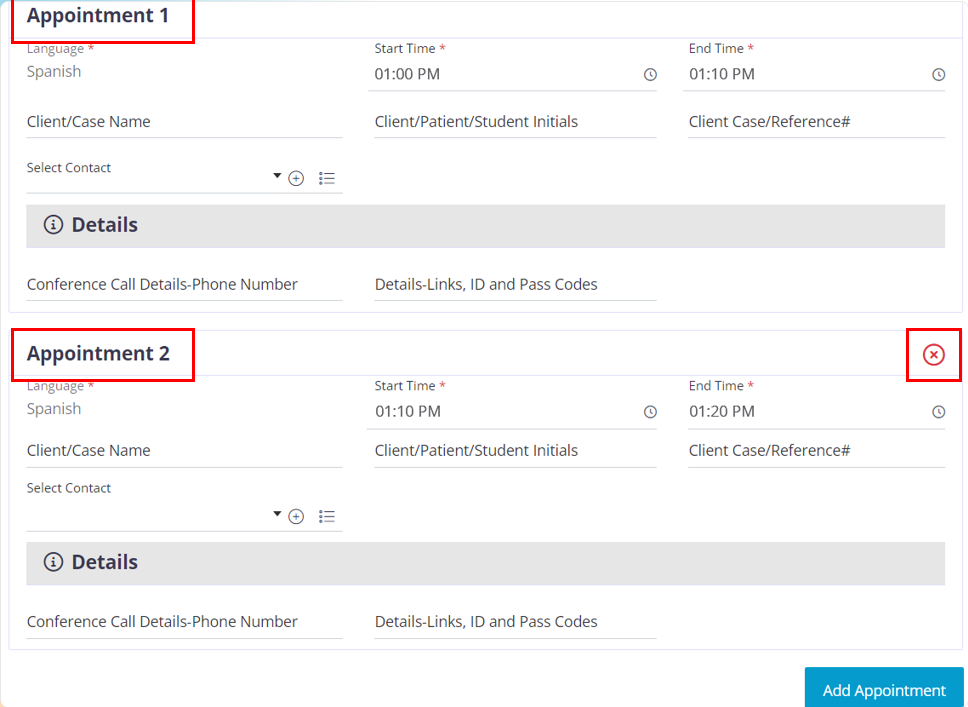
This is how a new block would look, the block will appear in the order of Appointment 2, Appointment 3, and Appointment 4. You can create a maximum of 4 blocks per authentication code. In case if you want to cancel a block click on the “x” icon.
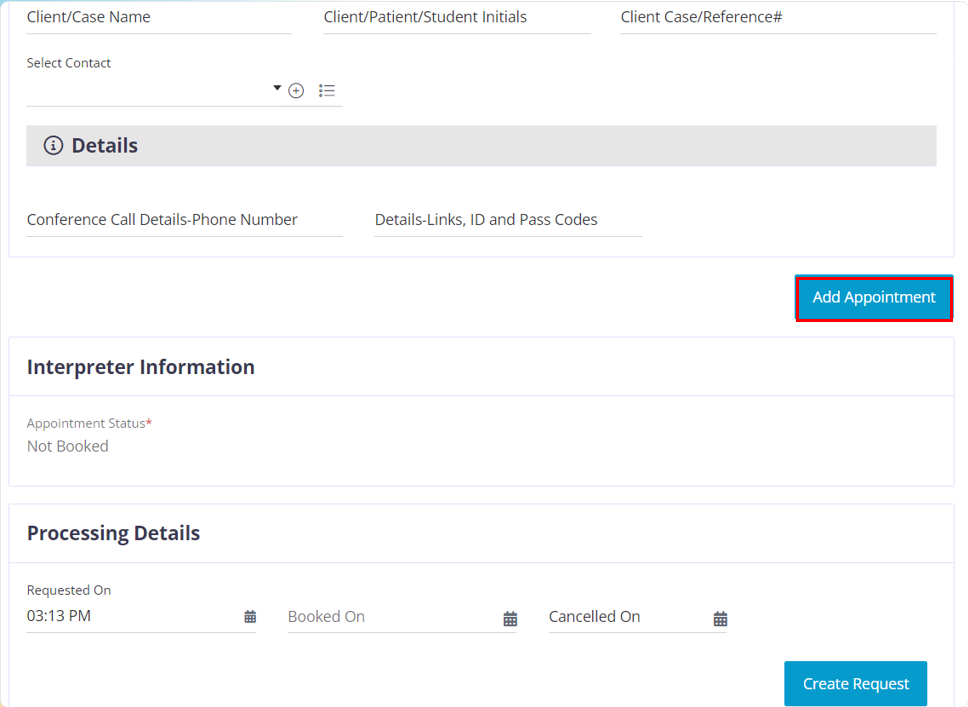
Once you have completed entering the required appointment information in the blocks click on the “Create request” button.
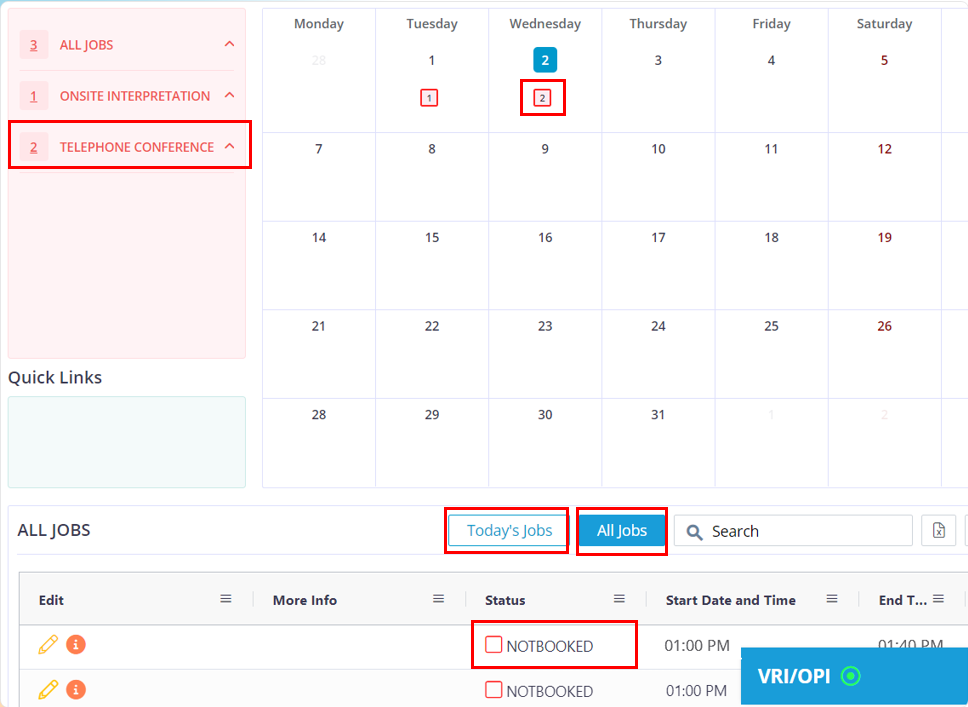
After you click on the “OK” button it will redirect you to the dashboard where you can find the appointment by using the authentication code or by searching for it in the my work space section under Telephone Conference” in the “Not-Booked” Status. Once it is booked it will be moved into the booked status.
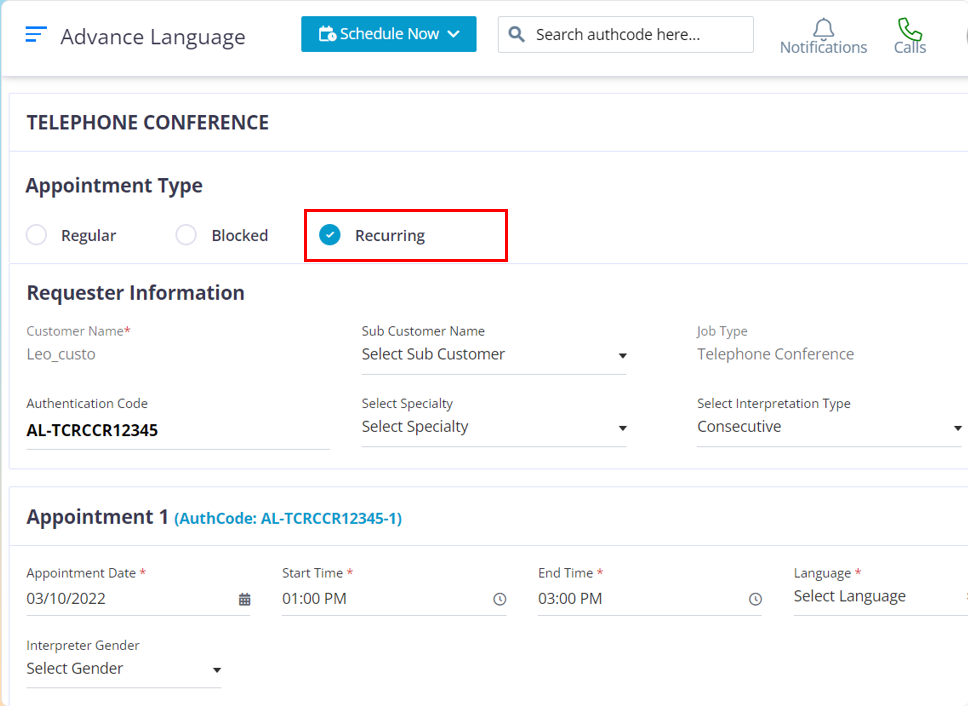
To create a telephone conference recurring appointment, please follow the below steps.
Move your cursor to the “Schedule Now Button” and click on the Onsite Interpretation option.
In the “Appointment type” section choose “Recurring”
The fields that have a red star at the top of them are mandatory fields. The other fields are optional and can be filled based on your company requirements.
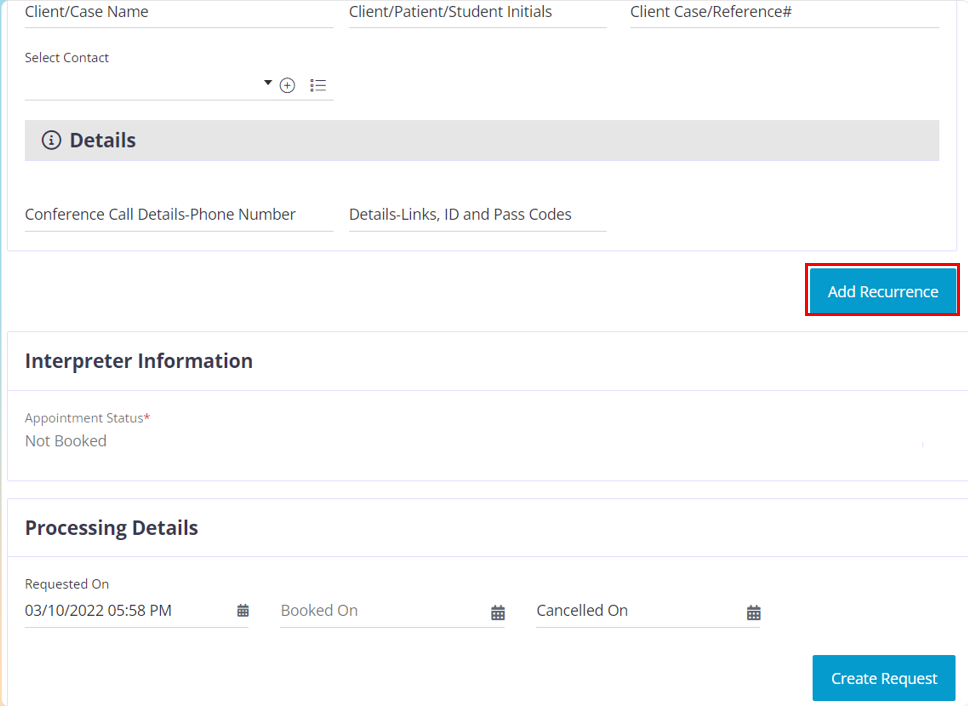
After you complete filling up the required data for appointment 1, click on the “Add Recurrence” button
In this pop up, you need to choose the required date range, say from January to April, after you choose the required date range, there are 3 filter options that you can use to alter the recurring pattern for the appointments and those filters are Daily, Weekly, and Monthly.
Daily section, The Every Day(s) filter helps you to set a recurring pattern based on the number of days. For example: The chosen date range is from January 1st to April 25th. assume today is a Monday and you have entered 7 in the Every day(S) box. It will set the recurring pattern to choose the next available date after every 7 days, so all the Mondays within the selected date range will be chosen. You have an option to exclude the weekends too.
Weekly, This functionality helps you to choose selected days in a week. Example: you choose Jan 1st to 31st as the date range and now you choose the weekly option, you will find all the days in a week (Monday to Sunday). If you choose Monday and Tuesday from the days displayed in the option, the software will calculate the available Mondays and Tuesdays with in the selected date range and it will populate the appointment below.
Monthly This helps you to set a monthly pattern for your recurring appointment. Once you have set the recurring pattern the available days will be chosen and you will find the required appointments below. Click on the “Add” button
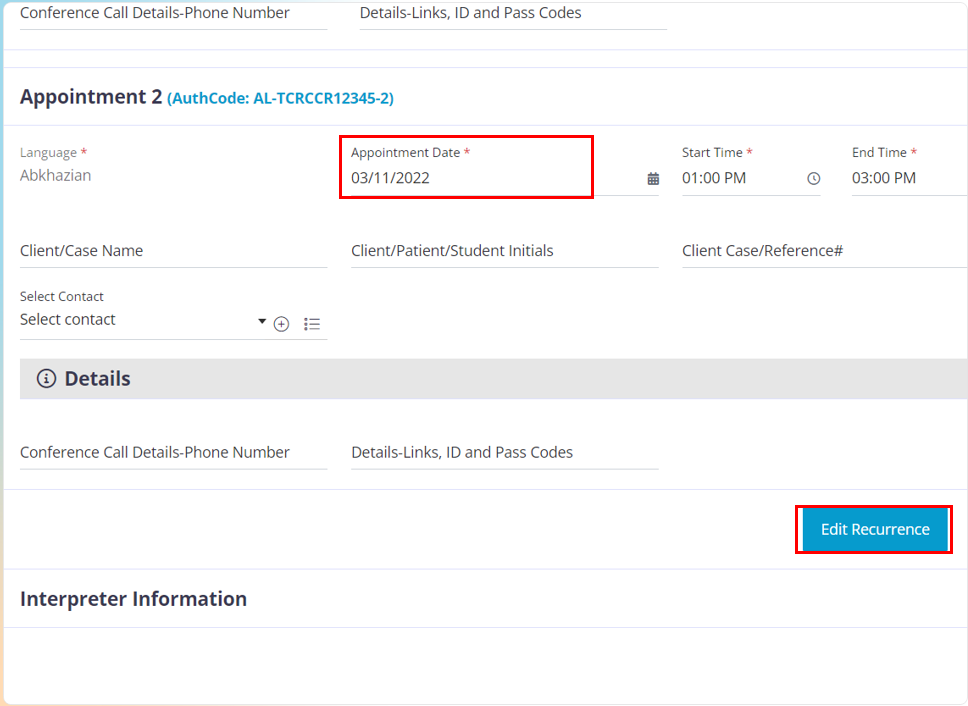
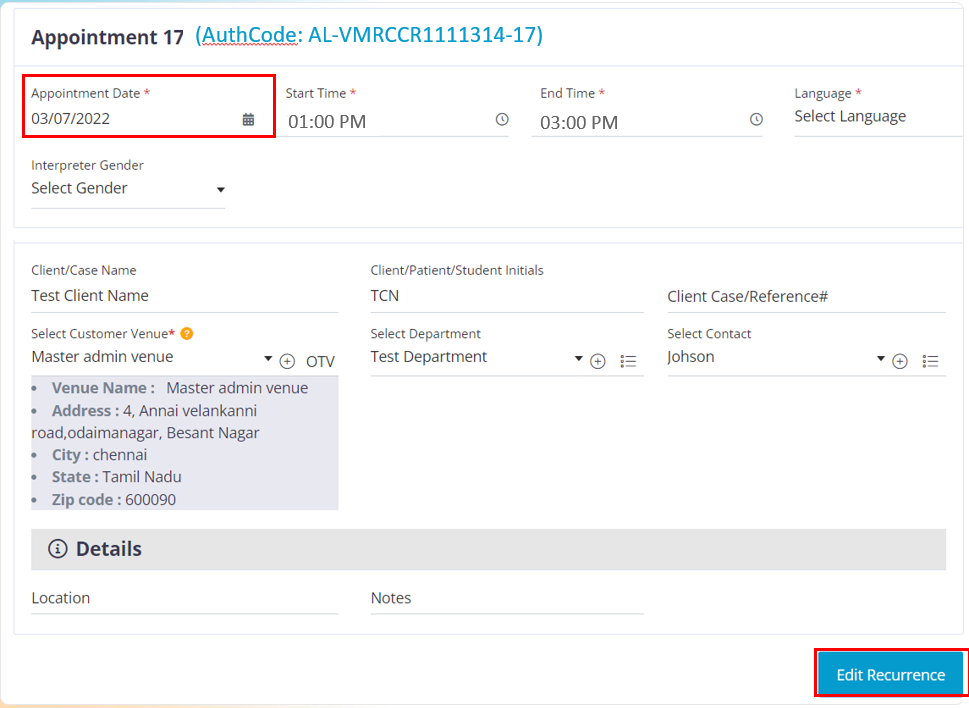
Now in your appointment page you will find all the appointments within the chosen date and their unique number listed in order. Incase if you wish to change the date for a particular appointment you can go to that particular appointment and click on the date field and change the date. But if you want to change the date for the series then, you will have to click on the “Edit Recurrence” button to edit the recurring pattern again.
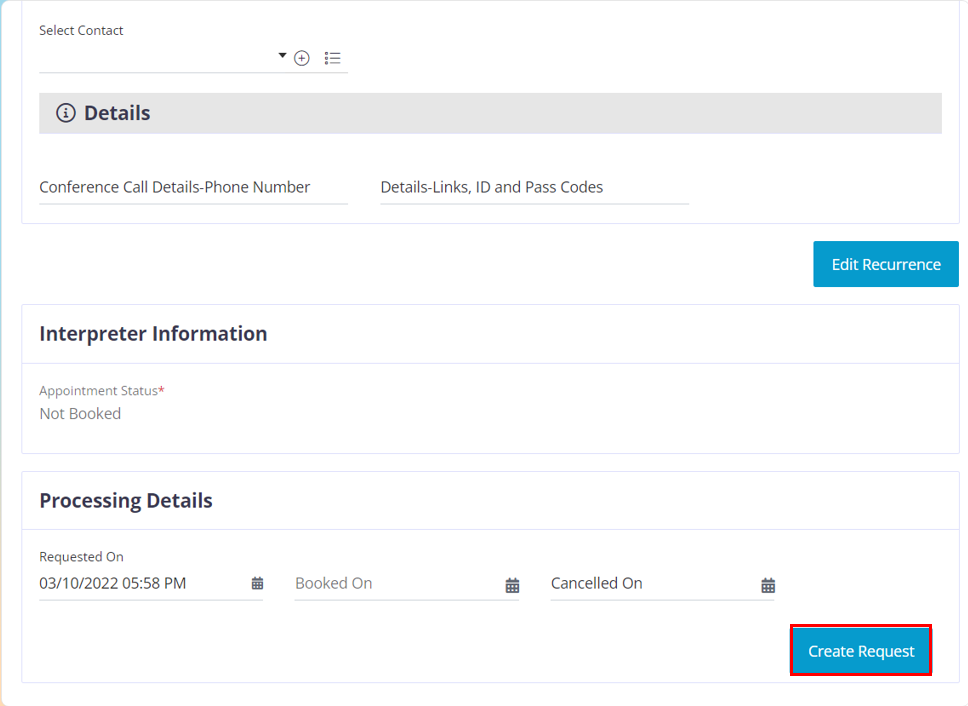
Click on the “Create Appointment” button to create the appointment. Now you have successfully created your recurring appointments.
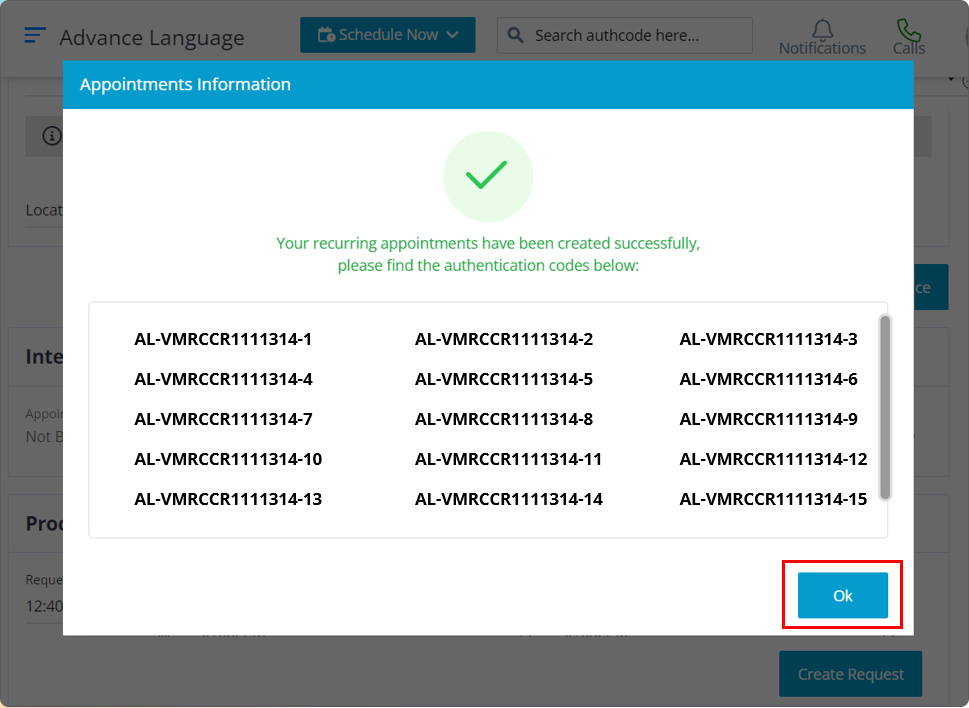
Click on the “OK” button, The pop up displays all the authentication code for the recurring appointments that you have created.
After you click on the “OK” button you will be re-directed to the dashboard where you can view the appointments.

To Create a regular telephone conference appointment by using the customer’s credentials, please follow the below steps.
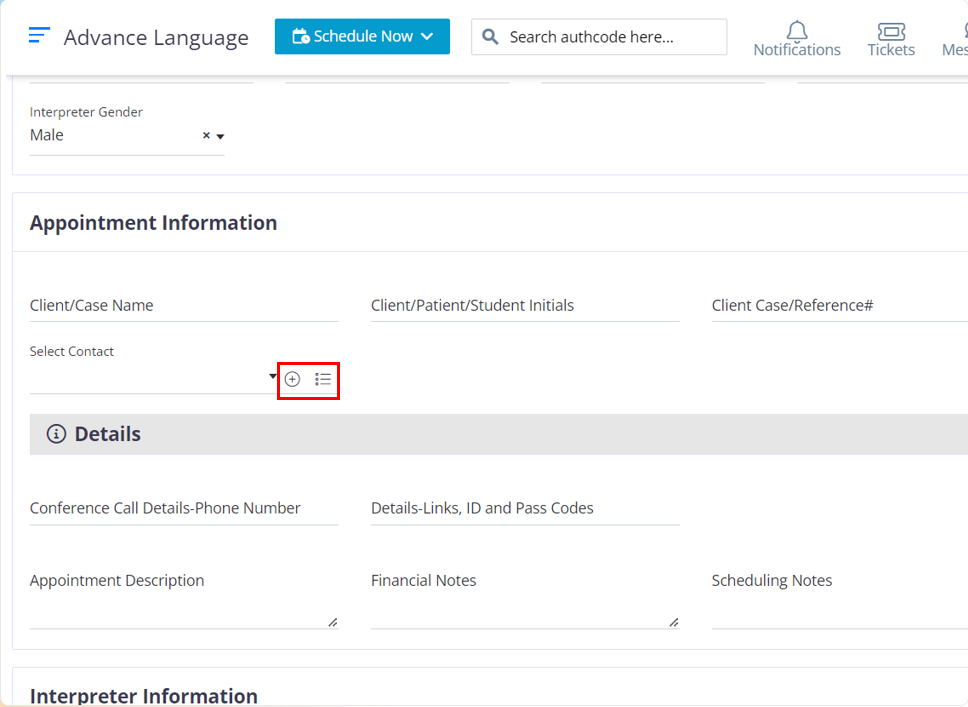
Appointment Information section:
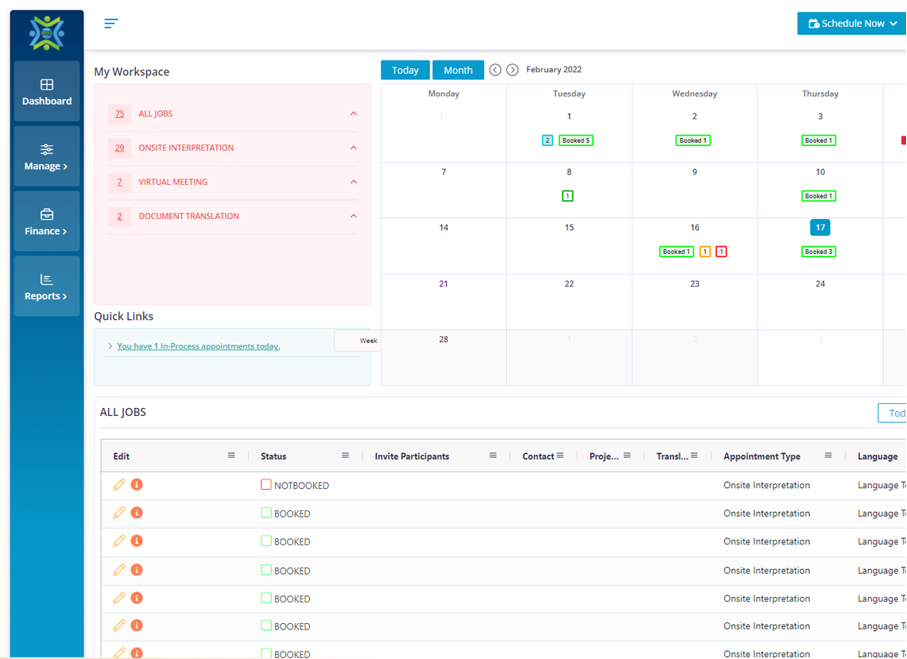
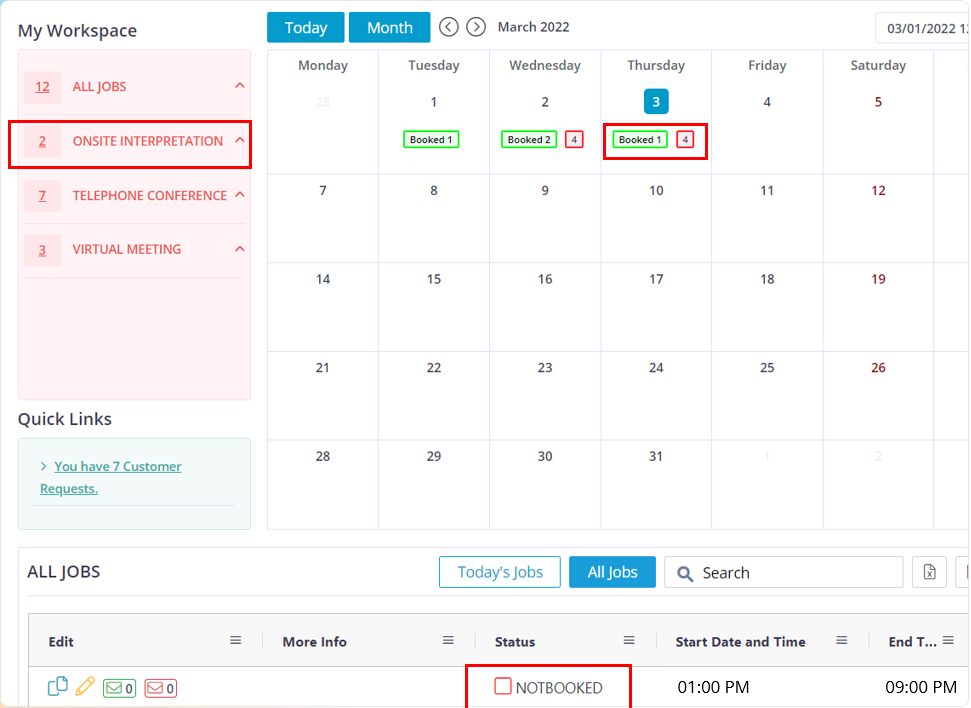
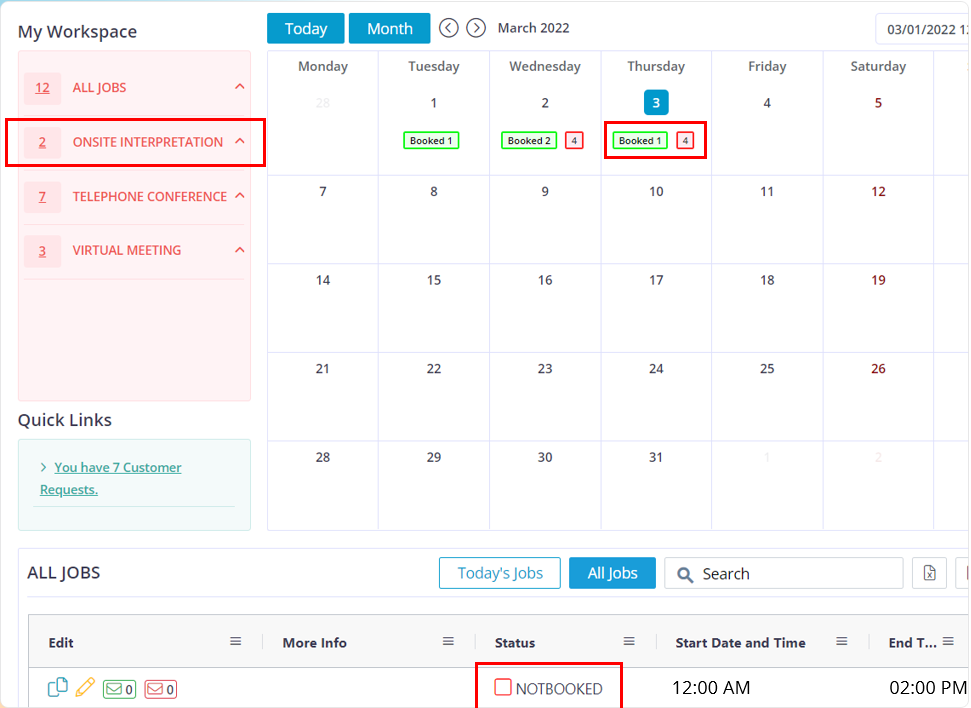
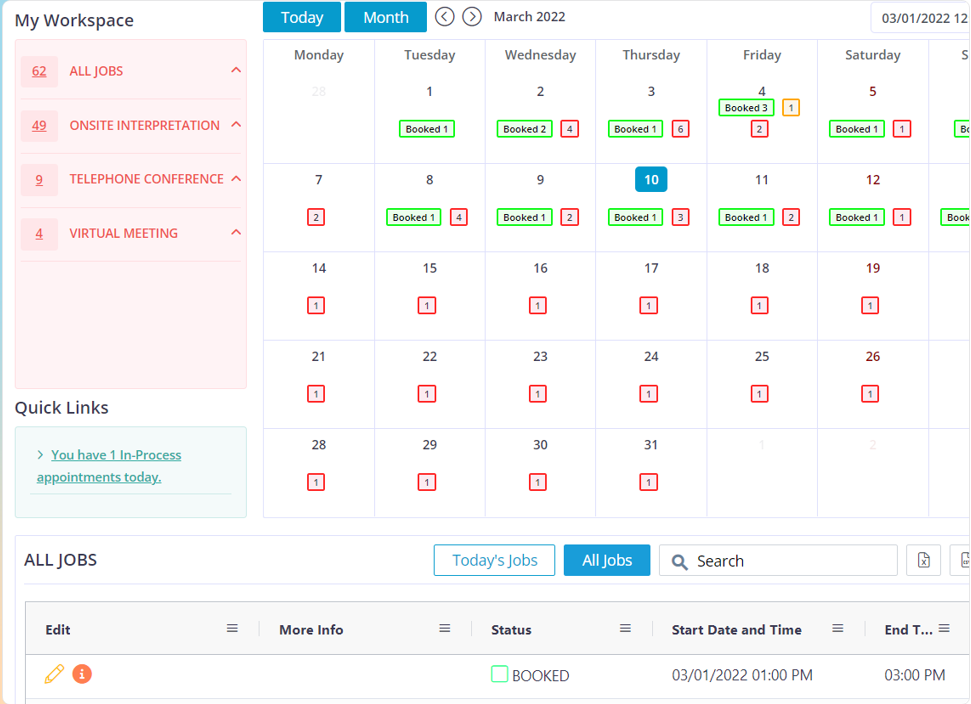
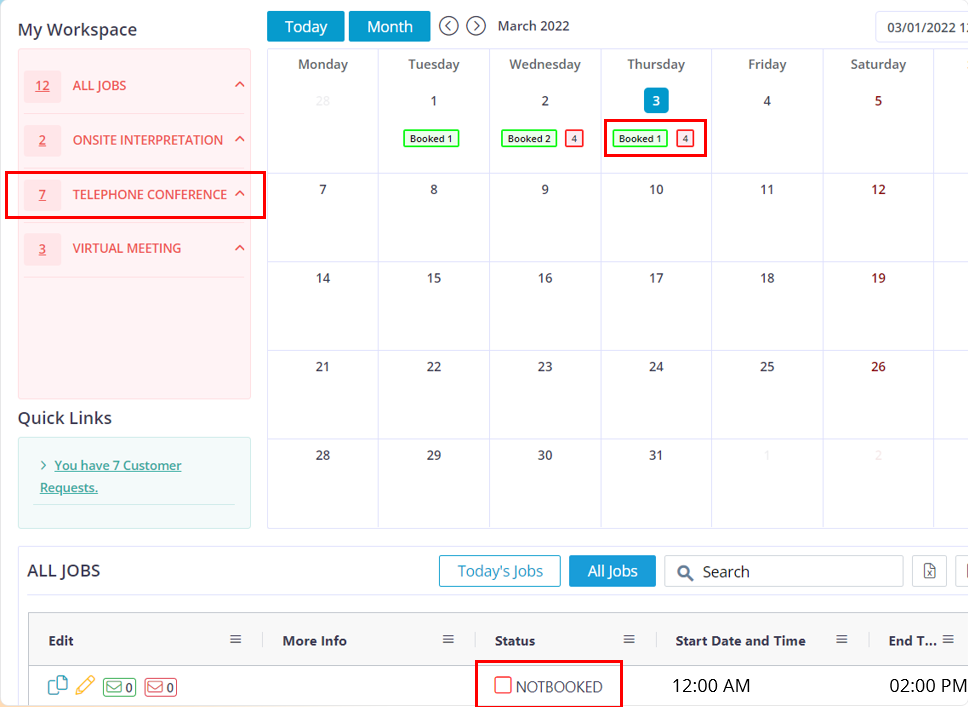
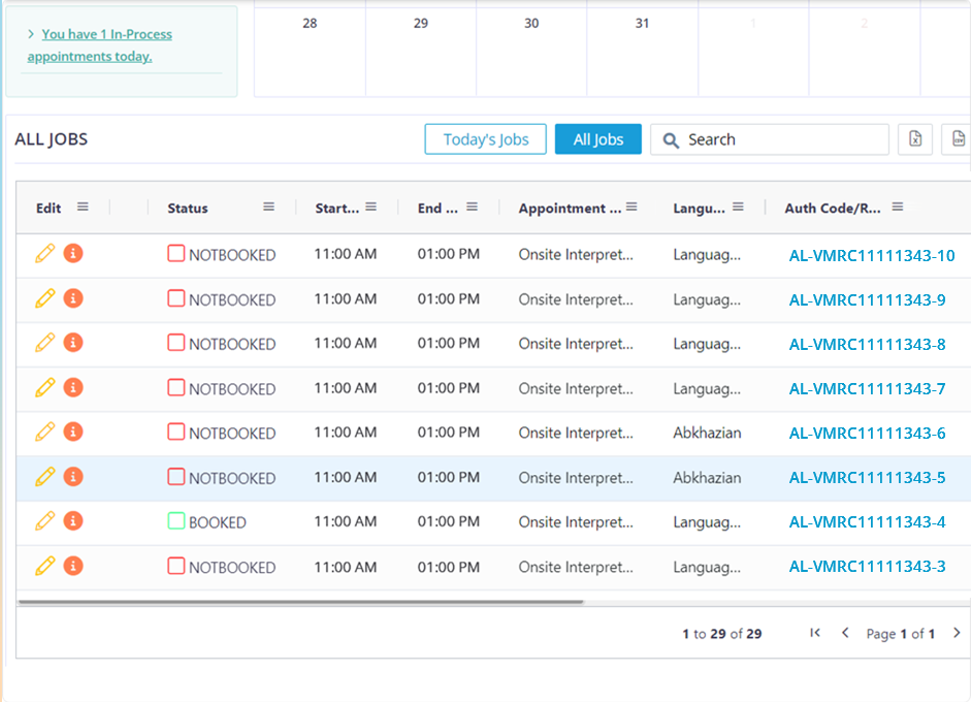
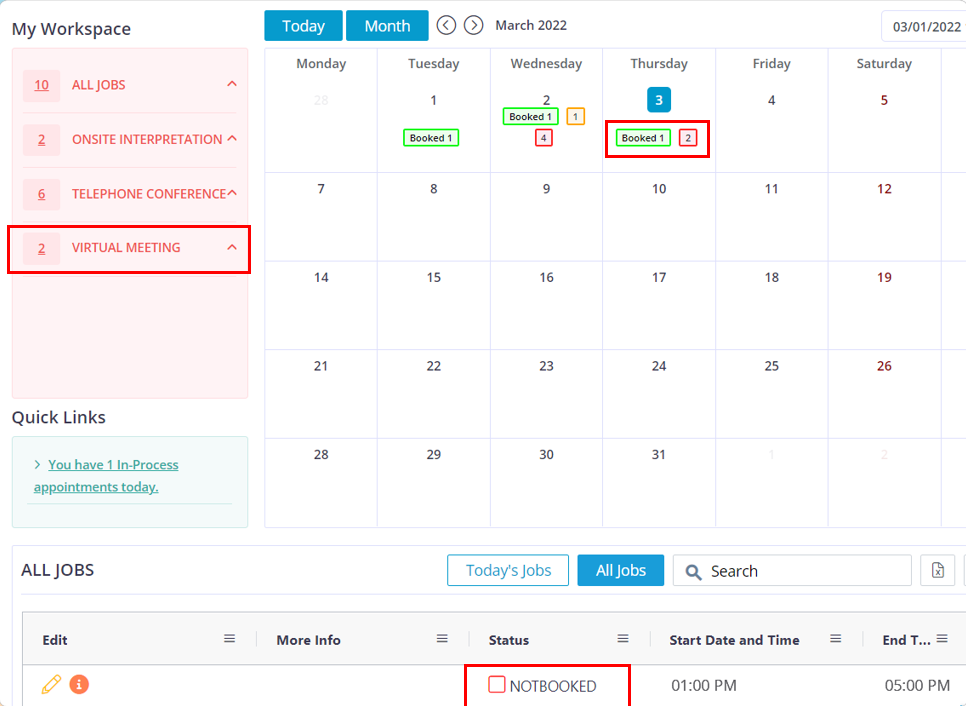
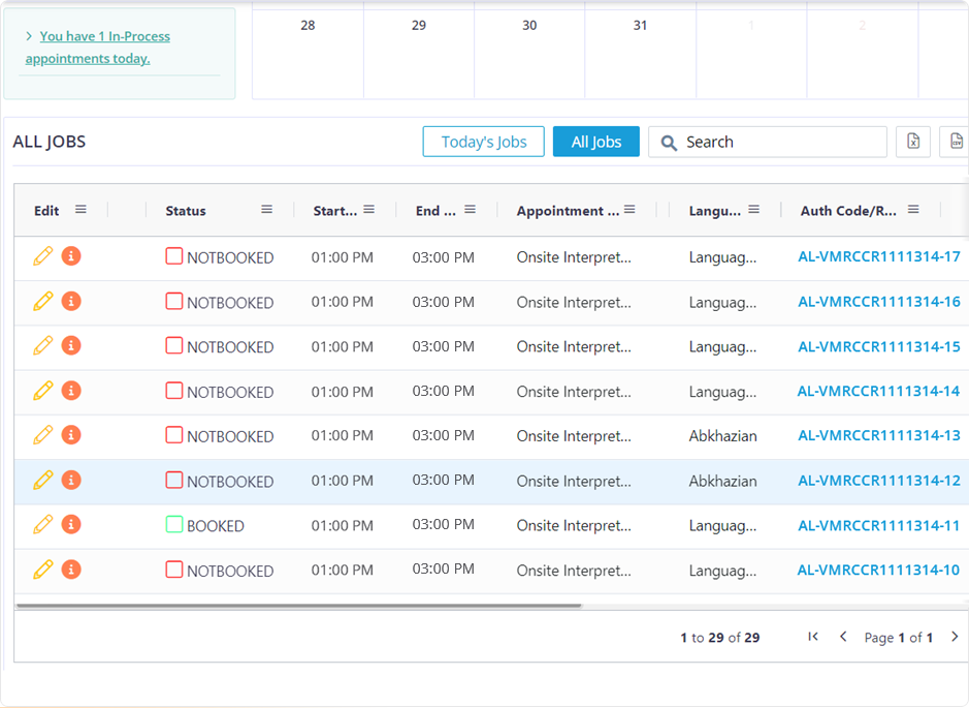
Once the dashboard loads up, you can find the appointment under All jobs, Today’s jobs or If you click on telephone conference in “My Workspace” and choose “Not-Booked” appointments you will find it there. You can also use the authentication code to pull up the appointment.
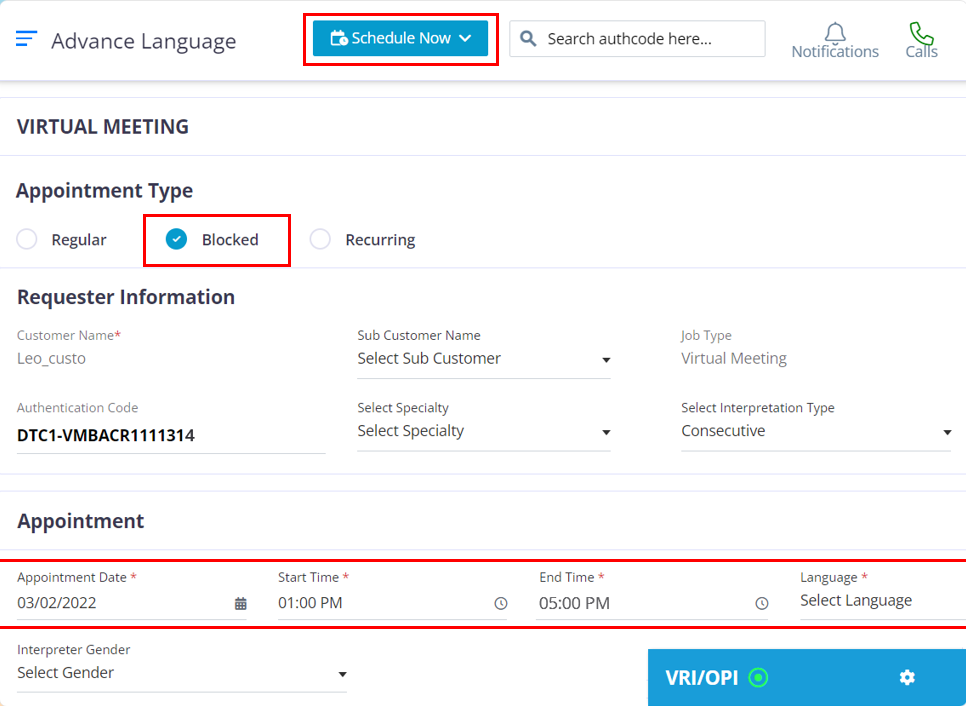
To Create a Virtual Meeting blocked appointment by using the customer’s credentials, please follow the below steps.
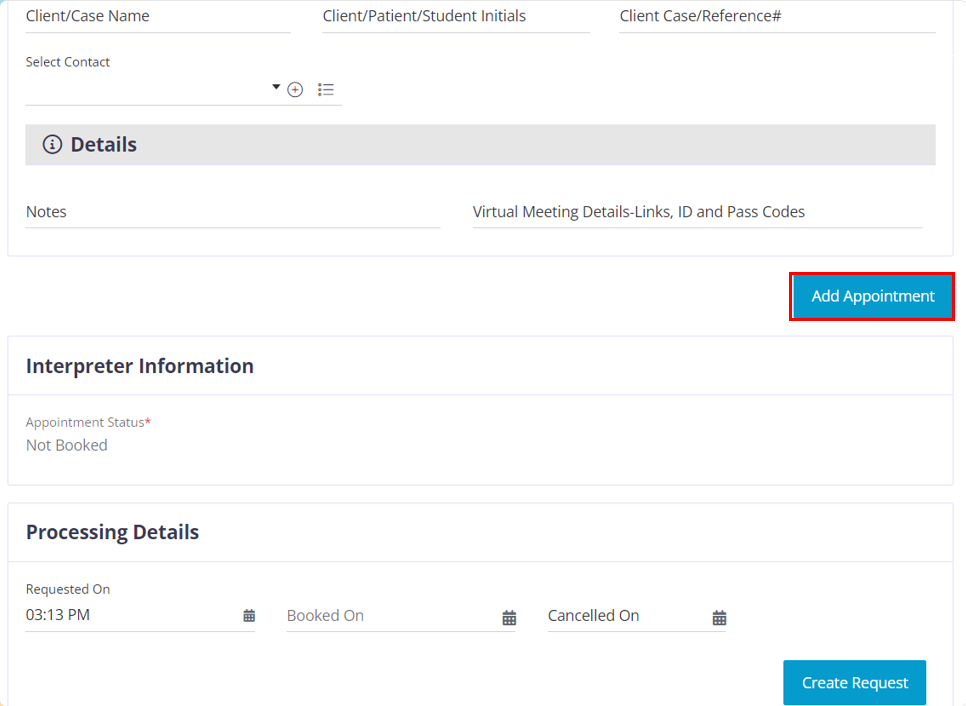
After you have completed entering the appointment information, Click on the “Add Appointment” button to open up a new block to enter the required appointment details.
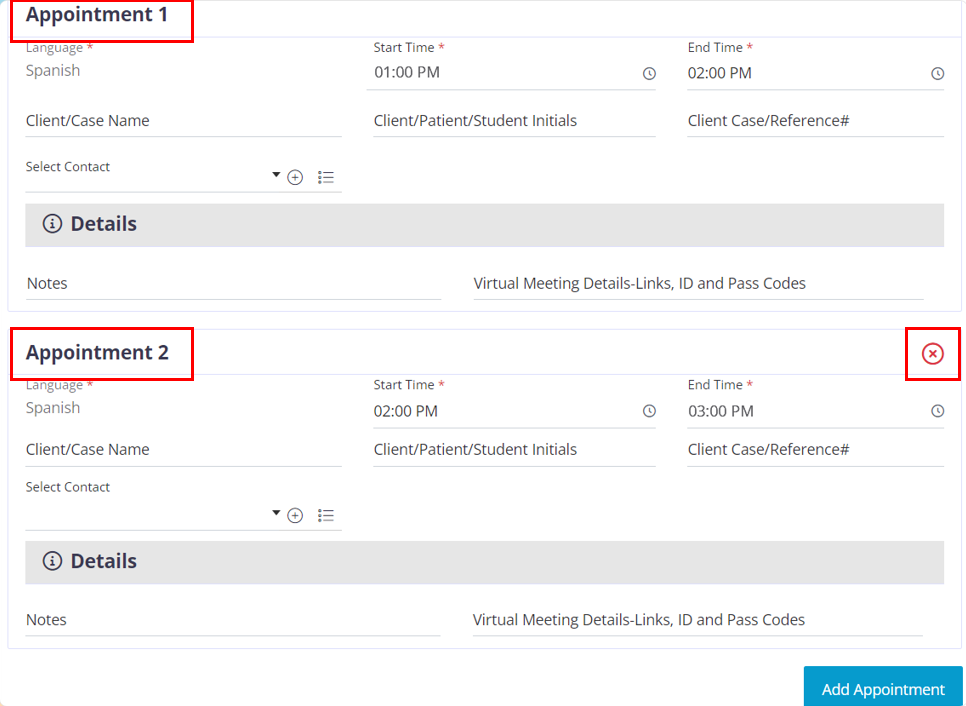
This is how a new block would look, the block will appear in the order of Appointment 2, Appointment 3, and Appointment 4. You can create a maximum of 4 blocks per authentication code. In case if you want to cancel a block click on the “x” icon.
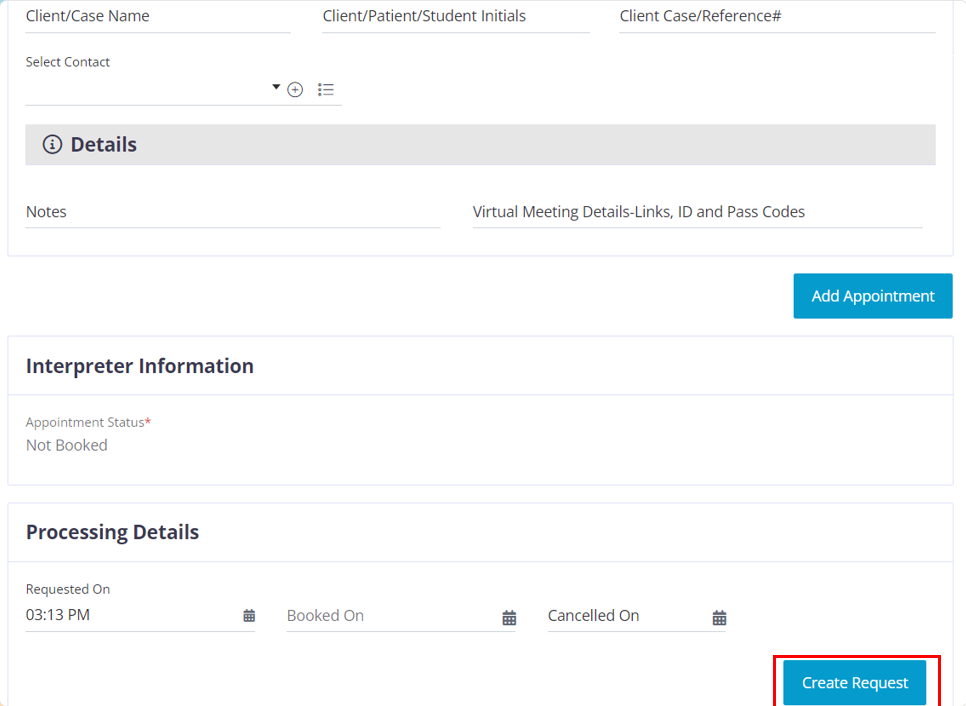
Once you have completed entering the required appointment information in the blocks click on the “Create request” button.
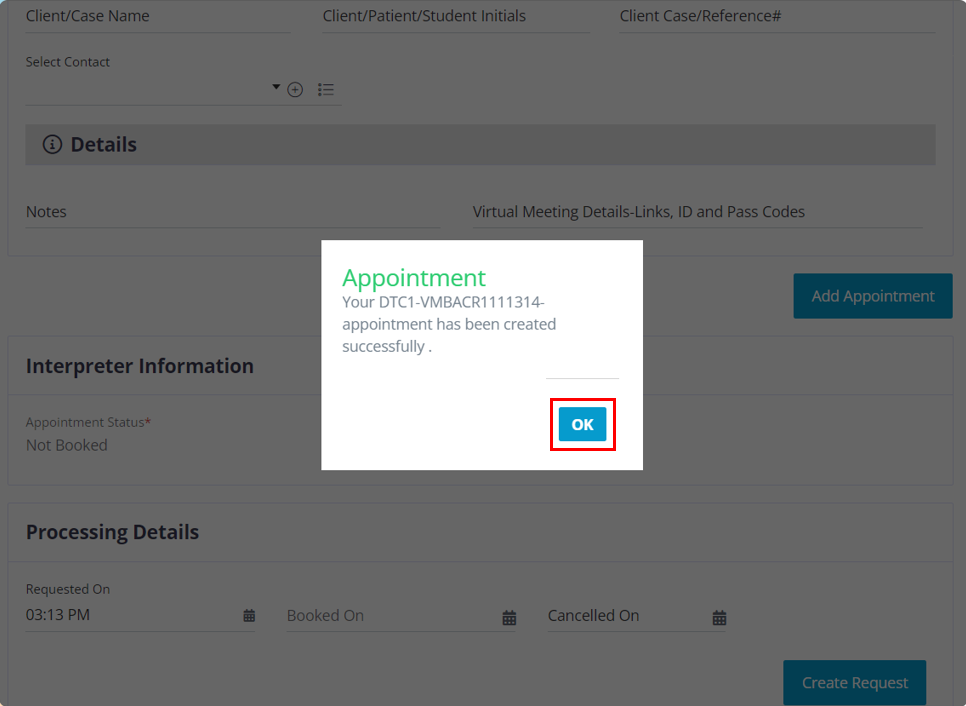
After you click on the “OK” button it will redirect you to the dashboard where you can find the appointment by using the authentication code or by searching for it in the my work space section under Telephone Conference” in the “Not-Booked” Status. Once it is booked it will be moved into the booked status.
To create a Virtual Meeting recurring appointment, please follow the below steps.
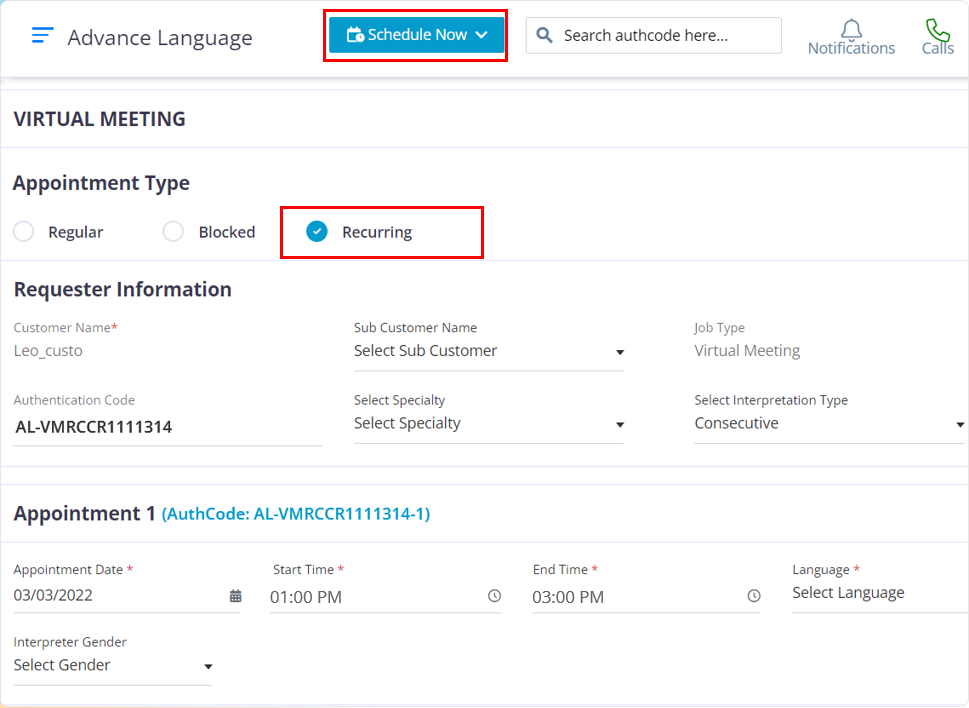
Move your cursor to the “Schedule Now Button” and click on the Virtual Meeting option.
In the Appointment type section choose “Recurring”
The fields that have a red star at the top of them are mandatory fields. The other fields are optional and can be filled based on your company requirements.

After you complete filling up the required data for appointment 1, click on the “Add Recurrence” button
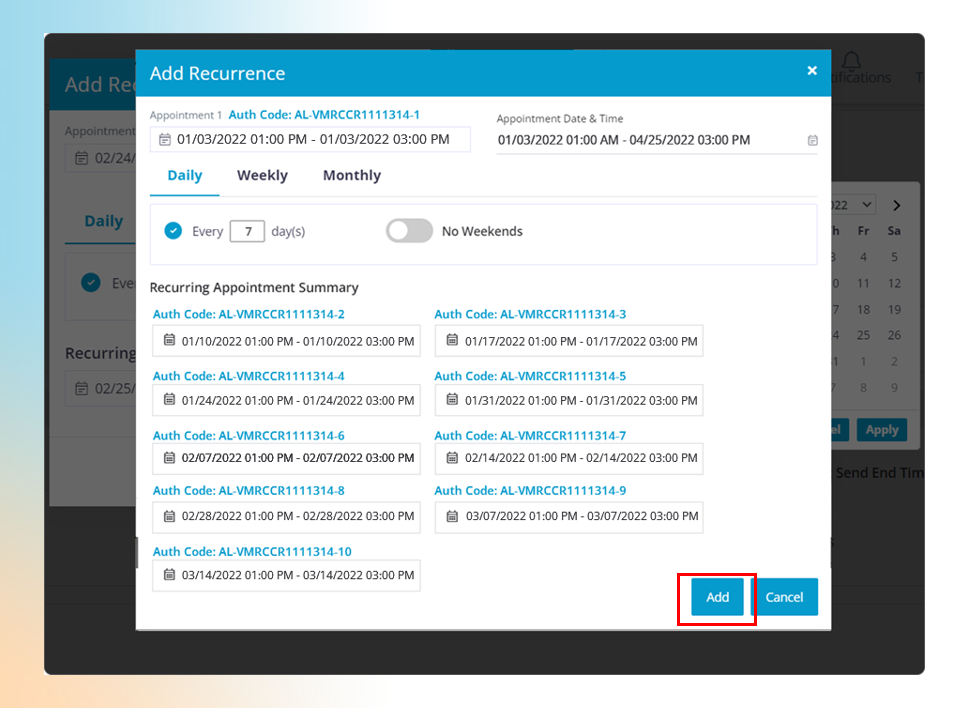
In this pop up, you need to choose the required date range, say from January to April, after you choose the required date range, there are 3 filter options that you can use to alter the recurring pattern for the appointments and those filters are Daily, Weekly, and Monthly.
Daily section, The Every Day(s) filter helps you to set a recurring pattern. For example: The chosen date range is from January 1st to April 25th. assume today is a Monday and you have entered 7 in the Every day(S) box. It will set the recurring pattern to choose the next available date after every 7 days, so all the Mondays within the selected date range will be chosen. You have an option to exclude the weekends too.
Weekly, This functionality helps you to choose selected days. Example: you choose Jan 1st to 31st as the date range and now you choose the weekly option, you will find all the days in a week (Monday to Sunday). If you choose Monday and Tuesday from the days displayed in the option, the software will calculate the available Mondays and Tuesdays with in the selected date range and it will populate the appointment below.
Monthly This helps you to set a monthly pattern for your recurring appointment. Once you have set the recurring pattern the available days will be chosen you will find the required appointments below. Click on the “Add” button. button
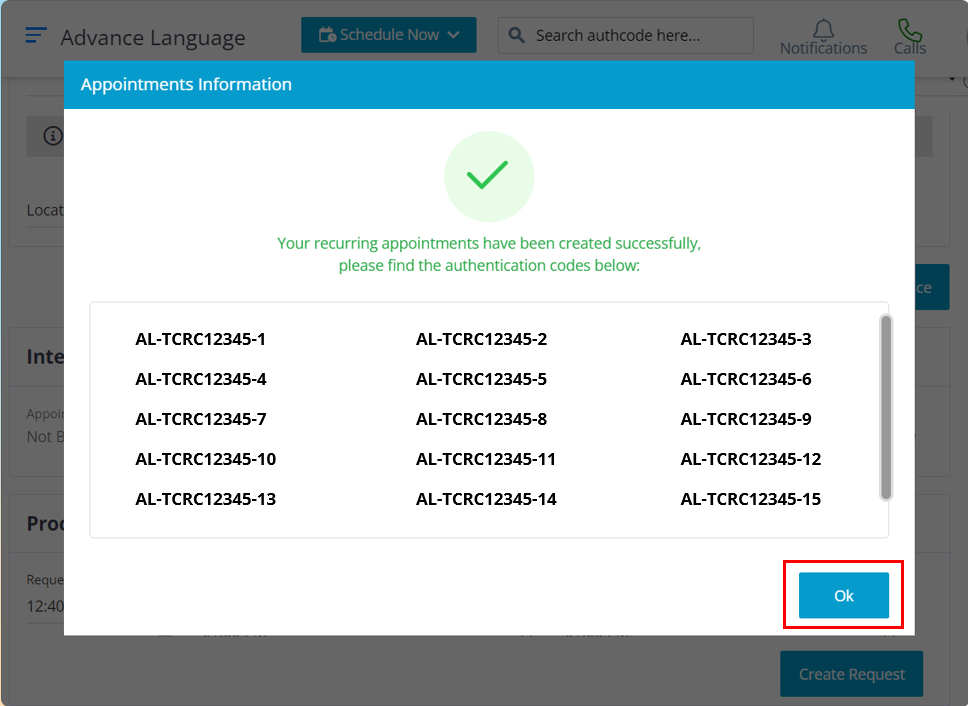
Click on the “Create Appointment” button to create the appointment. Now you have successfully created your recurring appointments.
Click on the “OK” button, The pop up displays all the authentication code for the recurring appointments that you have created.
After you click on the “OK” button you will be re-directed to the dashboard where you can view the appointments.
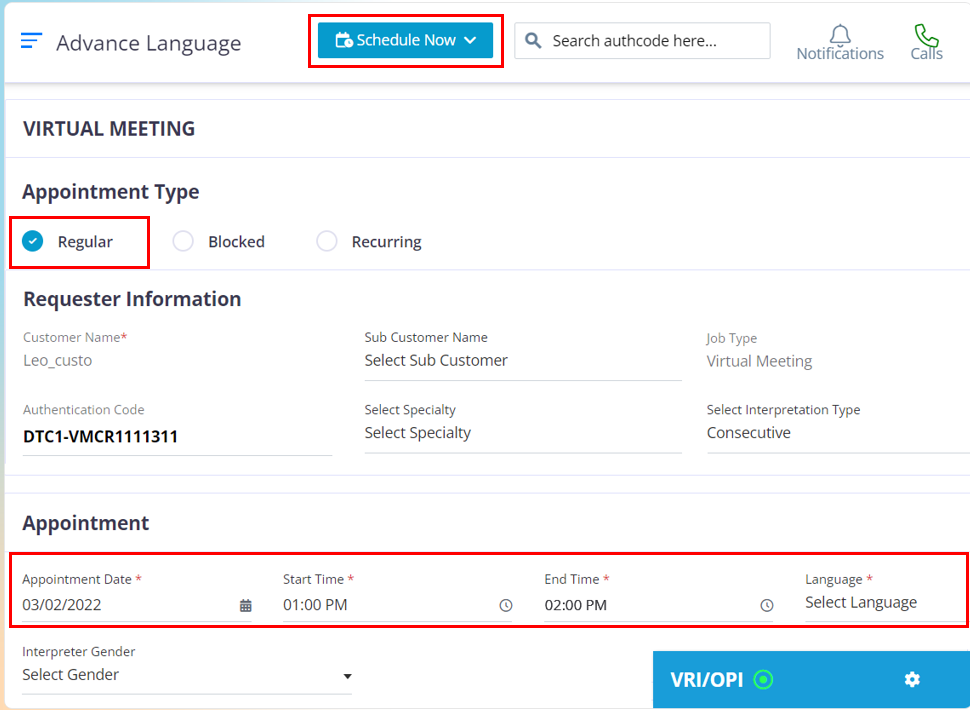
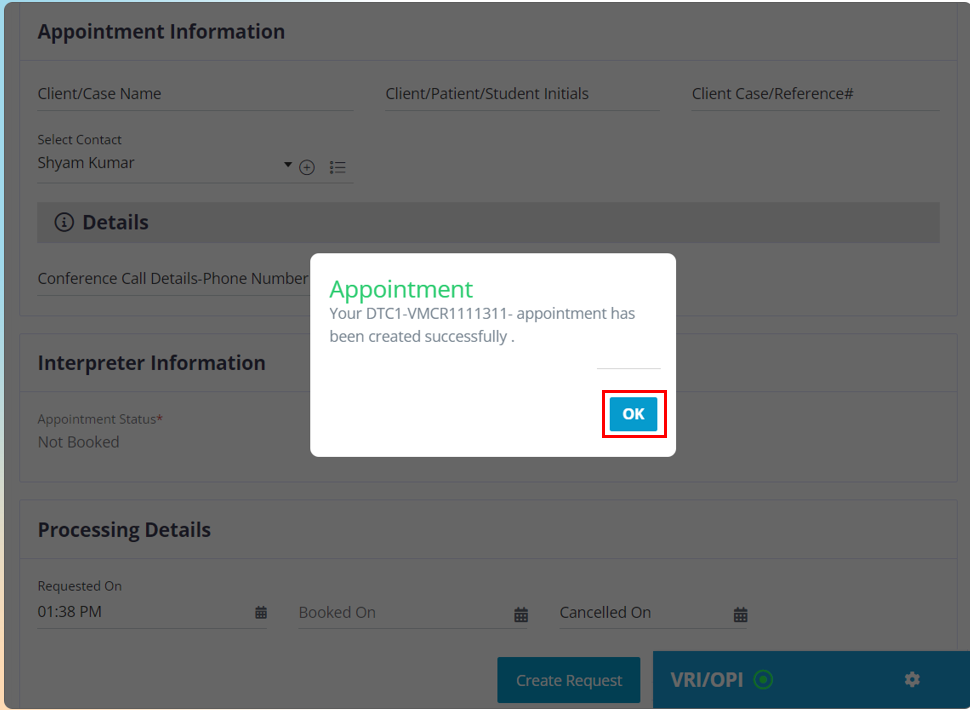
To Create a regular virtual meeting appointment from the customer’s end, please follow the below steps.
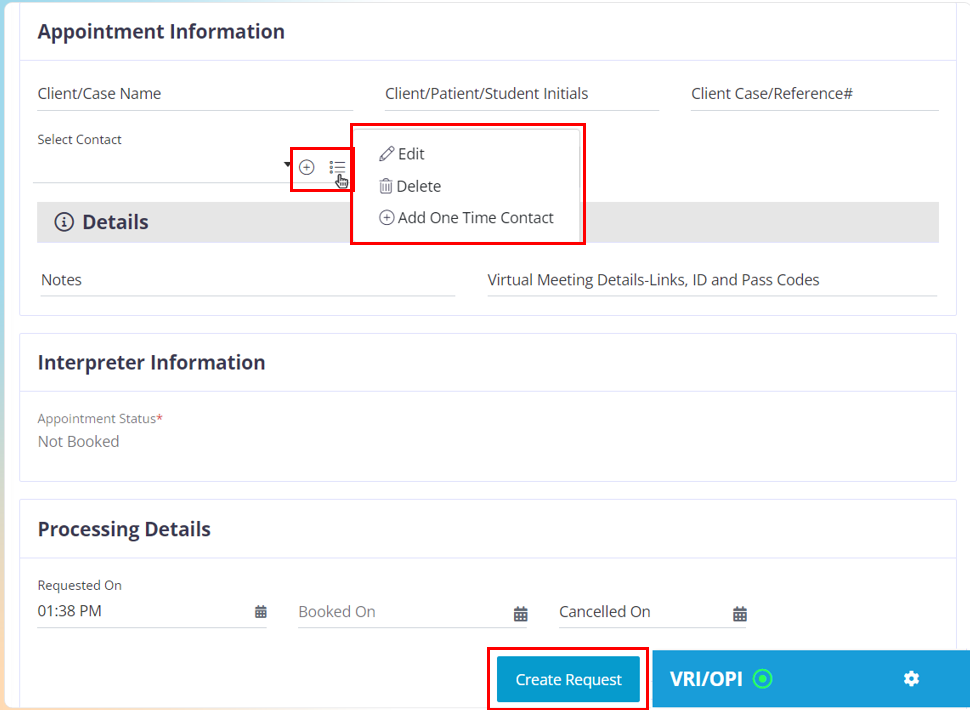
Appointment Information section:
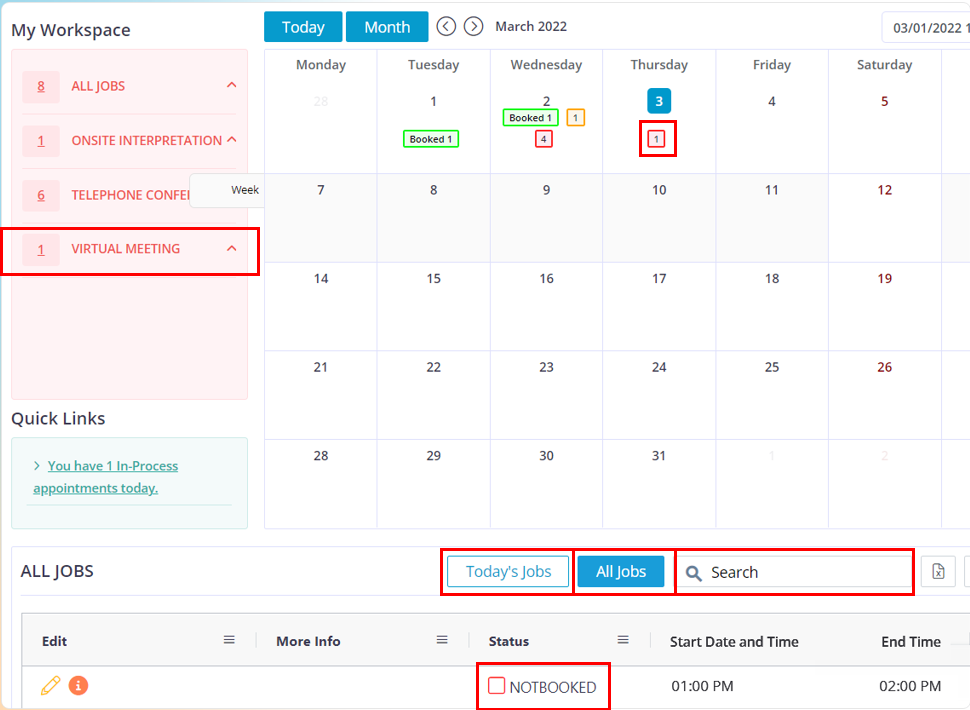
Once the dashboard loads up, you can find the appointment under All jobs, Today’s jobs or If you click on virtual meeting in “My Workspace” and choose “Not-Booked” appointments you will find it there. You can also use the authentication code to pull up the appointment.