1.Admin Dashboard
Log in with your respective User credentials.

Log in with your respective User credentials.
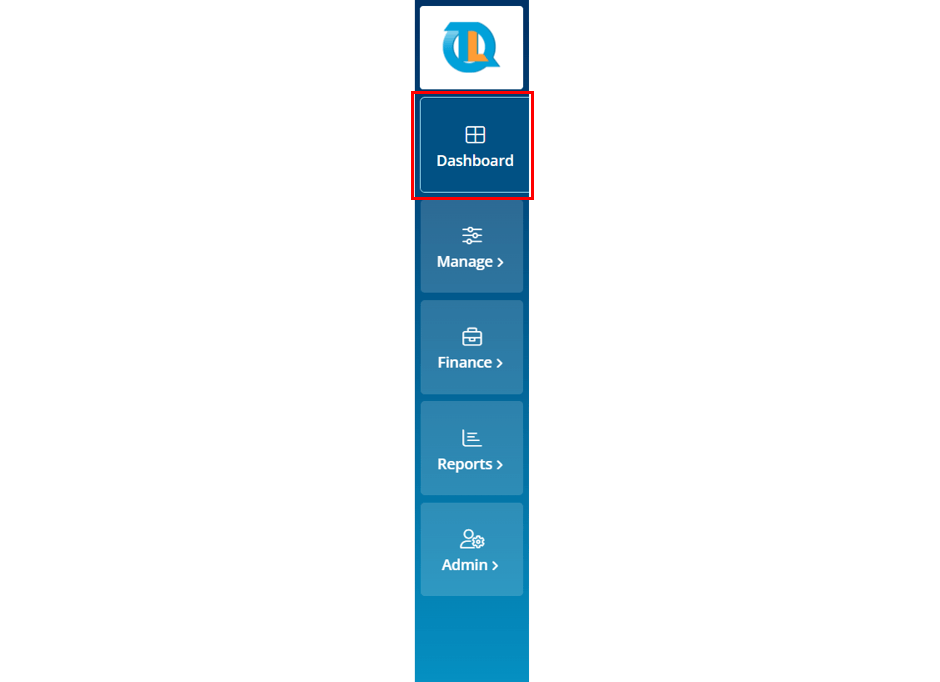
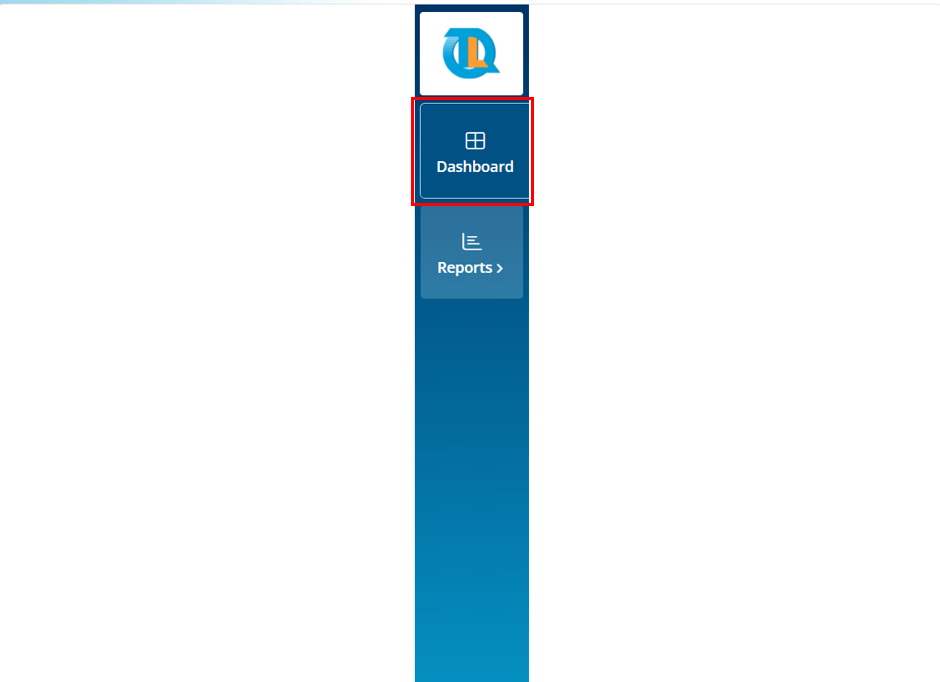
By default when you log in you will find yourself in the dashboard section.

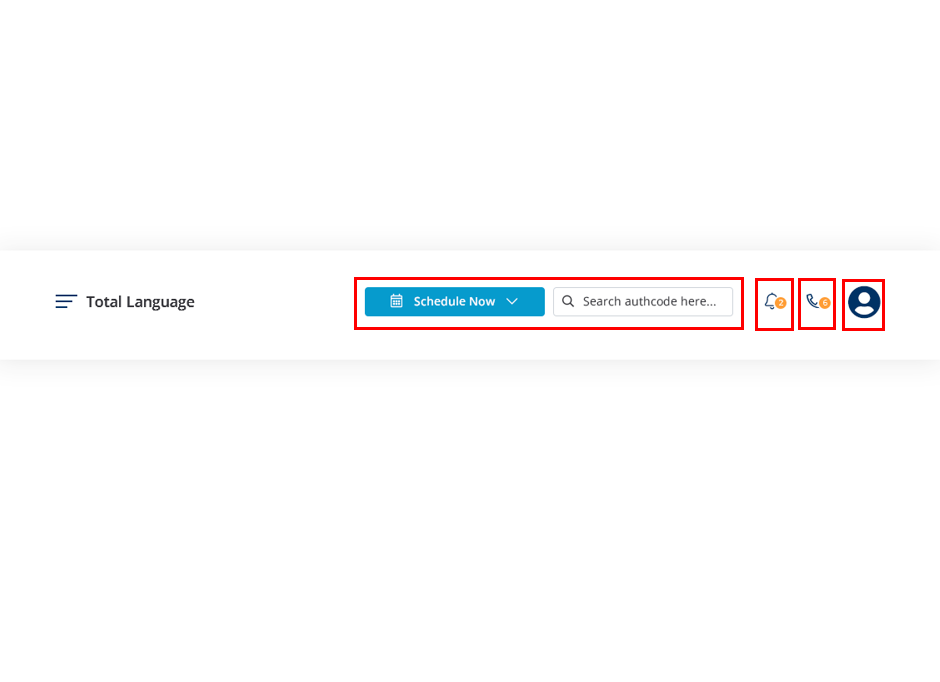
To create a new appointment click on the “Schedule Now” drop down button and choose the required service type.
The search bar is a universal one, you can use it to search for a particular appointment regardless of the appointment status by using the authentication code.
Bell Icon : When you click on the bell icon it will take you to notification page where you can view the notification and update requested from the customer and vendor.
Ticket Icon : When you click on it you can view the tickets that you have raised to development team for support.
Message icon: It Helps you to text and stay connected with your team members.
Profile symbol: When you click on it, it shows the name along with the options to change your password, support, Log out and close.
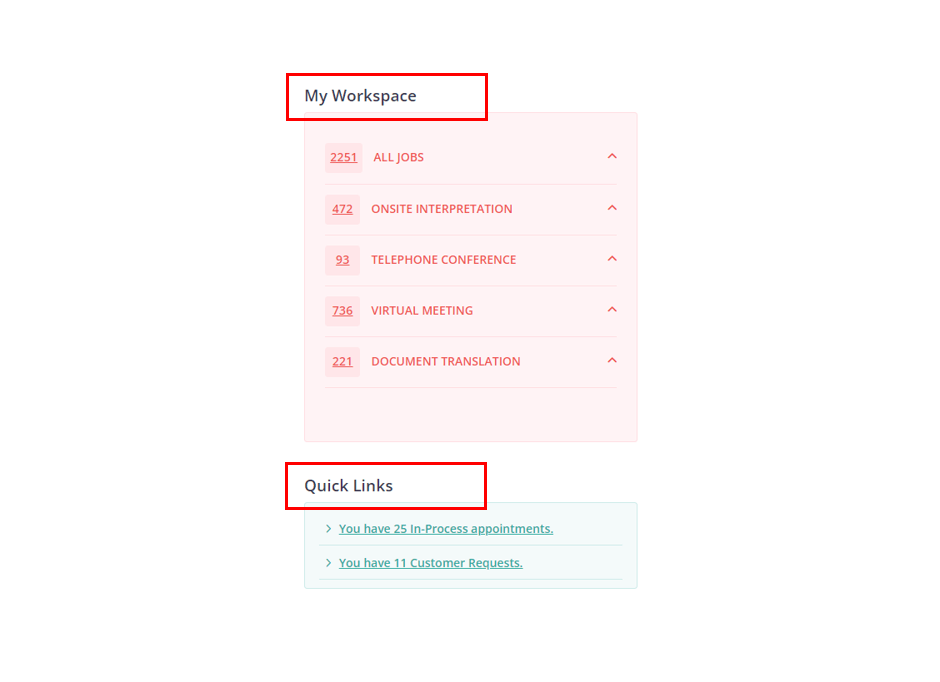
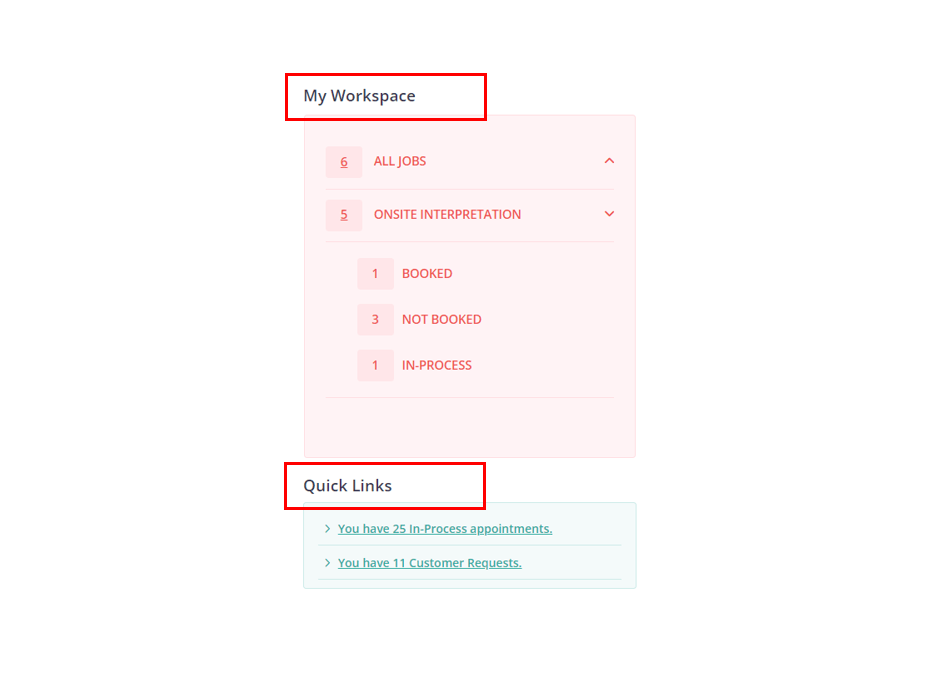
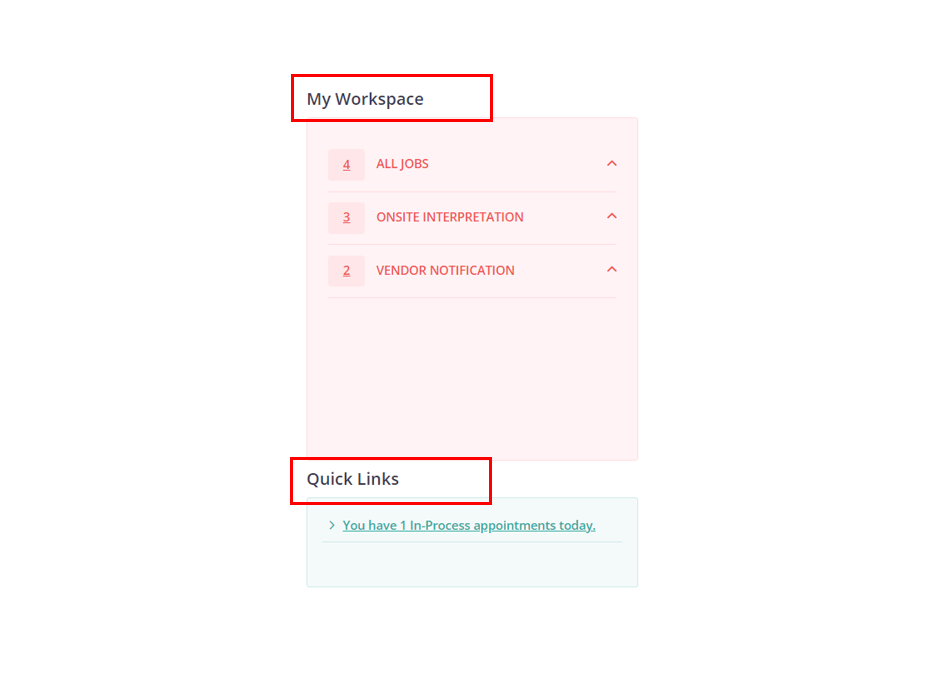
My Workspace : In this section you can view the total number of appointments that are present in specific job types and statuses. You can click on a required job type and you will get the appointment categorized by their current status [Not-Booked, In-processed, Booked etc.]. Based on the job type and the status that you choose the appointments will appear in the below grid.
Quick Links : In this section you can view the new appointment requests that are sent in by the customer, You can also access all the In-processed appointments by click on the In-process quick link.
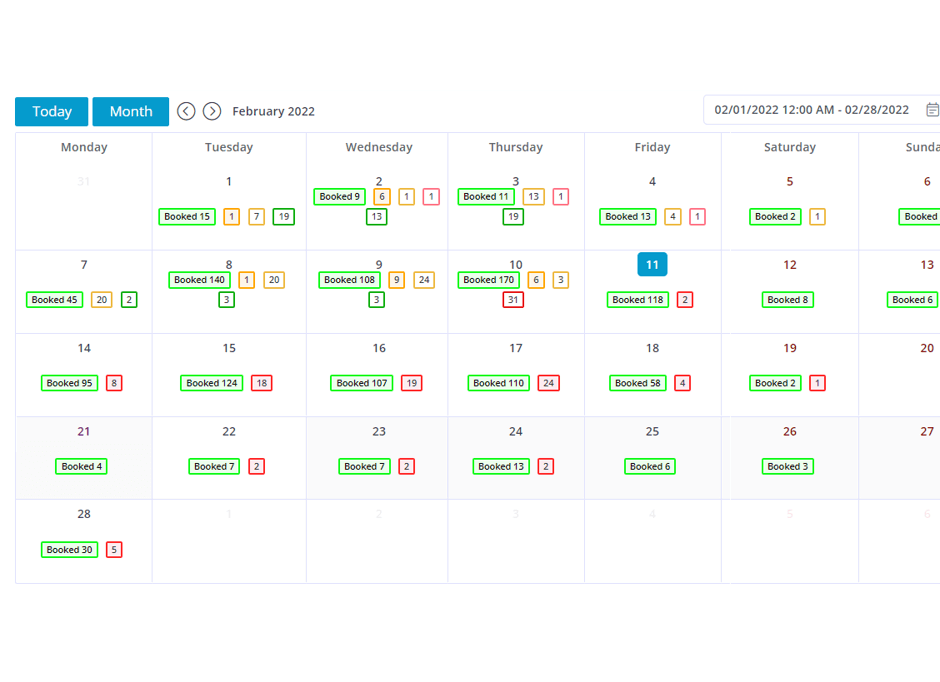
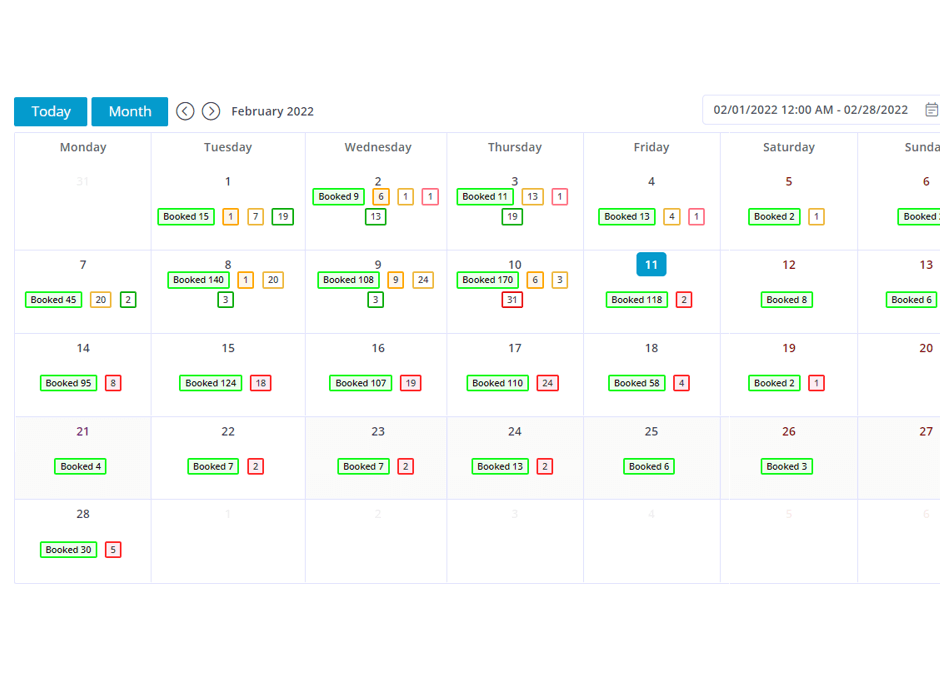
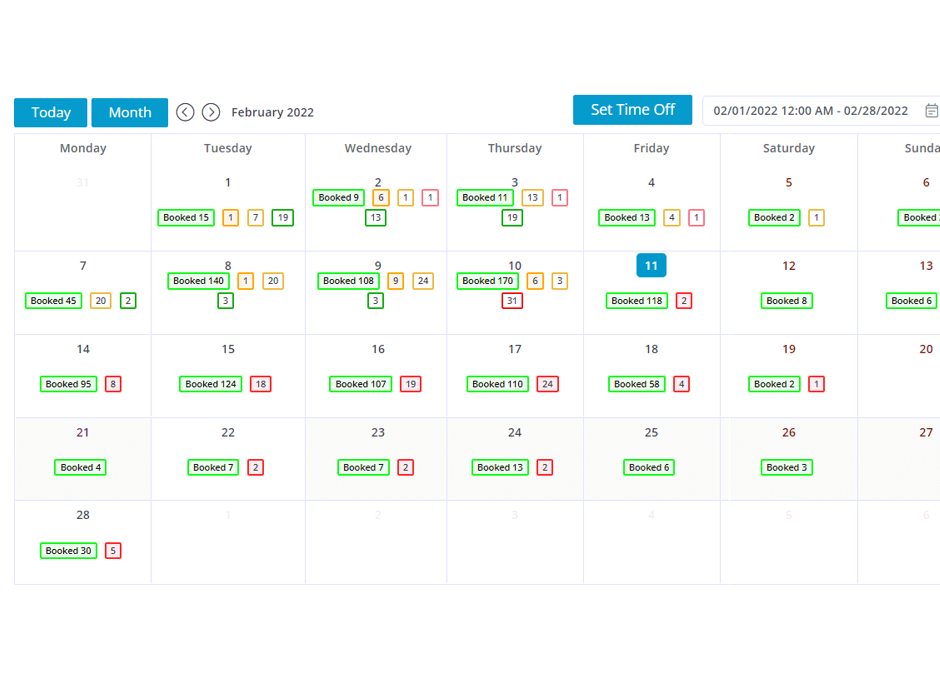
The color of the box tells you the status of the appointment and the number in it represents the total number of appointments that have been categorized into that status for that particular date.
When you click on the color squares you will get a pop up that displays the list of the authentication code for the appointments that are categorized under the chosen status.
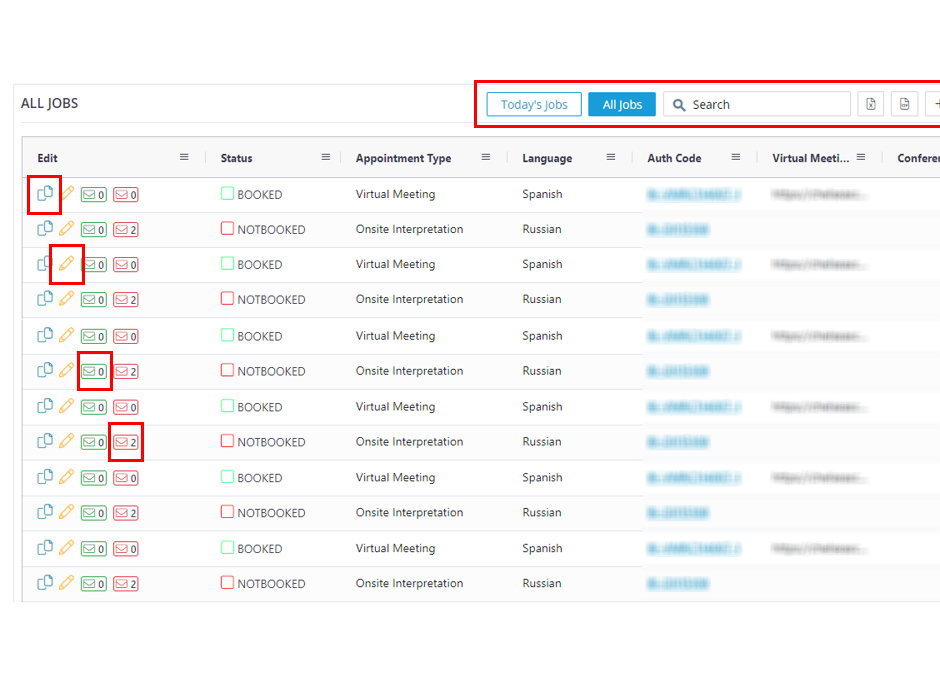
Today’s Job : You will find the appointments that are sent in by the customers on the current day.
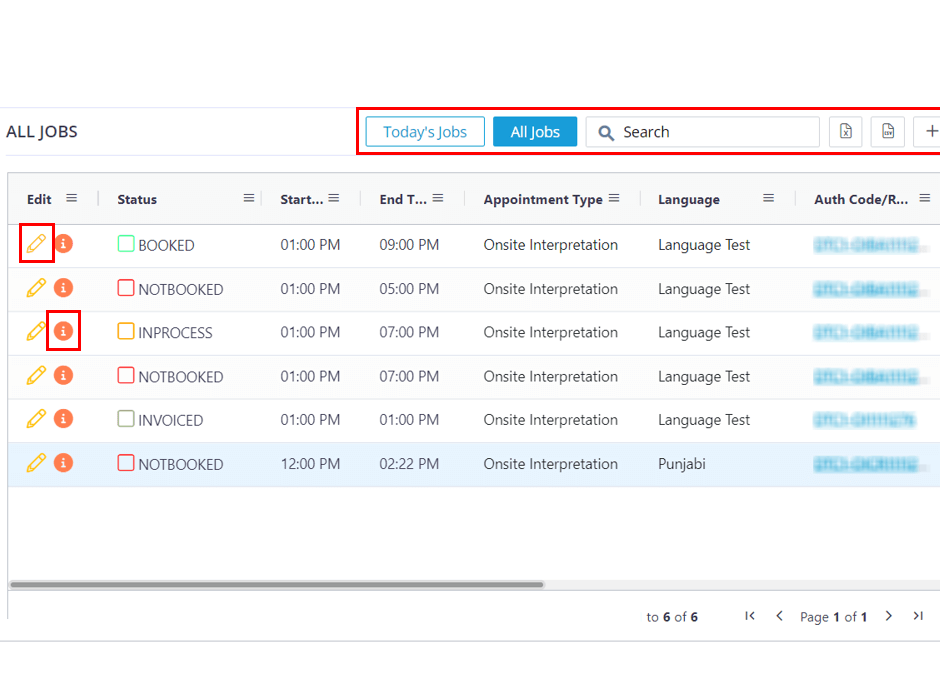
All Jobs : Here you will find all the jobs regardless of the status and type.
Search bar : You can search for an appointments by using it’s authentication code.
Excel icon : It will export all the appointments into a excel format.
Csv : It will download the appointment in csv format.
Plus icon : When you click on it you will only view the grid, the calendar, my workspace and quick links will be hidden to increase the space for the grid.
Grid : By default it will show “All jobs” when you login. You can choose what you want to view in the grid by the choosing the required job type and statuses.
Copy Icon : This functionality allows you to copy the appointments.
Pencil icon : When you click on this icon it will take you to the page were you can edit the appointment or you can assign interpreters for that particular appointment.
Green Envelope : You can view the list of the interpreter who have acknowledged that they are available to take up the appointment.
Red Envelope : Here you will find the list of the interpreter who have declined the appointment.
Log in with your respective user credentials
By default when you log in you will find your self in the dashboard section.
My Workspace : In this section you can view the total number of appointments that are present in specific job types and statuses. You can click on a required job type and you will get the appointment categorized by their current status [Not-Booked, In-processed, Booked etc.]. Based on the job type and the status that you choose the appointments will appear in the below grid.
Quick Links : In this section you can view the new appointment requests that are sent in by the customer, You can also access all the In-processed appointments by click on the In-process quick link.
The color of the box tells you the status of the appointment and the number in it represents the total number of appointments that have been categorized into that status for that particular date.
When you click on the color squares you will get a pop up that displays the list of the authentication code for the appointments that are categorized under the chosen status.

Today’s Job : Here you will find the appointments that you or the company staff creates for the current day regardless of job type and it’s status.
All Jobs : Here you will find all the jobs regardless of the status and type.
Search bar : You can search for an appointments by using it’s authentication code.
Excel icon : It will export all the appointments into a excel format.
Csv : It will download the appointment in csv format.
Plus icon : When you click on it you will only view the grid, the calendar, my workspace and quick links will be hidden to increase the space for the grid.
Grid : By default it will show “All jobs” when you login. You can choose what you want to view in the grid by the choosing the required job type and statuses.
Pencil icon : When you click on this icon it will take you to the page were you can edit the appointment or you can assign interpreters for that particular appointment.
Info icon : When you click on the “i” icon it will open the appointment details in a pop up where you can cancel the appointment in the Not-Booked status.
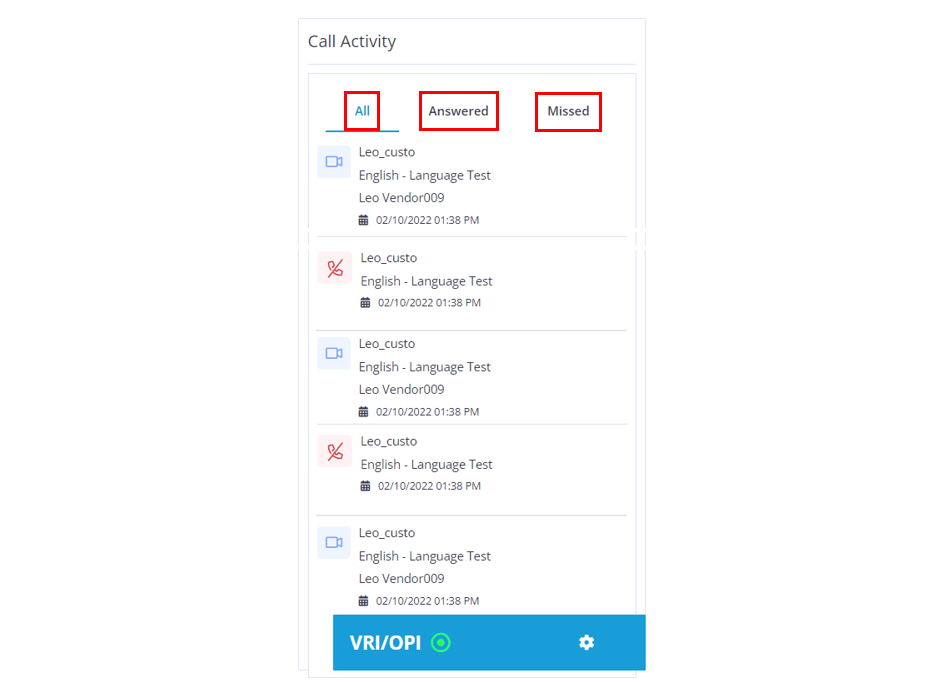
Call Activity : This section show you the Call history, you can toggle between “All, Answered, Missed” to keep track of your calls.
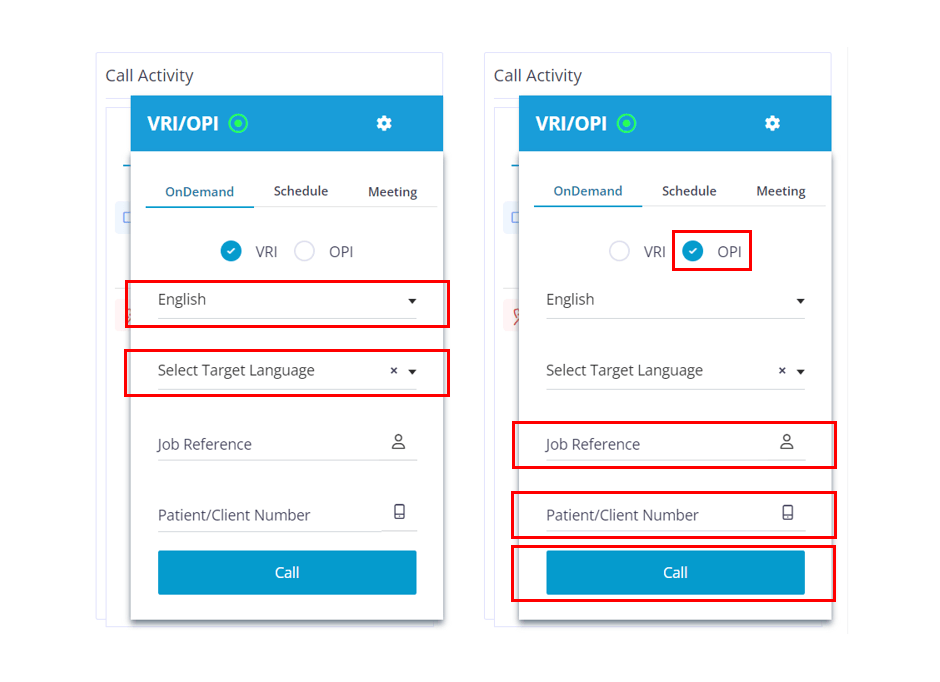
You can access this page by clicking on the phone icon or by click on the VRI/OPI bar that you will find at the bottom right of the page. As per your requirements choose the service that you would like to use,
On-Demand
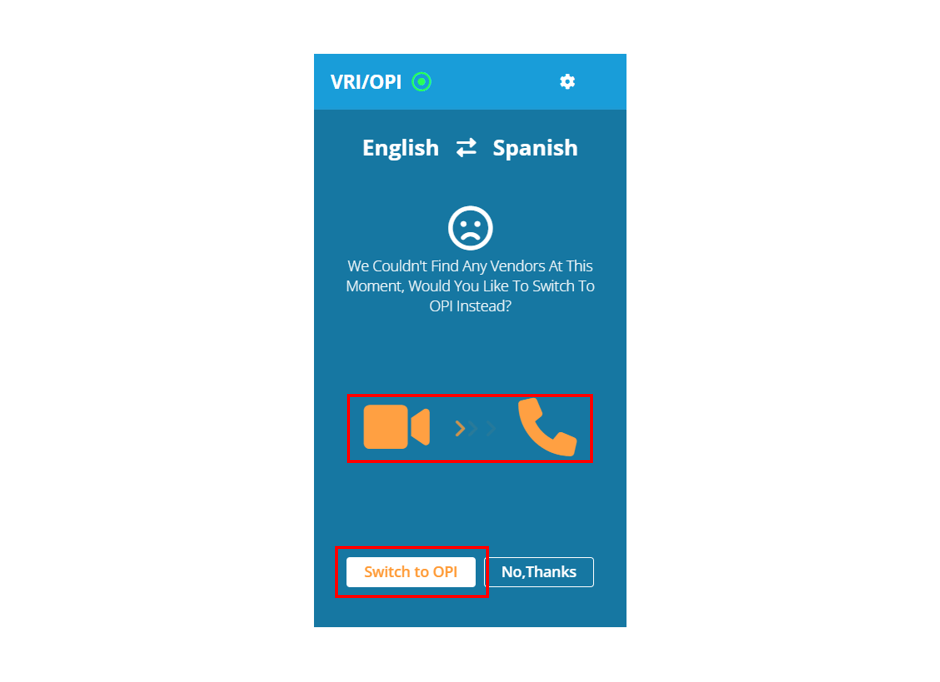
When you make a VRI call and if no vendor picks up the call, you will get an option to change your call type to voice call.
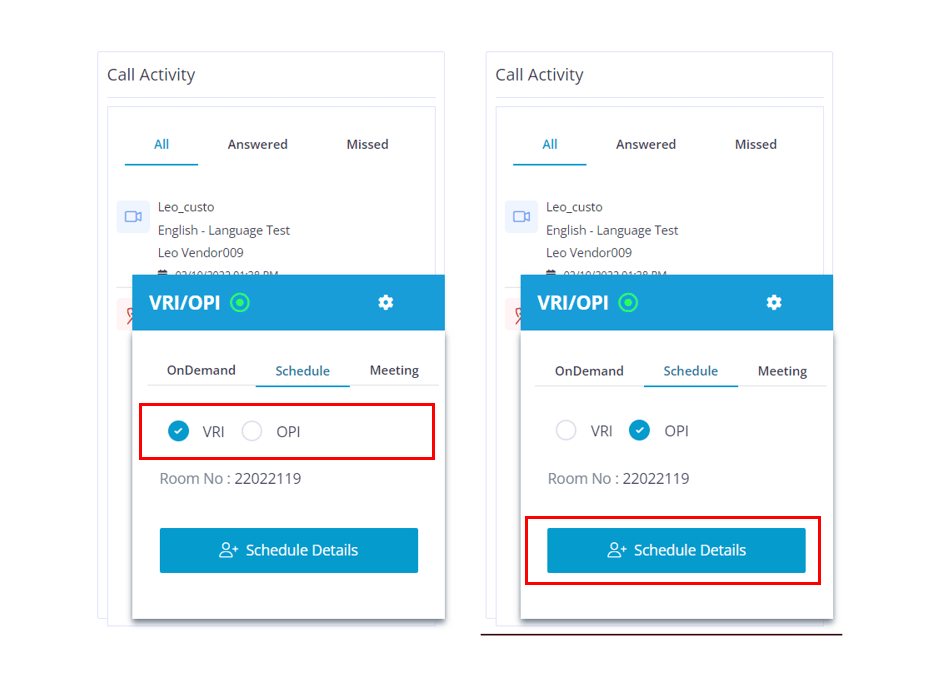
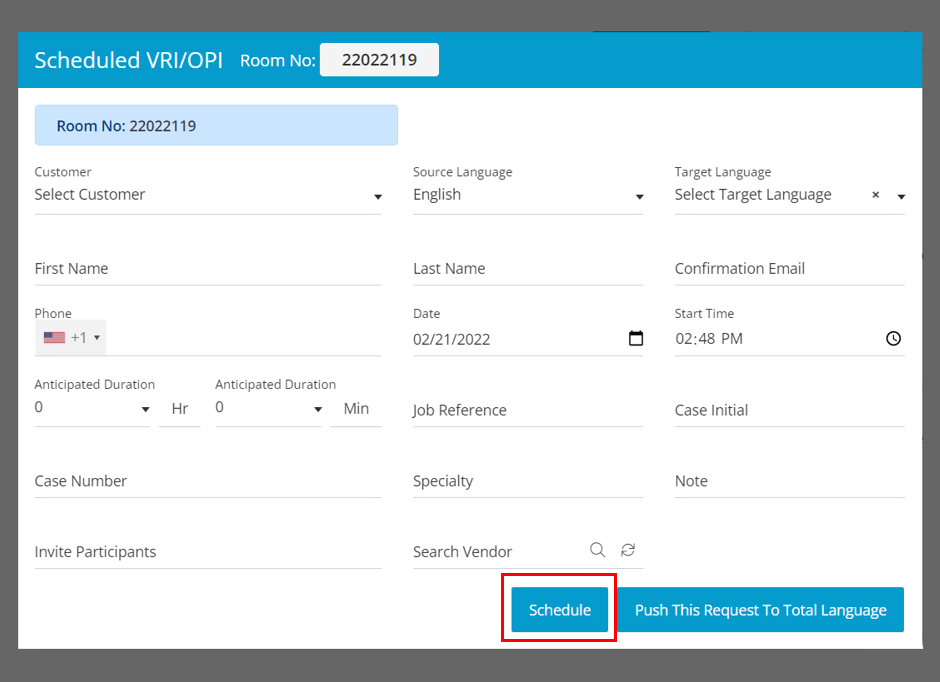
Schedule : Choose the required Service type and click on the “Schedule Details” button.
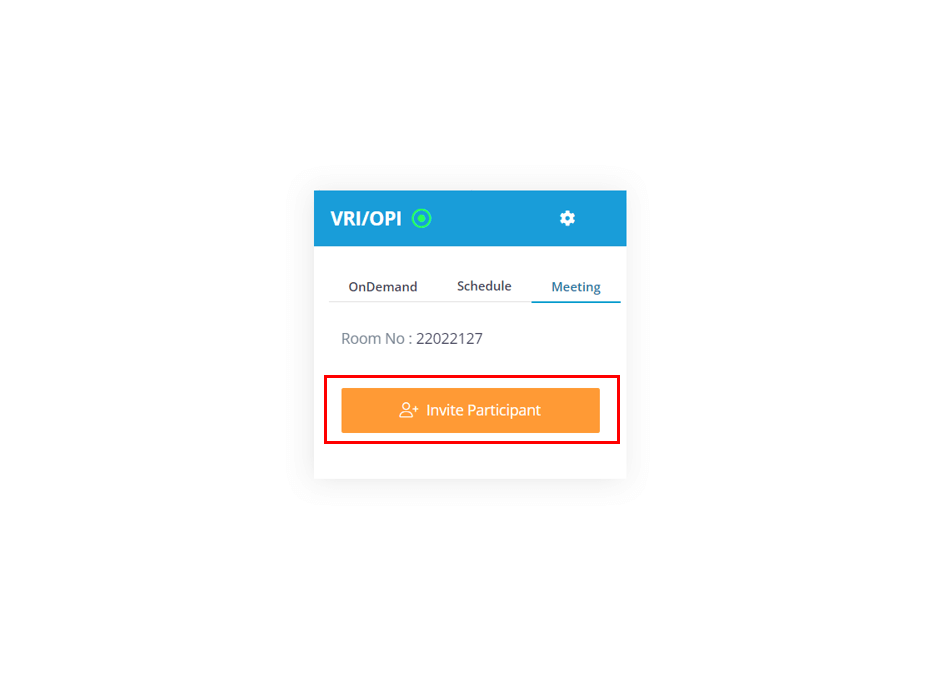
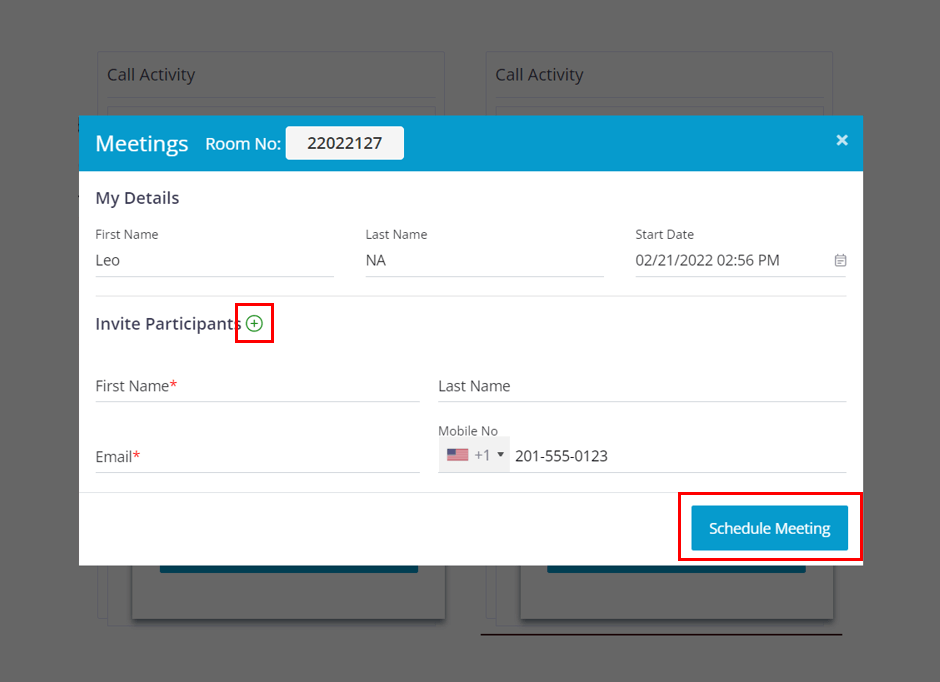
To use our Meeting platform click on the meeting option and click on the “Invite participant” button.

Log in with your respective user credentials
By default when you log in you will find yourself in the dashboard section.
My Workspace : In this section you can view the total number of appointments that are present in specific job types and statuses. You can click on a required job type and you will get the appointment categorized by their current status [Not-Booked, In-processed, Booked etc.]. Based on the job type and the status that you choose the appointments will appear in the below grid.
Quick Links : You can also access all the In-processed appointments by click on the In-process quick link.
The color of the box tells you the status of the appointment and the number in it represents the total number of appointments that have been categorized into that status for that particular date.
When you click on the color squares you will get a pop up that displays the list of the authentication code for the appointments that are categorized under the chosen status.
Today’s Job : Here you will find the appointments for the current day regardless of job type and it’s status.
All Jobs : Here you will find all the jobs regardless of the status and type.
Search bar : You can search for an appointments by using it’s authentication code.
Excel icon : It will export all the appointments into a excel format.
Csv :It will download the appointment in csv format.
Pencil icon : When you click on it, you will get a pop up to view the appointment details and you will have buttons to accept or decline it.
Info icon When you click on it, you will get a pop up to view the appointment details and you will have buttons to accept or decline it.
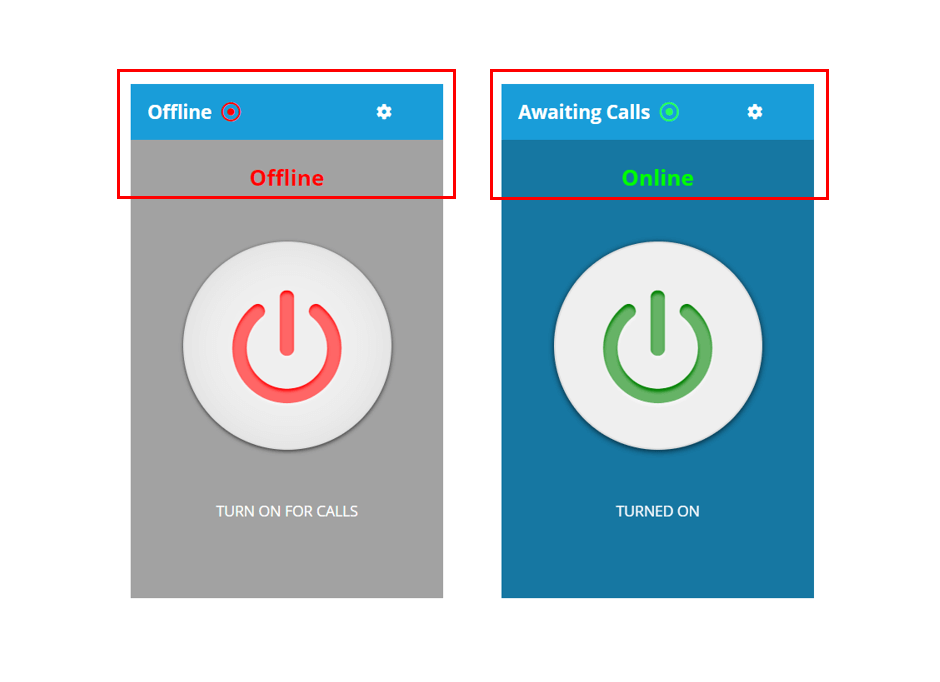
By default when you login you will be offline for VRI/OPI, when you are offline you will not receive any VRI/OPI calls.
If you want to receive VRI/OPI calls, click on the offline tab that you will find on the bottom right, a pop up will appear click on the “ON” button and the status will change to “Awaiting calls”, Now you will receive calls.